Difference between revisions of "Sacred 2:Better Yields"
(New page: {{subst:Quest}}) |
Gogoblender (talk | contribs) |
||
| (6 intermediate revisions by 4 users not shown) | |||
| Line 1: | Line 1: | ||
| − | |||
| − | |||
| − | |||
<div class="plainlinks"> | <div class="plainlinks"> | ||
{|WIDTH="100%" | {|WIDTH="100%" | ||
|WIDTH="15%" VALIGN="TOP"|__TOC__ | |WIDTH="15%" VALIGN="TOP"|__TOC__ | ||
|WIDTH="35%" VALIGN="TOP"| | |WIDTH="35%" VALIGN="TOP"| | ||
| − | * '''Quest Objective:''' | + | * '''Quest Objective:''' Test some new seeds |
| − | * '''Quest Difficulty:''' | + | * '''Quest Difficulty:''' 2 stars |
| − | * '''Quest Giver:''' | + | * '''Quest Giver:''' [[Sacred 2:Seraphim Florentina|Seraphim Florentina]] |
| − | * '''Location(s):''' | + | * '''Location(s):''' [[Sacred 2:Seraphim Island|Seraphim Island]] and [[Sacred 2:Skook's Corner|Skook's Corner]] |
| − | * '''Prerequisite Quest:''' | + | * '''Prerequisite Quest:''' None |
| − | * '''Next Quest:''' | + | * '''Next Quest:''' None |
| − | * '''Reward:''' | + | * '''Reward:''' [[Sacred 2:Gold|Gold]] [[Sacred 2:Experience|Experience]] |
| − | |WIDTH="50%" VALIGN="TOP"| | + | |WIDTH="50%" VALIGN="TOP"| |
| − | + | {{S2frame|[[Image:BetterYields_FlorentinaMap.jpg|250px]][[Image:BetterYields_FlorentinaTabMap.jpg|250px]]|right|'''[[Sacred 2:Map of Ancaria|View the Ancaria Interactive Map]]'''}} | |
| − | {{S2frame|[[Image: | ||
|} | |} | ||
{|WIDTH="100%" | {|WIDTH="100%" | ||
|WIDTH="60%" VALIGN="TOP"| | |WIDTH="60%" VALIGN="TOP"| | ||
== Quick Walkthrough == | == Quick Walkthrough == | ||
| − | + | * Talk to Seraphim Florentina | |
| − | * | + | * Test her new seeds |
| − | * | + | * Return to Seraphim Florentina to collect your reward |
| − | * | + | |WIDTH="40%" VALIGN="TOP"|{{S2frame|[[Image:BetterYields_FlorentinaCamera.jpg|500px]]}} |
| − | |WIDTH="40%" VALIGN="TOP"|{{S2frame|[[Image: | ||
|} | |} | ||
== Detailed Walkthrough == | == Detailed Walkthrough == | ||
| − | + | You will find Seraphim Florentina in a building just east of the Small Portal near the southern end of Seraphim Island. She will tell you that she has been working on a new, magically-altered seed and asks you to test it for her. | |
| − | + | {{S2 Dialogue|NPC NAME=Florentina|PORTRAIT FILE NAME=dialog553.png|DIALOGUE=Test these pumpkin seeds.<br /><br /> | |
| + | It's nice to see you! I am Florcntina, and my name is no coincidence! I've always been interested in plants. It's a fascinating topic, and so inexhaustible! | ||
| + | Do you want to see my latest experiment? Here! I cultivated these pumpkin seeds myself, with a little magic. The plants are more resistant and the fruits are noticeably larger than regular pumpkins. I improved the taste too. Would you be so kind as to sow the seeds? I still have some experiments I have to perform. You would make my work a lot easier. Let me know when you're ready. I'll make your journey a little easier.}} | ||
| − | + | When you agree, she will teleport you to a small garden just north of Skook's Corner. | |
| − | + | {{S2frame|[[Image:BetterYields_MirjaMap.jpg|250px]][[Image:BetterYields_MirjaTabMap.jpg|250px]]|left]]}} | |
| − | {{S2frame|[[Image: | ||
<br clear="both" /> | <br clear="both" /> | ||
| − | + | {{S2frame|[[Image:BetterYields_Mirja1Camera.jpg|400px]]|left}} | |
| − | |||
| − | {{S2frame|[[Image: | ||
<br clear="both" /> | <br clear="both" /> | ||
| − | + | Activate the pumpkin to begin the experiment. Unfortunately, this causes the nearby humans to explode. {{S2frame|[[Image:BetterYields_Mirja2Camera.jpg|400px]]|left}} | |
| − | {{S2frame|[[Image: | ||
<br clear="both" /> | <br clear="both" /> | ||
| + | Then talk to [[Sacred 2:Mirja|Mirja]] who is standing nearby. | ||
| − | + | {{S2 Dialogue|NPC NAME=Mirja|PORTRAIT FILE NAME=Dialog122.png|DIALOGUE=What have you don...}} | |
| − | + | With that, Mirja explodes and you are teleported back to Seraphim Florentina. | |
| − | |||
| − | + | Seraphim Florentina is horrified that experiment failed and mildly disturbed about the exploding humans. Your quest is now complete. | |
| − | |||
| − | |||
| − | |||
| − | |||
| − | |||
| − | |||
| − | |||
| − | |||
| − | |||
| − | |||
| − | |||
| − | |||
| − | |||
| + | {{S2 Dialogue|NPC NAME=Florentina|PORTRAIT FILE NAME=dialog553.png|DIALOGUE=The experiment didn’t work? Hm... That's too bad. Very bad! The part about the Humans is tragic too I guess. It's time to go back to the drawing board.}} | ||
== Logbook Entry == | == Logbook Entry == | ||
| − | |||
{| | {| | ||
| − | |{{S2frame|[[Image: | + | |{{S2frame|[[Image:BetterYields_Logbook.jpg|300px]]|left}} |
| − | |||
|} | |} | ||
== Notes == | == Notes == | ||
| − | + | ||
</div> | </div> | ||
| − | |||
[[Category:Sacred 2 Quest|{{PAGENAME}}]] | [[Category:Sacred 2 Quest|{{PAGENAME}}]] | ||
[[Category:Sacred 2 Side Quest|{{PAGENAME}}]] | [[Category:Sacred 2 Side Quest|{{PAGENAME}}]] | ||
| − | [[Category:Sacred 2 | + | [[Category:Sacred 2 The Dragon Sea Islands Quest|{{PAGENAME}}]] |
| − | |||
| − | |||
| − | |||
| − | |||
| − | |||
| − | |||
Latest revision as of 17:37, 18 November 2013
|
| ||||||||||
Quick Walkthrough
|
| |||||||||
Detailed Walkthrough
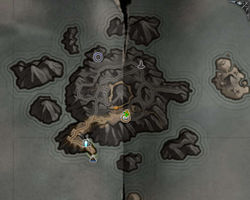
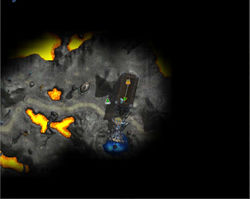
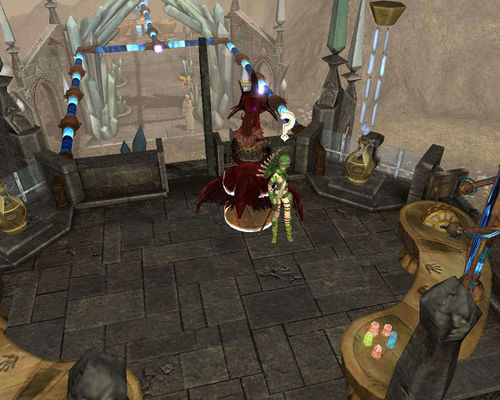
You will find Seraphim Florentina in a building just east of the Small Portal near the southern end of Seraphim Island. She will tell you that she has been working on a new, magically-altered seed and asks you to test it for her.
Test these pumpkin seeds.
It's nice to see you! I am Florcntina, and my name is no coincidence! I've always been interested in plants. It's a fascinating topic, and so inexhaustible!
Do you want to see my latest experiment? Here! I cultivated these pumpkin seeds myself, with a little magic. The plants are more resistant and the fruits are noticeably larger than regular pumpkins. I improved the taste too. Would you be so kind as to sow the seeds? I still have some experiments I have to perform. You would make my work a lot easier. Let me know when you're ready. I'll make your journey a little easier.
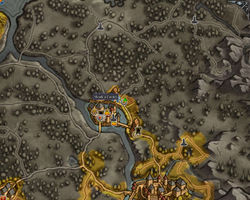
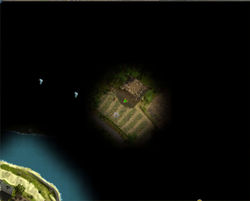
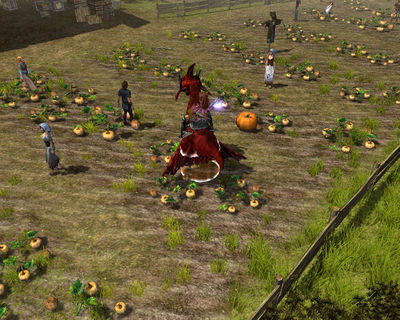
When you agree, she will teleport you to a small garden just north of Skook's Corner.
|
| ||
|
| ||
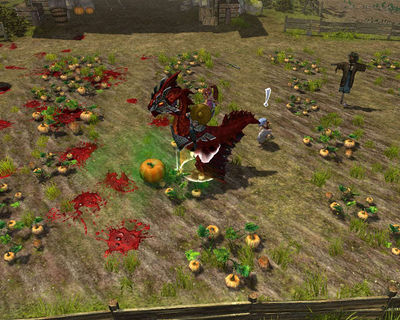
Activate the pumpkin to begin the experiment. Unfortunately, this causes the nearby humans to explode.
|
| ||
Then talk to Mirja who is standing nearby.
With that, Mirja explodes and you are teleported back to Seraphim Florentina.
Seraphim Florentina is horrified that experiment failed and mildly disturbed about the exploding humans. Your quest is now complete.
The experiment didn’t work? Hm... That's too bad. Very bad! The part about the Humans is tragic too I guess. It's time to go back to the drawing board.
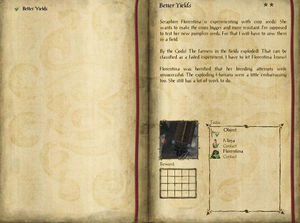
Logbook Entry
| |||||||||
