Difference between revisions of "Sacred 2:Shirka with the Dragons"
(New page: {{subst:Quest}}) |
|||
| (One intermediate revision by the same user not shown) | |||
| Line 1: | Line 1: | ||
| − | |||
| − | |||
| − | |||
<div class="plainlinks"> | <div class="plainlinks"> | ||
{|WIDTH="100%" | {|WIDTH="100%" | ||
|WIDTH="15%" VALIGN="TOP"|__TOC__ | |WIDTH="15%" VALIGN="TOP"|__TOC__ | ||
|WIDTH="35%" VALIGN="TOP"| | |WIDTH="35%" VALIGN="TOP"| | ||
| − | * '''Quest Objective:''' | + | * '''Quest Objective:''' Talk with Shirka |
| − | * '''Quest Difficulty:''' | + | * '''Quest Difficulty:''' No difficulty given for this quest |
| − | * '''Quest Giver:''' | + | * '''Quest Giver:''' [[Sacred 2:Shirka Alana - NPC|Shirka Alana]] |
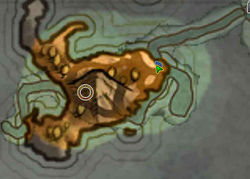
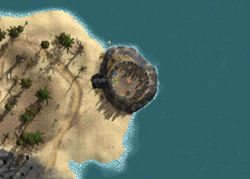
| − | * '''Location(s):''' | + | * '''Location(s):''' [[Sacred 2:Southern Dragon Sea Island|Southern Dragon Sea Island]], near the dragon [[Sacred 2:Mer-Kil|Mer-Kil]] |
| − | * '''Prerequisite Quest:''' | + | * '''Prerequisite Quest:''' [[Sacred 2:Semil Keytan|Semil Keytan]] |
| − | * '''Next Quest:''' | + | * '''Next Quest:''' [[Sacred 2:Shirka and Keytan|Shirka and Keytan]] |
| − | * '''Reward:''' | + | * '''Reward:''' [[Sacred 2:Experience|Experience]] |
| − | + | * '''Main Quest Page:''' [[Sacred 2:Inquisitor Class Chain Quest|Inquisitor Class Chain Quest]] | |
| − | {{S2frame|[[Image: | + | |WIDTH="50%" VALIGN="TOP"| |
| + | |||
| + | {{S2frame|[[Image:shirka9map.jpg|250px]][[Image:shirka9tab.jpg|250px]]|right|'''[[Sacred 2:Map of Ancaria|View the Ancaria Interactive Map]]'''}} | ||
|} | |} | ||
{|WIDTH="100%" | {|WIDTH="100%" | ||
|WIDTH="60%" VALIGN="TOP"| | |WIDTH="60%" VALIGN="TOP"| | ||
== Quick Walkthrough == | == Quick Walkthrough == | ||
| − | + | ||
| − | * | + | * Travel through [[Sacred 2:Carnach Cave|Carnach Cave]] to [[Sacred 2:Southern Dragon Sea Island|Southern Dragon Sea Island]] |
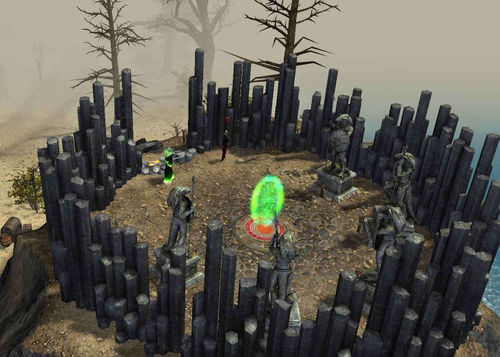
| − | * | + | * Speak to Shirka near portal platform (right next to [[Sacred 2:Mer-Kil|Mer-Kil]]) |
| − | + | ||
| − | |WIDTH="40%" VALIGN="TOP"|{{S2frame|[[Image: | + | |WIDTH="40%" VALIGN="TOP"|{{S2frame|[[Image:shirka9loc.jpg|500px]]}} |
|} | |} | ||
== Detailed Walkthrough == | == Detailed Walkthrough == | ||
| − | |||
| − | + | You wend your way through the Carnach Cave and exit at the Southern Dragon Island. Right next to Mer-Kil you see [[Sacred 2:Shirka Alana - NPC|Shirka]]. | |
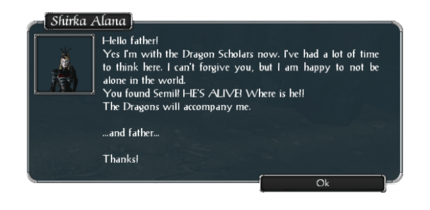
| + | [[Image:shirka9chat.png|430px]] | ||
| − | + | She says she's been studying with the Dragon Scholars She's had a lot of time to think and she's happy that she is not alone in the world any more. It looks like she's finally making a name for herself. You tell her you found Semil and he's alive and well. You don't know where he is but last you saw him he was on a boat bound for [[Sacred 2:Urthak's Moxie|Urthak's Moxie]]. While she can't forgive you for not being there, she realizes that you're trying now and thanks you for finding [[Sacred 2:Seargent Keytan|Semil]]. Looks like she's going to be fine from here on out so you part ways and decide to head to the [[Sacred 2:Bengaresh Desert|Bengaresh Desert]]. This completes part 5. Part 6, [[Sacred 2:Shirka and Keytan|Shirka and Keytan]], continues in [[Sacred 2:Khorum|Khorum]]. | |
| − | |||
| − | |||
| − | |||
| − | |||
| − | |||
| − | |||
| − | |||
| − | |||
| − | |||
| − | |||
| − | |||
| − | |||
| − | |||
| − | |||
| − | |||
| − | |||
| − | |||
| − | |||
| − | |||
| − | |||
| − | |||
| − | |||
| − | |||
| − | |||
| − | |||
| − | |||
| − | |||
| − | |||
| − | |||
| − | |||
| − | |||
| − | |||
== Logbook Entry == | == Logbook Entry == | ||
| − | + | ||
{| | {| | ||
| − | |{{S2frame|[[Image: | + | |{{S2frame|[[Image:dragonslog.jpg|300px]]|left}} |
| − | |||
|} | |} | ||
== Notes == | == Notes == | ||
| − | + | ||
</div> | </div> | ||
| − | |||
[[Category:Sacred 2 Quest|{{PAGENAME}}]] | [[Category:Sacred 2 Quest|{{PAGENAME}}]] | ||
| − | + | [[Category:Sacred 2 Chain Quest Part|{{PAGENAME}}]] | |
| − | [[Category:Sacred 2 Chain Quest | + | [[Category:Sacred 2 Class Quest|{{PAGENAME}}]] |
| − | [[Category:Sacred 2 Class | ||
| − | |||
[[Category:Sacred 2 Shadow Path Quest|{{PAGENAME}}]] | [[Category:Sacred 2 Shadow Path Quest|{{PAGENAME}}]] | ||
| − | [[Category:Sacred 2 | + | [[Category:Sacred 2 Dragon Sea Islands Quest|{{PAGENAME}}]] |
| − | |||
| − | |||
Latest revision as of 19:07, 1 January 2012
|
| ||||||||||
Quick Walkthrough
|
| |||||||||
Detailed Walkthrough
You wend your way through the Carnach Cave and exit at the Southern Dragon Island. Right next to Mer-Kil you see Shirka.
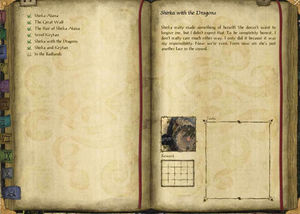
She says she's been studying with the Dragon Scholars She's had a lot of time to think and she's happy that she is not alone in the world any more. It looks like she's finally making a name for herself. You tell her you found Semil and he's alive and well. You don't know where he is but last you saw him he was on a boat bound for Urthak's Moxie. While she can't forgive you for not being there, she realizes that you're trying now and thanks you for finding Semil. Looks like she's going to be fine from here on out so you part ways and decide to head to the Bengaresh Desert. This completes part 5. Part 6, Shirka and Keytan, continues in Khorum.
Logbook Entry
| |||||||||
