Difference between revisions of "Sacred 2:Temple Guardian Class Chain Quest"
Jump to navigation
Jump to search
| (5 intermediate revisions by the same user not shown) | |||
| Line 5: | Line 5: | ||
|WIDTH="35%" VALIGN="TOP"| | |WIDTH="35%" VALIGN="TOP"| | ||
* '''Quest Objective:''' Journey through Ancaria trying to recover your memory | * '''Quest Objective:''' Journey through Ancaria trying to recover your memory | ||
| − | * '''Quest Difficulty:''' No | + | * '''Quest Difficulty:''' No difficulty given for this chain quest |
* '''Quest Giver:''' [[Sacred 2: Hologram|Hologram]] | * '''Quest Giver:''' [[Sacred 2: Hologram|Hologram]] | ||
* '''Location(s):''' [[Sacred 2:Tyr Lysia|Tyr Lysia]] in the [[Sacred 2:Temple Ruins|Temple Ruins]] | * '''Location(s):''' [[Sacred 2:Tyr Lysia|Tyr Lysia]] in the [[Sacred 2:Temple Ruins|Temple Ruins]] | ||
| − | * '''Reward:''' [[Sacred 2:Gold|Gold]] [[Sacred 2:Experience|Experience]] [[Sacred 2:Plasma Energy Core|Plasma Energy Core]] | + | * '''Reward:''' [[Sacred 2:Gold|Gold]], [[Sacred 2:Experience|Experience]], [[Sacred 2:Plasma Energy Core|Plasma Energy Core]] |
|WIDTH="50%" VALIGN="TOP"| | |WIDTH="50%" VALIGN="TOP"| | ||
| Line 34: | Line 34: | ||
== Quick Walkthrough == | == Quick Walkthrough == | ||
| + | {|WIDTH="100%" | ||
| + | |WIDTH="60%" VALIGN="TOP"| | ||
=== 1. [[Sacred 2:Unpack|Unpack]] === | === 1. [[Sacred 2:Unpack|Unpack]] === | ||
| Line 57: | Line 59: | ||
* Speak to Mage Aegwyn again | * Speak to Mage Aegwyn again | ||
| − | + | |WIDTH="40%" VALIGN="TOP"|{{S2frame|[[Image:unpackmastermap.jpg|200px]]}} | |
| + | |} | ||
| + | |||
| + | {|WIDTH="100%" | ||
| + | |WIDTH="60%" VALIGN="TOP"| | ||
| + | |||
| Line 67: | Line 74: | ||
* Click on terminal and listen to Hologram | * Click on terminal and listen to Hologram | ||
* Click on terminal on opposite wall and listen to Hologram again | * Click on terminal on opposite wall and listen to Hologram again | ||
| − | * Talk to [[Sacred 2: | + | * Talk to [[Sacred 2:Temple Guardian DX4-100|Temple Guardian DX4-100]] |
* Defeat the 6 [[Sacred 2:A-thousand-years-old Bonsai Dragon|A-thousand-years-old Bonsai Dragons]] | * Defeat the 6 [[Sacred 2:A-thousand-years-old Bonsai Dragon|A-thousand-years-old Bonsai Dragons]] | ||
* Leave cave and talk to Hologram | * Leave cave and talk to Hologram | ||
| Line 75: | Line 82: | ||
* Defeat the the Temple Guardian, [[Sacred 2:TW-1395 Hunter Deluxe|TW-1395 Hunter Deluxe]] | * Defeat the the Temple Guardian, [[Sacred 2:TW-1395 Hunter Deluxe|TW-1395 Hunter Deluxe]] | ||
| + | |WIDTH="40%" VALIGN="TOP"|{{S2frame|[[Image:verificationmastermap.jpg|200px]]}} | ||
| + | |} | ||
| + | |||
| + | {|WIDTH="100%" | ||
| + | |WIDTH="60%" VALIGN="TOP"| | ||
| Line 86: | Line 98: | ||
* Head to Swamp and enter cave near [[Sacred 2:Ruins of Gazath|Ruins of Gazath]] | * Head to Swamp and enter cave near [[Sacred 2:Ruins of Gazath|Ruins of Gazath]] | ||
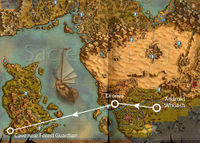
* Collect '''Yellowed Dragon Tooth - Third Key''', then talk to [[Sacred 2:Temple Guardian PIII-300|Temple Guardian PIII-300]] | * Collect '''Yellowed Dragon Tooth - Third Key''', then talk to [[Sacred 2:Temple Guardian PIII-300|Temple Guardian PIII-300]] | ||
| − | * Defeat | + | * Defeat 5 Temple Guardians |
* Leave cave and head to another cave in [[Sacred 2:Bengaresh Desert|Bengaresh Desert]] near the [[Sacred 2:Twitty Tister|Twitty Tister]] | * Leave cave and head to another cave in [[Sacred 2:Bengaresh Desert|Bengaresh Desert]] near the [[Sacred 2:Twitty Tister|Twitty Tister]] | ||
* Enter cave | * Enter cave | ||
| + | |||
| + | |WIDTH="40%" VALIGN="TOP"|{{S2frame|[[Image:authorizationmastermap.jpg|200px]][[Image:authorizationmastermap2.jpg|200px]]}} | ||
| + | |} | ||
| + | |||
| + | {|WIDTH="100%" | ||
| + | |WIDTH="60%" VALIGN="TOP"| | ||
=== 4. [[Sacred 2:Trojans|Trojans]] === | === 4. [[Sacred 2:Trojans|Trojans]] === | ||
| − | * Talk to [[Sacred 2: | + | * Talk to [[Sacred 2:Alibaba|Alibaba]] |
* Defeat Alibaba and his gang | * Defeat Alibaba and his gang | ||
* Collect '''Energy Source XS - Fourth Key''' | * Collect '''Energy Source XS - Fourth Key''' | ||
| Line 102: | Line 120: | ||
* Talk to Ambrox, Envoy of the Dragons to establish the truce | * Talk to Ambrox, Envoy of the Dragons to establish the truce | ||
| + | |WIDTH="40%" VALIGN="TOP"|{{S2frame|[[Image:trojansmastermap.jpg|200px]]}} | ||
| + | |} | ||
| + | |||
| + | {|WIDTH="100%" | ||
| + | |WIDTH="60%" VALIGN="TOP"| | ||
| Line 114: | Line 137: | ||
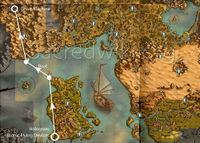
* Travel to the Strange Machine located in southwestern Dyr Lain (enter cave near [[Sacred 2:Forest Guardian|Forest Guardian]]) | * Travel to the Strange Machine located in southwestern Dyr Lain (enter cave near [[Sacred 2:Forest Guardian|Forest Guardian]]) | ||
| + | |WIDTH="40%" VALIGN="TOP"|{{S2frame|[[Image:communicationmastermap.jpg|200px]]}} | ||
| + | |} | ||
| + | |||
| + | {|WIDTH="100%" | ||
| + | |WIDTH="60%" VALIGN="TOP"| | ||
| Line 121: | Line 149: | ||
* Travel to the Great Machine | * Travel to the Great Machine | ||
| + | |WIDTH="40%" VALIGN="TOP"|{{S2frame|[[Image:creatormastermap.jpg|200px]]}} | ||
| + | |} | ||
| + | |||
| + | {|WIDTH="100%" | ||
| + | |WIDTH="60%" VALIGN="TOP"| | ||
| Line 127: | Line 160: | ||
* Talk to [[Sacred 2:Temple Guardian Hologram|Temple Guardian Hologram]] | * Talk to [[Sacred 2:Temple Guardian Hologram|Temple Guardian Hologram]] | ||
| + | |WIDTH="40%" VALIGN="TOP"|{{S2frame|[[Image:newcreationmastermap.jpg|200px]]}} | ||
| + | |} | ||
| Line 133: | Line 168: | ||
| − | [[Category:Sacred 2 Quest]] | + | |
| − | [[Category:Sacred 2 Chain Quest]] | + | [[Category:Sacred 2 Quest|{{PAGENAME}}]] |
| − | [[Category:Sacred 2 Class Quest]] | + | [[Category:Sacred 2 Chain Quest|{{PAGENAME}}]] |
| − | [[Category:Sacred 2 Light Path Quest]] | + | [[Category:Sacred 2 Class Quest|{{PAGENAME}}]] |
| − | [[Category:Sacred 2 Tyr Lysia Quest]] | + | [[Category:Sacred 2 Light Path Quest|{{PAGENAME}}]] |
| + | [[Category:Sacred 2 Tyr Lysia Quest|{{PAGENAME}}]] | ||
Latest revision as of 18:53, 8 April 2012
|
| ||||||||||
|
| ||
Quest Parts
This is the name for the 7-part 'chain-quest' starting in the Temple Ruins.
The seven quests in this chain are:
- Unpack
- Verification
- The Authorization Key
- Trojans
- Communication
- Creators and Destroyers
- A New Creation
...
In order to start your journey towards completing this multi-part quest, you will have to speak to the Hologram. The detailed information on this string of quests starts HERE
Quick Walkthrough
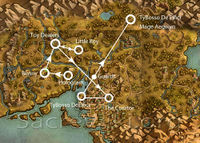
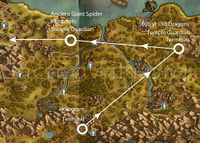
1. Unpack
|
| |||||||||
|
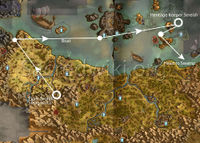
2. Verification
|
| |||||||||
|
3. The Authorization Key
|
| |||||||||
|
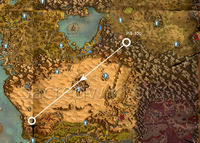
4. Trojans
|
| |||||||||
|
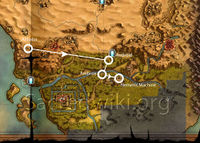
5. Communication
|
| |||||||||
|
6. Creators and Destroyers
|
| |||||||||
|
7. A New Creation
|
| |||||||||
