Difference between revisions of "Sacred 2:The Lover"
(→Notes) |
|||
| Line 11: | Line 11: | ||
* '''Quest Difficulty:''' 4 stars | * '''Quest Difficulty:''' 4 stars | ||
* '''Quest Giver:''' [[Sacred 2:Mary Ann|Mary Ann]] | * '''Quest Giver:''' [[Sacred 2:Mary Ann|Mary Ann]] | ||
| − | * '''Location(s):''' [[Sacred 2:High Elf Outpost|High Elf Outpost]] | + | * '''Location(s):''' [[Sacred 2:High Elf Outpost 2|High Elf Outpost 2]] |
* '''Prerequisite Quest:''' None | * '''Prerequisite Quest:''' None | ||
* '''Next Quest:''' [[Sacred 2:Orpheus Himself|Orpheus Himself]] ''or'' [[Sacred 2:Changing Sides|Changing Sides]] | * '''Next Quest:''' [[Sacred 2:Orpheus Himself|Orpheus Himself]] ''or'' [[Sacred 2:Changing Sides|Changing Sides]] | ||
| Line 21: | Line 21: | ||
== Quick Walkthrough == | == Quick Walkthrough == | ||
| − | * Talk to Mary Ann | + | * Talk to [[Sacred 2:Mary Ann|Mary Ann]]. |
| − | * Lead Mary Ann to the | + | * Lead [[Sacred 2:Mary Ann|Mary Ann]] to the [[Sacred 2:The Lair of Orpheus|The Lair of Orpheus]]. |
| − | * Lead Mary Ann through the | + | * Lead [[Sacred 2:Mary Ann|Mary Ann]] through the [[Sacred 2:The Lair of Orpheus|The Lair of Orpheus]] to her lover. |
| − | * Talk to Logamir | + | * Talk to her lover, [[Sacred 2:Logamir|Logamir]]. |
| − | * Find Orpheus | + | * Find [[Sacred 2:Orpheus - Orpheus|Orpheus]]. |
| − | * Talk to Orpheus | + | * Talk to [[Sacred 2:Orpheus - Orpheus|Orpheus]]. |
== Detailed Walkthrough == | == Detailed Walkthrough == | ||
| − | Talk to Mary Ann to learn that her lover is dead, but she plans to free him from the underworld and lead him back to life. She will then join | + | Talk to [[Sacred 2:Mary Ann|Mary Ann]] to learn that her lover is dead, but she plans to free him from the underworld and lead him back to life. She will then join your party. |
| − | [http://www.sacredwiki.org/images/Sacred_2/quests/Chapter01/Orpheus/The%20Lover/sacred2Orpheus1a.jpg http://www.sacredwiki.org/images/Sacred_2/quests/Chapter01/Orpheus/The%20Lover/th_sacred2Orpheus1a.jpg]<br> | + | <br> |
| − | Lead her out of the High Elf Outpost and then | + | [http://www.sacredwiki.org/images/Sacred_2/quests/Chapter01/Orpheus/The%20Lover/sacred2Orpheus1a.jpg http://www.sacredwiki.org/images/Sacred_2/quests/Chapter01/Orpheus/The%20Lover/th_sacred2Orpheus1a.jpg] |
| − | [http://www.sacredwiki.org/images/Sacred_2/quests/Chapter01/Orpheus/The%20Lover/sacred2Orpheus1wt1.jpg http://www.sacredwiki.org/images/Sacred_2/quests/Chapter01/Orpheus/The%20Lover/th_sacred2Orpheus1wt1.jpg] [http://www.sacredwiki.org/images/Sacred_2/quests/Chapter01/Orpheus/The%20Lover/sacred2Orpheus1wt2.jpg http://www.sacredwiki.org/images/Sacred_2/quests/Chapter01/Orpheus/The%20Lover/th_sacred2Orpheus1wt2.jpg]<br> | + | <br> |
| − | Talk to Logamir and he will ask you to help them escape. Your first task is to kill Orpheus...<br> | + | Lead her out of the [[Sacred 2:High Elf Outpost 2|High Elf Outpost 2]] and then northeast from the nearby Resurrection Monument to the 'underworld' entrance. Head west in the [[Sacred 2:The Lair of Orpheus|The Lair of Orpheus]] and then north at the T-Junction. [[Sacred 2:Logamir|Logamir]], her lover, is in the small chamber at the end of the corridor. |
| − | [http://www.sacredwiki.org/images/Sacred_2/quests/Chapter01/Orpheus/The%20Lover/sacred2Orpheus1b.jpg http://www.sacredwiki.org/images/Sacred_2/quests/Chapter01/Orpheus/The%20Lover/th_sacred2Orpheus1b.jpg]<br> | + | <br> |
| − | Head out of the chamber and go | + | [http://www.sacredwiki.org/images/Sacred_2/quests/Chapter01/Orpheus/The%20Lover/sacred2Orpheus1wt1.jpg http://www.sacredwiki.org/images/Sacred_2/quests/Chapter01/Orpheus/The%20Lover/th_sacred2Orpheus1wt1.jpg] [http://www.sacredwiki.org/images/Sacred_2/quests/Chapter01/Orpheus/The%20Lover/sacred2Orpheus1wt2.jpg http://www.sacredwiki.org/images/Sacred_2/quests/Chapter01/Orpheus/The%20Lover/th_sacred2Orpheus1wt2.jpg] |
| + | <br> | ||
| + | Talk to [[Sacred 2:Logamir|Logamir]] and he will ask you to help them escape. Your first task is to kill [[Sacred 2:Orpheus - Orpheus|Orpheus]]... | ||
| + | <br> | ||
| + | [http://www.sacredwiki.org/images/Sacred_2/quests/Chapter01/Orpheus/The%20Lover/sacred2Orpheus1b.jpg http://www.sacredwiki.org/images/Sacred_2/quests/Chapter01/Orpheus/The%20Lover/th_sacred2Orpheus1b.jpg] | ||
| + | <br> | ||
| + | Head out of the chamber and go south into a large room of enemies. Fortunately you don't have to worry too much about the two lovers at this point. Head to the northwest corner of the room and follow the corridor north into another small chamber where [[Sacred 2:Orpheus - Orpheus|Orpheus]] is waiting. The quest will update as completed as you approach him, however, if you don't want Mary Ann and her lover following you around everywhere, you now need to talk to [[Sacred 2:Orpheus - Orpheus|Orpheus]] and pick which of the two possible endings you want this tale to have. | ||
| + | <br> | ||
[http://www.sacredwiki.org/images/Sacred_2/quests/Chapter01/Orpheus/The%20Lover/sacred2Orpheus1wt3.jpg http://www.sacredwiki.org/images/Sacred_2/quests/Chapter01/Orpheus/The%20Lover/th_sacred2Orpheus1wt3.jpg] [http://www.sacredwiki.org/images/Sacred_2/quests/Chapter01/Orpheus/The%20Lover/sacred2Orpheus2a.jpg http://www.sacredwiki.org/images/Sacred_2/quests/Chapter01/Orpheus/The%20Lover/th_sacred2Orpheus2a.jpg]<br><br> | [http://www.sacredwiki.org/images/Sacred_2/quests/Chapter01/Orpheus/The%20Lover/sacred2Orpheus1wt3.jpg http://www.sacredwiki.org/images/Sacred_2/quests/Chapter01/Orpheus/The%20Lover/th_sacred2Orpheus1wt3.jpg] [http://www.sacredwiki.org/images/Sacred_2/quests/Chapter01/Orpheus/The%20Lover/sacred2Orpheus2a.jpg http://www.sacredwiki.org/images/Sacred_2/quests/Chapter01/Orpheus/The%20Lover/th_sacred2Orpheus2a.jpg]<br><br> | ||
| − | If you pick '''In Orpheus' Service''', then you will receive the quest [[Sacred 2:Orpheus Himself|Orpheus Himself]].<br> | + | If you pick '''In Orpheus' Service''', then you will receive the quest [[Sacred 2:Orpheus Himself|Orpheus Himself]]. |
| + | <br> | ||
If you pick '''Destroying Orpheus''', then you will receive the quest [[Sacred 2:Changing Sides|Changing Sides]]. | If you pick '''Destroying Orpheus''', then you will receive the quest [[Sacred 2:Changing Sides|Changing Sides]]. | ||
| Line 47: | Line 55: | ||
== Logbook Entry == | == Logbook Entry == | ||
| − | '''After [[Sacred 2:Changing Sides|Changing Sides]] is completed'''<br> | + | '''After [[Sacred 2:Changing Sides|Changing Sides]] is completed''' |
| + | <br> | ||
[http://www.sacredwiki.org/images/Sacred_2/quests/Chapter01/Orpheus/The%20Lover/S2LogTheLoverifChangingSides.jpg http://www.sacredwiki.org/images/Sacred_2/quests/Chapter01/Orpheus/The%20Lover/th_S2LogTheLoverifChangingSides.jpg]<br><br> | [http://www.sacredwiki.org/images/Sacred_2/quests/Chapter01/Orpheus/The%20Lover/S2LogTheLoverifChangingSides.jpg http://www.sacredwiki.org/images/Sacred_2/quests/Chapter01/Orpheus/The%20Lover/th_S2LogTheLoverifChangingSides.jpg]<br><br> | ||
| − | '''After [[Sacred 2:Orpheus Himself|Orpheus Himself]] is completed'''<br> | + | '''After [[Sacred 2:Orpheus Himself|Orpheus Himself]] is completed''' |
| + | <br> | ||
[http://www.sacredwiki.org/images/Sacred_2/quests/Chapter01/Orpheus/The%20Lover/S2LogTheLoverifOrpheusHimself.jpg http://www.sacredwiki.org/images/Sacred_2/quests/Chapter01/Orpheus/The%20Lover/th_S2LogTheLoverifOrpheusHimself.jpg] | [http://www.sacredwiki.org/images/Sacred_2/quests/Chapter01/Orpheus/The%20Lover/S2LogTheLoverifOrpheusHimself.jpg http://www.sacredwiki.org/images/Sacred_2/quests/Chapter01/Orpheus/The%20Lover/th_S2LogTheLoverifOrpheusHimself.jpg] | ||
Revision as of 18:31, 15 January 2011
|
|
Quick Walkthrough
- Talk to Mary Ann.
- Lead Mary Ann to the The Lair of Orpheus.
- Lead Mary Ann through the The Lair of Orpheus to her lover.
- Talk to her lover, Logamir.
- Find Orpheus.
- Talk to Orpheus.
Detailed Walkthrough
Talk to Mary Ann to learn that her lover is dead, but she plans to free him from the underworld and lead him back to life. She will then join your party.

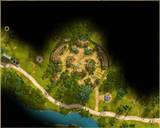
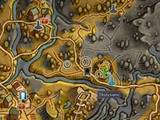
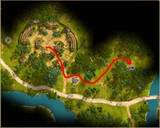
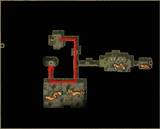
Lead her out of the High Elf Outpost 2 and then northeast from the nearby Resurrection Monument to the 'underworld' entrance. Head west in the The Lair of Orpheus and then north at the T-Junction. Logamir, her lover, is in the small chamber at the end of the corridor.
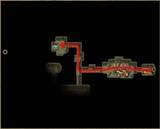
Talk to Logamir and he will ask you to help them escape. Your first task is to kill Orpheus...

Head out of the chamber and go south into a large room of enemies. Fortunately you don't have to worry too much about the two lovers at this point. Head to the northwest corner of the room and follow the corridor north into another small chamber where Orpheus is waiting. The quest will update as completed as you approach him, however, if you don't want Mary Ann and her lover following you around everywhere, you now need to talk to Orpheus and pick which of the two possible endings you want this tale to have.

If you pick In Orpheus' Service, then you will receive the quest Orpheus Himself.
If you pick Destroying Orpheus, then you will receive the quest Changing Sides.
Logbook Entry
After Changing Sides is completed
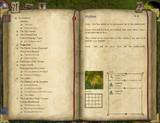
After Orpheus Himself is completed
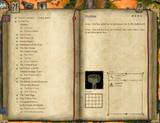
Notes
- Bug: Some of the Tasks and Log entries for the quest Changing Sides appear to update under the log for this quest.
- Tip: The quest Changing Sides results in more EXP overall - this may be a consideration if you are not playing in character.
