Difference between revisions of "Sacred 2:Buried Treasures"
(Bring up to current standard) |
Gogoblender (talk | contribs) (→Detailed Walkthrough: Dialogue Box) |
||
| (One intermediate revision by one other user not shown) | |||
| Line 29: | Line 29: | ||
{{S2frame|[[Image:BuriedTreasures_CharacterDialog.jpg]]|left}} | {{S2frame|[[Image:BuriedTreasures_CharacterDialog.jpg]]|left}} | ||
<br clear="both" /> | <br clear="both" /> | ||
| + | |||
| + | {{S2 Dialogue|NPC NAME=The Player|PORTRAIT FILE NAME=Seraphim-dialog.png|DIALOGUE=The archaeologist's camp...but the archaeologist doesn't seem to be here. Only a group of bandits who rummage through his belongings. I guess I have to go and teach them some manners.}} | ||
| + | |||
{{S2frame|[[Image:BuriedTreasures_TheivesCamera.jpg|400px]]|left}} | {{S2frame|[[Image:BuriedTreasures_TheivesCamera.jpg|400px]]|left}} | ||
<br clear="both" /> | <br clear="both" /> | ||
| Line 35: | Line 38: | ||
{{S2frame|[[Image:BuriedTreasures_Hattmir1Dialog.jpg]]|left}} | {{S2frame|[[Image:BuriedTreasures_Hattmir1Dialog.jpg]]|left}} | ||
<br clear="both" /> | <br clear="both" /> | ||
| + | |||
| + | {{S2 Dialogue|NPC NAME=Hattmir|PORTRAIT FILE NAME=dialog170.png|DIALOGUE=Who're you? Bugger off! That's our loot! We was here first! You don't mess with Hattmir!}} | ||
The thieves do not stand a chance. After defeating his people, Hattmir has a completely different attitude. | The thieves do not stand a chance. After defeating his people, Hattmir has a completely different attitude. | ||
{{S2frame|[[Image:BuriedTreasures_Hattmir2Dialog.jpg]]|left}} | {{S2frame|[[Image:BuriedTreasures_Hattmir2Dialog.jpg]]|left}} | ||
<br clear="both" /> | <br clear="both" /> | ||
| + | |||
| + | {{S2 Dialogue|NPC NAME=Hattmir|PORTRAIT FILE NAME=dialog170.png|DIALOGUE=Wait, hold on! I... uhm... we... we was just keepin care of the archaelogists's stuff! Looks deserted, the camp does, and for some time, too. Didn't want nothing to end up in the wrong hands, you see? You can never know. Can't trust nobody these days now, can you? But now I changed me mind. And actually - I've gotta hurry. Never have no time, you see? will ya let me go?}} | ||
Whether you let him live or not has not affect on the quest outcome. After finishing with Hattmir, you will find the Archaeologist's notes in a crate in his camp. | Whether you let him live or not has not affect on the quest outcome. After finishing with Hattmir, you will find the Archaeologist's notes in a crate in his camp. | ||
| Line 45: | Line 52: | ||
== Logbook Entry == | == Logbook Entry == | ||
| + | Logbook if you kill Hattmir<br> | ||
[http://www.sacredwiki.org/images/Sacred_2/quests/IceBlood/cursed/buried/log3.jpg http://www.sacredwiki.org/images/Sacred_2/quests/IceBlood/cursed/buried/th_log3.jpg] | [http://www.sacredwiki.org/images/Sacred_2/quests/IceBlood/cursed/buried/log3.jpg http://www.sacredwiki.org/images/Sacred_2/quests/IceBlood/cursed/buried/th_log3.jpg] | ||
| − | + | Logbook if you spare Hattmir | |
| + | {| | ||
| + | |{{S2frame|[[Image:BuriedTreasures_Logbook1.jpg|300px]]|left}} | ||
| + | |{{S2frame|[[Image:BuriedTreasures_Logbook2.jpg|300px]]|left}} | ||
| + | |} | ||
== Notes == | == Notes == | ||
Latest revision as of 16:32, 7 December 2013
|
| |||||||||
Quick Walkthrough
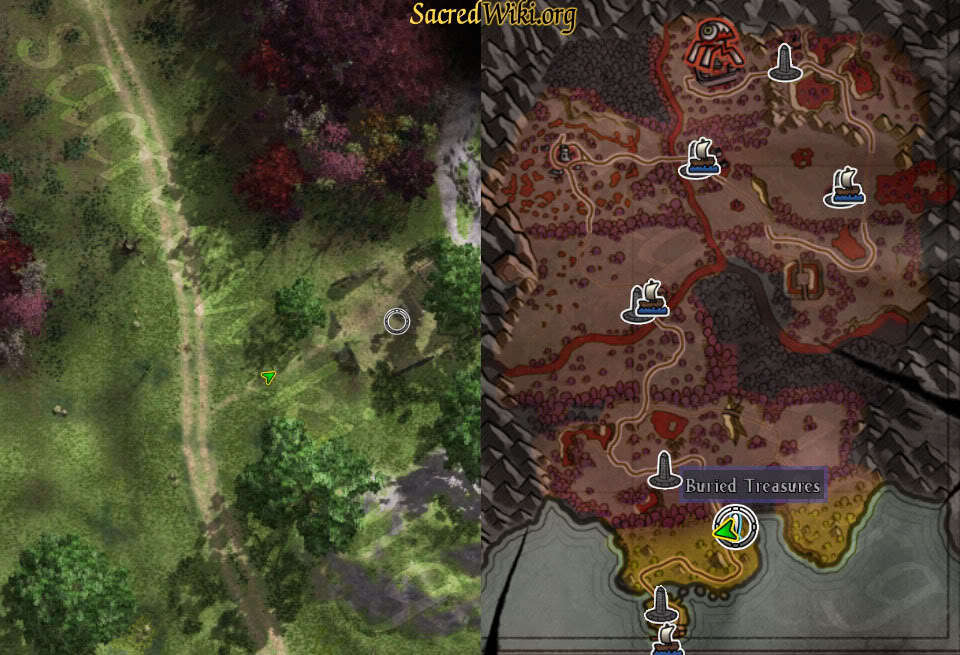
- Travel East and find the Archeologist's Camp
- Speak to Hattmir
- Defeat the three thieves
- Speak to Hattmir
- Choose to kill him or let him go (quest reward will differ depending on choice - Light character will get experience and items when choosing to let Hattmir run away. Edit: While this may have been true in the initial release of Ice and Blood, as of patch 2.65.2 a dark character will gain the experience and items for allowing Hattmir to run away.)
- Click on nearby box
- Pick up The Archeologist's notes
Detailed Walkthrough
You arrive at the Archaeologist's Camp only to discover a group of thieves pillaging the site. That just will not do.
|
| ||
 |
||


The archaeologist's camp...but the archaeologist doesn't seem to be here. Only a group of bandits who rummage through his belongings. I guess I have to go and teach them some manners.
|
| ||
 |
||
You talk to the leader, Hattmir. He is quite cocky, and the other thieves attack.
|
| ||
 |
||
The thieves do not stand a chance. After defeating his people, Hattmir has a completely different attitude.
|
| ||
 |
||


Wait, hold on! I... uhm... we... we was just keepin care of the archaelogists's stuff! Looks deserted, the camp does, and for some time, too. Didn't want nothing to end up in the wrong hands, you see? You can never know. Can't trust nobody these days now, can you? But now I changed me mind. And actually - I've gotta hurry. Never have no time, you see? will ya let me go?
Whether you let him live or not has not affect on the quest outcome. After finishing with Hattmir, you will find the Archaeologist's notes in a crate in his camp.
|
| ||
 |
||
Logbook Entry
Logbook if you kill Hattmir
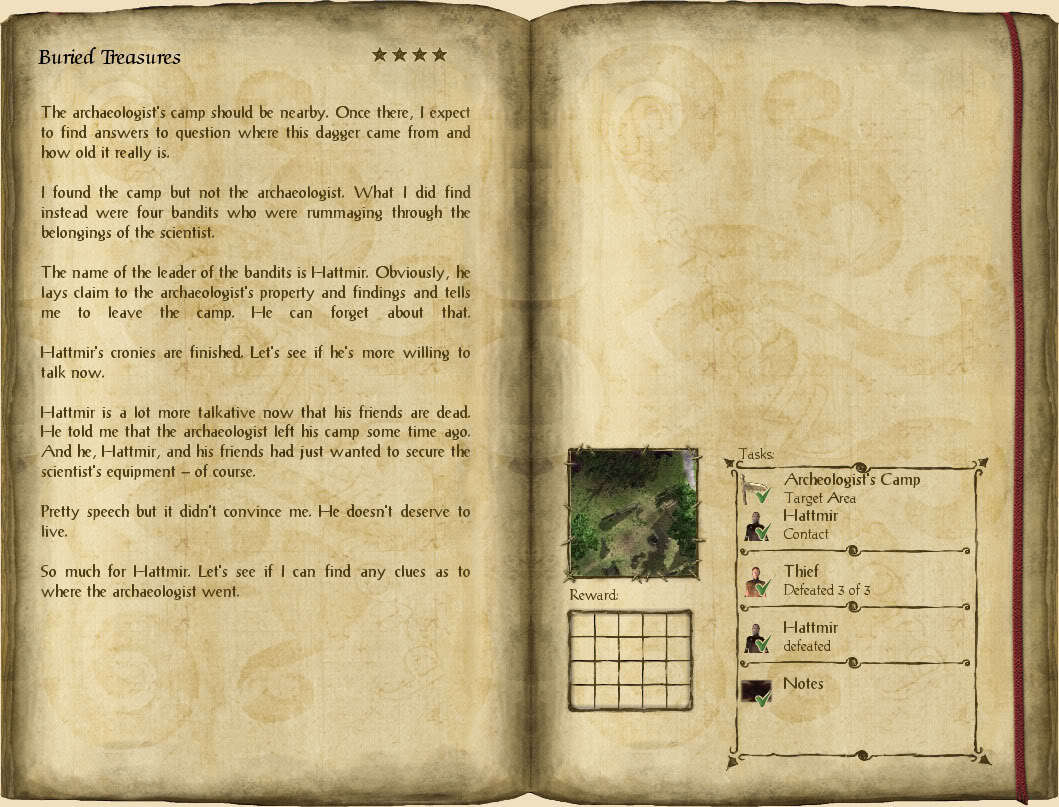
Logbook if you spare Hattmir
|
| ||||||||||||||||||


Notes
TYPE IN ANY POSSIBLE BUGS, EXPLOITS, TRICKS, HINTS, SHORTCUTS ETC