Difference between revisions of "Sacred 2:In Accordance with Nature"
(Replacing page with '{{subst:Quest}}<div class="plainlinks">') |
|||
| Line 1: | Line 1: | ||
| − | |||
| − | |||
| − | |||
<div class="plainlinks"> | <div class="plainlinks"> | ||
{|WIDTH="100%" | {|WIDTH="100%" | ||
|WIDTH="15%" VALIGN="TOP"|__TOC__ | |WIDTH="15%" VALIGN="TOP"|__TOC__ | ||
|WIDTH="35%" VALIGN="TOP"| | |WIDTH="35%" VALIGN="TOP"| | ||
| − | * '''Quest Objective:''' | + | * '''Quest Objective:''' Try to restore nature's balance |
| − | * '''Quest Difficulty:''' | + | * '''Quest Difficulty:''' No difficulty given for this quest |
| − | * '''Quest Giver:''' | + | * '''Quest Giver:''' [[Sacred 2:Hunter Drogo|Hunter Drogo]] |
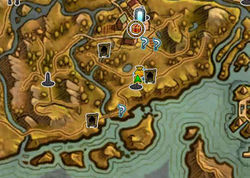
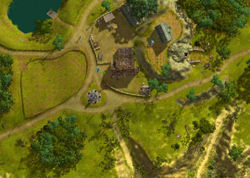
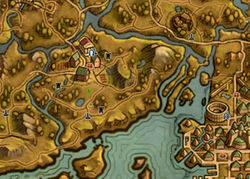
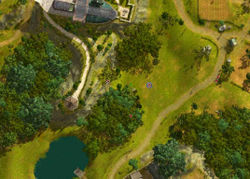
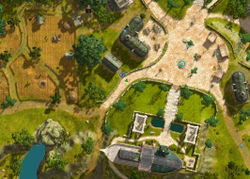
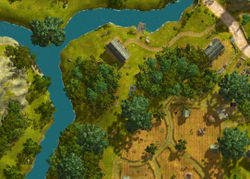
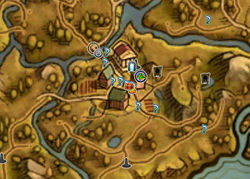
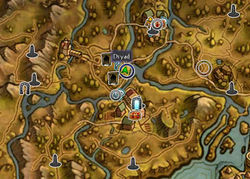
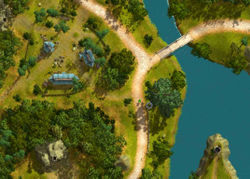
| − | * '''Location(s):''' | + | * '''Location(s):''' [[Sacred 2:Tyr Lysia|Tyr Lysia]] at the [[Sacred 2:Happy Cow Farm|Happy Cow Farm]] |
| − | * '''Prerequisite Quest:''' | + | * '''Prerequisite Quest:''' None |
| − | * '''Next Quest:''' | + | * '''Next Quest:''' [[Sacred 2:Life in the City|Life in the City]] |
| − | * '''Reward:''' | + | * '''Reward:''' [[Sacred 2:Gold|Gold]], [[Sacred 2:Experience|Experience]] |
| − | |WIDTH="50%" VALIGN="TOP"| | + | |WIDTH="50%" VALIGN="TOP"| |
| − | {{S2frame|[[Image: | + | {{S2frame|[[Image:drogomap.jpg|250px]][[Image:drogotab.jpg|250px]]|right|'''[[Sacred 2:Map of Ancaria|View the Ancaria Interactive Map]]'''}} |
|} | |} | ||
{|WIDTH="100%" | {|WIDTH="100%" | ||
|WIDTH="60%" VALIGN="TOP"| | |WIDTH="60%" VALIGN="TOP"| | ||
== Quick Walkthrough == | == Quick Walkthrough == | ||
| − | + | ||
| − | * | + | * Talk to [[Sacred 2:Hunter Drogo|Hunter Drogo]] |
| − | * | + | * Escort Drogo and [[Sacred 2:Tim Nightowl|Tim Nightowl]] to deer |
| − | * | + | * Subdue Drogo and Nightowl |
| − | |WIDTH="40%" VALIGN="TOP"|{{S2frame|[[Image: | + | * Talk to Nightowl |
| + | * Talk to [[Sacred 2:Reckless Hunter|Reckless Hunter]] and defeat 3 of them | ||
| + | * Talk to [[Sacred 2:Thelendra|Thelendra]] in [[Sacred 2:Sloeford|Sloeford]] | ||
| + | * Talk to [[Sacred 2:Slave Overseer|Slave Overseer]] and defeat 4 of them | ||
| + | * Talk to [[Sacred 2:Slave Theodus|Slave Theodus]] | ||
| + | * Talk to [[Sacred 2:Lohen|Lohen]] | ||
| + | * Subdue Lohen and 2 [[Sacred 2:Stable Boy|Stable Boys]] | ||
| + | * Talk to [[Sacred 2:Mayor Wilkes|Mayor Wilkes]] | ||
| + | * Head to [[Sacred 2:High Elf Outpost 1|High Elf Outpost]] | ||
| + | * Kill Kobolds to collect 10 '''Kobold Heads''' | ||
| + | * Return to Mayor Wilkes and talk to him | ||
| + | * Travel just north of [[Sacred 2:Celestial Dome|Celestial Dome]] | ||
| + | * Talk to [[Sacred 2:Knickknack|Knickknack]] | ||
| + | |||
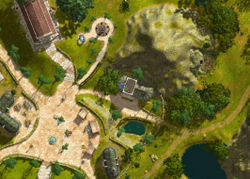
| + | |WIDTH="40%" VALIGN="TOP"|{{S2frame|[[Image:drogoloc.jpg|500px]]}} | ||
|} | |} | ||
== Detailed Walkthrough == | == Detailed Walkthrough == | ||
| − | |||
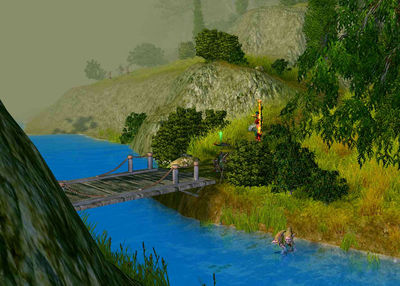
| − | + | You set sail form your home lands and set sail for [[Sacred 2:Tyr Lysia|Tyr Lysia]]. You land along the southern shore on the [[Sacred 2:Gold Island|Gold Island]]. As you head inland you come upon the small hamlet named [[Sacred 2:Happy Cow Farm|Happy Cow Farm]]. Two High Elves notice you and beckon you to come closer. [[Sacred 2:Hunter Drogo|Hunter Drogo]] asks if you can help him and his partner, [[Sacred 2:Tim Nightowl|Tim Nightowl]] hunt down a deer. They have almost no experience and could use any help you give them. | |
| + | [[Image:drogochat.gif|430px]] | ||
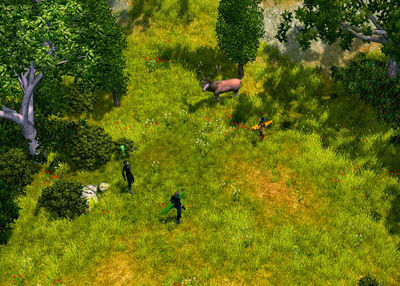
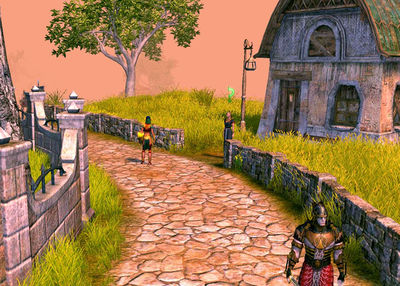
| − | + | You agree to help out and soon find a deer just outside the Happy Cow Farm. Drogo's eyes light up when he sees the size of the deer. He thinks it's head will look great above his fireplace. When you inquire about the carcass he says it can rot for all he cares. As a Dryad you've grown up around nature and have learned to live with it and from it. This senseless waste of meat has you incensed. They're only trophy hunters! You decide to show your displeasure and teach them a lesson. | |
| + | |||
| + | {{S2frame|[[Image:deerloc.jpg|250px]][[Image:deertab.jpg|250px]]|left]]}} | ||
| + | <br clear="both" /> | ||
| − | {{S2frame|[[Image: | + | {{S2frame|[[Image:deer.jpg|400px]]|left}} |
<br clear="both" /> | <br clear="both" /> | ||
| + | [[Image:drogochat2.gif|430px]] | ||
| + | |||
| + | Nightowl pleads for you to stop. He says it was only a deer. But when he sees the look in your eyes he concedes that killing a deer only for it's antlers is wrong. The got caught up in the thrill of the hunt and never thought about the end result. They both take off like Ker herself is after them. | ||
| + | |||
| + | [[Image:nightowlchat.gif|430px]] | ||
| + | |||
| + | You see some more hunters a short distance away and head over to talk to them. Seems they already heard about the incident with Drogo. He and his buddies decide that a 'tree-hugger' like you has no business telling High Elves what to do. They attack but a seasoned hunter like you has no real problem eliminating them. You can't understand the arrogance from these elves. You're not denying anyone their right to hunt. But you dislike their reasons why. | ||
| − | {{S2frame|[[Image: | + | |
| + | |||
| + | |||
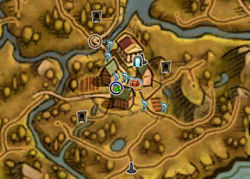
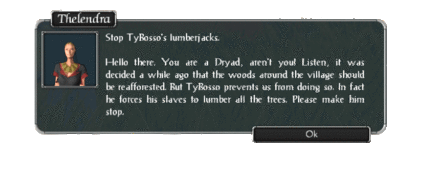
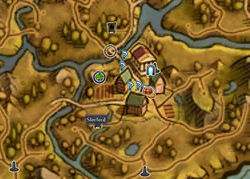
| + | You're really in a bad mood now as you head into [[Sacred 2:Sloeford|Sloeford]]. You speak with a local resident named [[Sacred 2:Thelendra|Thelendra]]. She says that the town has decided the surrounding area should be re-forested. But a man named [[Sacred 2:TyBosso DeElfici|TyBosso]] is preventing the plan from being realized. In fact, he's forcing his slaves to clear even more trees. | ||
| + | |||
| + | {{S2frame|[[Image:thelendramap.jpg|250px]][[Image:thelendratab.jpg|250px]]|left]]}} | ||
<br clear="both" /> | <br clear="both" /> | ||
| − | + | {{S2frame|[[Image:thelendraloc.jpg|400px]]|left}} | |
| − | {{S2frame|[[Image: | ||
<br clear="both" /> | <br clear="both" /> | ||
| + | [[Image:thelendrachat.gif|430px]] | ||
| − | |||
| − | [[ | + | You walk out to the nearby woods to see what is going on. The [[Sacred 2:Slave Overseer|Slave Overseer]] says that his boss, TyBosso DeElfici needs more ships for his business and they need to cut down as many trees as possible. So greed is stopping the re=planting of trees. You ask him to stop and he can't believe you're serious. The next thing you know you're being attacked. After you kill the overseers, [[Sacred 2:Slave Theodus|Slave Theodus]] thanks you for freeing him and the others. |
| − | |||
| − | {{S2frame|[[Image: | + | {{S2frame|[[Image:overseermap.jpg|250px]][[Image:overseertab.jpg|250px]]|left]]}} |
<br clear="both" /> | <br clear="both" /> | ||
| + | |||
| + | {{S2frame|[[Image:overseerloc.jpg|400px]]|left}} | ||
| + | <br clear="both" /> | ||
| + | |||
| + | [[Image:overseerchat.gif|430px]] | ||
| + | |||
| + | He had debts he couldn't pay off to TyBosso and forced into working for him. They'll hide out in the mountains until the inevitable search for them winds down and then make their way to the Human realm. Well, at least one problem is solved. He did mention something about that house over there. | ||
| + | |||
| + | [[Image:theoduschat.gif|430px]] | ||
| + | |||
| + | You go to check it our and can't believe what you see. They are killing cows and dumping them into the river! When you confront [[Sacred 2:Lohen|Lohen]] he says that's the way it's always been done. He doesn't care about polluting the river with bloated carcasses. He doesn't care about the fish or any of the other wildlife that depend on the waters. The mayor pays him one silver per cow and the poisoned water helps keep the Kobolds away from town. You can never remember being so angry in your life. You give Lohen and his [[Sacred 2:Stable Boy|Stable Boys]] a beatdown they'll never forget and head straight for the mayor's house. | ||
| + | |||
| + | |||
| + | {{S2frame|[[Image:lohenloc.jpg|400px]]|left}} | ||
| + | <br clear="both" /> | ||
| + | |||
| + | [[Image:lohenchat.gif|430px]] | ||
| + | |||
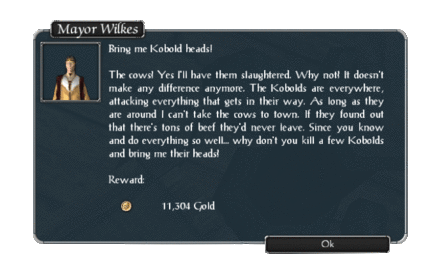
| + | [[Sacred 2:Mayor Wilkes|Mayor Wilkes]] explains that they were butchering the cows to prevent the Kobolds from getting them. If they knew about all that meat they'd never get rid of them. But it seems it doesn't matter now since the little Kobolds are all over.. He doesn't seem to think there's anything that can be done so you agree to go out and kill a few to prove him wrong. | ||
| + | |||
| + | {{S2frame|[[Image:wilkesmap.jpg|250px]][[Image:wilkestab.jpg|250px]]|left]]}} | ||
| + | <br clear="both" /> | ||
| + | |||
| + | {{S2frame|[[Image:wilkesloc.jpg|400px]]|left}} | ||
| + | <br clear="both" /> | ||
| + | |||
| + | [[Image:wilkeschat.gif|430px]] | ||
| + | |||
| + | |||
| + | You travel to the [[Sacred 2:High Elf Outpost 1|High Elf Outpost]] and kill enough to bring back 10 '''Kobold Heads''' to show him that they can do something about the problem. That seems to re-energize the mayor. He promises to get the townsfolk together and see what they can do to solve their problems. | ||
| + | |||
| + | {{S2frame|[[Image:koboldheadmap.jpg|250px]][[Image:koboldheadtab.jpg|250px]]|left]]}} | ||
| + | <br clear="both" /> | ||
| + | |||
| + | [[Image:wilkeschat2.gif|430px]] | ||
| + | |||
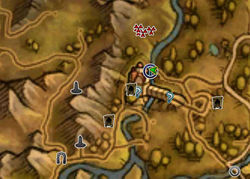
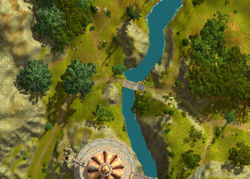
| + | You decide to head towards the [[Sacred 2:Kobold Camp|Kobold Camp]] to see what is going on with the Kobolds. On the way, you meet [[Sacred 2:Knickknack|Knickknack]] on a bridge just north of [[Sacred 2:Celestial Dome|Celestial Dome]]. He wants you to help poisoning the water! | ||
| + | |||
| + | |||
| + | {{S2frame|[[Image:knickknackmap.jpg|250px]][[Image:knickknacktab.jpg|250px]]|left]]}} | ||
| + | <br clear="both" /> | ||
| + | |||
| + | {{S2frame|[[Image:knickknackloc.jpg|400px]]|left}} | ||
| + | <br clear="both" /> | ||
| + | |||
| + | [[Image:knickknackchat.gif|430px]] | ||
| + | |||
| + | |||
| + | This ends the first part of this chain quest. Head to [[Sacred 2:Thylysium|Thylysium]] to continue in the second part, [[Sacred 2:Life in the City|Life in the City]]. | ||
| + | |||
== Quest Enemies == | == Quest Enemies == | ||
| − | |||
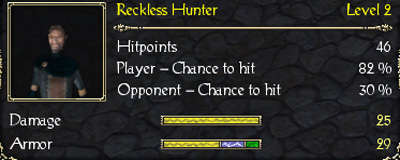
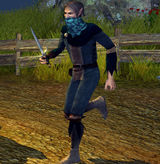
| − | + | == [[Sacred 2:Reckless Hunter|Reckless Hunter]] == | |
| − | {{:Sacred 2: | + | {{:Sacred 2:Reckless Hunter}} |
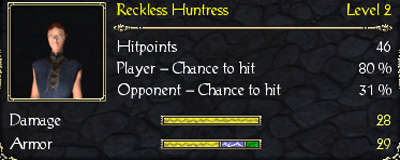
| + | == [[Sacred 2:Reckless Huntress|Reckless Huntress]] == | ||
| + | {{:Sacred 2:Reckless Huntress}} | ||
| + | |||
| + | == [[Sacred 2:Slave Overseer|Slave Overseer]] == | ||
| + | {{:Sacred 2:Slave Overseer}} | ||
| + | |||
| + | == [[Sacred 2:Stable Boy|Stable Boy]] == | ||
| + | {{:Sacred 2:Stable Boy}} | ||
| + | |||
| + | Note: Sometimes you will only 'subdue' them and not kill them. | ||
== Hirelings and Escorts == | == Hirelings and Escorts == | ||
| − | |||
| − | * [[Sacred 2: | + | * [[Sacred 2:Hunter Drogo|Hunter Drogo]] - Escort. Immortal. |
| − | * [[Sacred 2: | + | * [[Sacred 2:Tim Nightowl|Tim Nightowl]] - Escort. Immortal. |
| + | == Logbook Entry == | ||
| − | |||
| − | |||
{| | {| | ||
| − | |{{S2frame|[[Image: | + | |{{S2frame|[[Image:accordancenaturelog1.jpg|300px]]|left}} |
| − | |{{S2frame|[[Image: | + | |{{S2frame|[[Image:accordancenaturelog2.jpg|300px]]|left}} |
| + | |{{S2frame|[[Image:accordancenaturelog3.jpg|300px]]|left}} | ||
|} | |} | ||
== Notes == | == Notes == | ||
| − | |||
| − | |||
| − | |||
</div> | </div> | ||
| − | |||
[[Category:Sacred 2 Quest|{{PAGENAME}}]] | [[Category:Sacred 2 Quest|{{PAGENAME}}]] | ||
| − | + | [[Category:Sacred 2 Chain Quest Part|{{PAGENAME}}]] | |
| − | [[Category:Sacred 2 Chain Quest | ||
[[Category:Sacred 2 Class Quest|{{PAGENAME}}]] | [[Category:Sacred 2 Class Quest|{{PAGENAME}}]] | ||
[[Category:Sacred 2 Light Path Quest|{{PAGENAME}}]] | [[Category:Sacred 2 Light Path Quest|{{PAGENAME}}]] | ||
| − | + | ||
| − | |||
| − | |||
| − | |||
<div class="plainlinks"> | <div class="plainlinks"> | ||
Revision as of 22:06, 6 January 2012
|
| ||||||||||
Quick Walkthrough
|
| |||||||||
Detailed Walkthrough
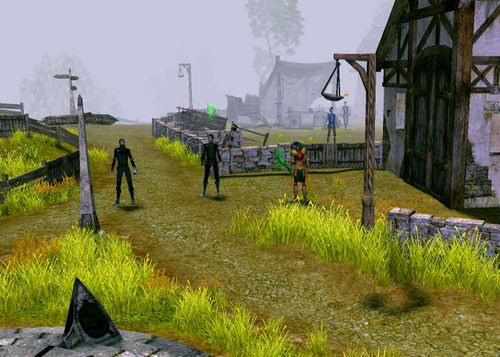
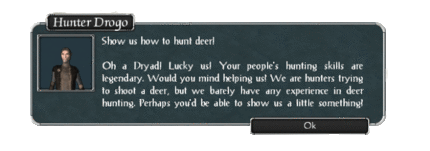
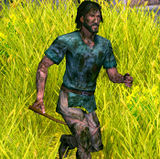
You set sail form your home lands and set sail for Tyr Lysia. You land along the southern shore on the Gold Island. As you head inland you come upon the small hamlet named Happy Cow Farm. Two High Elves notice you and beckon you to come closer. Hunter Drogo asks if you can help him and his partner, Tim Nightowl hunt down a deer. They have almost no experience and could use any help you give them.
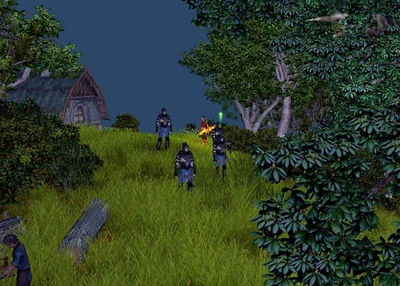
You agree to help out and soon find a deer just outside the Happy Cow Farm. Drogo's eyes light up when he sees the size of the deer. He thinks it's head will look great above his fireplace. When you inquire about the carcass he says it can rot for all he cares. As a Dryad you've grown up around nature and have learned to live with it and from it. This senseless waste of meat has you incensed. They're only trophy hunters! You decide to show your displeasure and teach them a lesson.
|
| ||
|
| ||
Nightowl pleads for you to stop. He says it was only a deer. But when he sees the look in your eyes he concedes that killing a deer only for it's antlers is wrong. The got caught up in the thrill of the hunt and never thought about the end result. They both take off like Ker herself is after them.
You see some more hunters a short distance away and head over to talk to them. Seems they already heard about the incident with Drogo. He and his buddies decide that a 'tree-hugger' like you has no business telling High Elves what to do. They attack but a seasoned hunter like you has no real problem eliminating them. You can't understand the arrogance from these elves. You're not denying anyone their right to hunt. But you dislike their reasons why.
You're really in a bad mood now as you head into Sloeford. You speak with a local resident named Thelendra. She says that the town has decided the surrounding area should be re-forested. But a man named TyBosso is preventing the plan from being realized. In fact, he's forcing his slaves to clear even more trees.
|
| ||
|
| ||
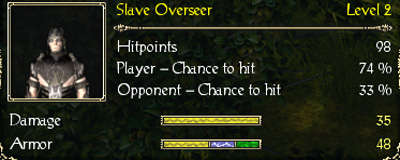
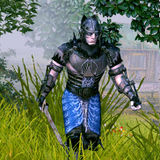
You walk out to the nearby woods to see what is going on. The Slave Overseer says that his boss, TyBosso DeElfici needs more ships for his business and they need to cut down as many trees as possible. So greed is stopping the re=planting of trees. You ask him to stop and he can't believe you're serious. The next thing you know you're being attacked. After you kill the overseers, Slave Theodus thanks you for freeing him and the others.
|
| ||
|
| ||
He had debts he couldn't pay off to TyBosso and forced into working for him. They'll hide out in the mountains until the inevitable search for them winds down and then make their way to the Human realm. Well, at least one problem is solved. He did mention something about that house over there.
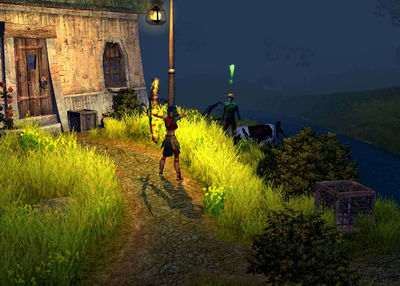
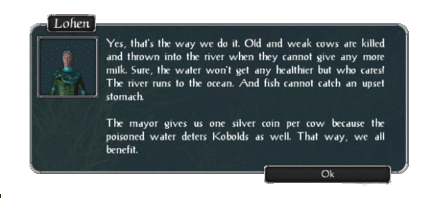
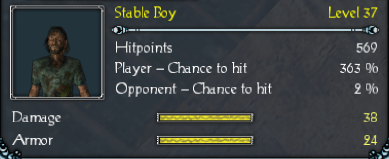
You go to check it our and can't believe what you see. They are killing cows and dumping them into the river! When you confront Lohen he says that's the way it's always been done. He doesn't care about polluting the river with bloated carcasses. He doesn't care about the fish or any of the other wildlife that depend on the waters. The mayor pays him one silver per cow and the poisoned water helps keep the Kobolds away from town. You can never remember being so angry in your life. You give Lohen and his Stable Boys a beatdown they'll never forget and head straight for the mayor's house.
|
| ||
Mayor Wilkes explains that they were butchering the cows to prevent the Kobolds from getting them. If they knew about all that meat they'd never get rid of them. But it seems it doesn't matter now since the little Kobolds are all over.. He doesn't seem to think there's anything that can be done so you agree to go out and kill a few to prove him wrong.
|
| ||
|
| ||
You travel to the High Elf Outpost and kill enough to bring back 10 Kobold Heads to show him that they can do something about the problem. That seems to re-energize the mayor. He promises to get the townsfolk together and see what they can do to solve their problems.
|
| ||
You decide to head towards the Kobold Camp to see what is going on with the Kobolds. On the way, you meet Knickknack on a bridge just north of Celestial Dome. He wants you to help poisoning the water!
|
| ||
|
| ||
This ends the first part of this chain quest. Head to Thylysium to continue in the second part, Life in the City.
Quest Enemies
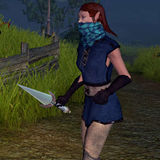
Reckless Hunter
|
|
Damage Types: Weakest Against: Quest:In Accordance with Nature Quest Location: Happy Cow Farm in Tyr Lysia | ||||||||||||||||||
Reckless Huntress
|
|
Damage Types: Weakest Against: Quest:In Accordance with Nature Quest Location: Happy Cow Farm in Tyr Lysia | ||||||||||||||||||
Slave Overseer
|
|
Damage Types: Weakest Against: Quest:In Accordance with Nature Quest Location: Happy Cow Farm in Tyr Lysia | ||||||||||||||||||
Stable Boy
|
|
Damage Types: Weakest Against: | ||||||||||||||||||
Note: Sometimes you will only 'subdue' them and not kill them.
Hirelings and Escorts
- Hunter Drogo - Escort. Immortal.
- Tim Nightowl - Escort. Immortal.
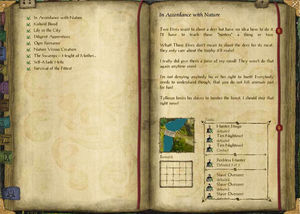
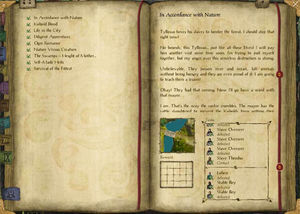
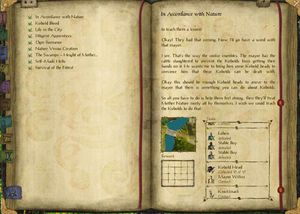
Logbook Entry
|
|
| |||||||||||||||||||||||||||
Notes
