Difference between revisions of "Sacred 2:The Banished Man"
(New page: {{subst:Quest}}) |
|||
| Line 1: | Line 1: | ||
| − | |||
| − | |||
<div class="plainlinks"> | <div class="plainlinks"> | ||
| Line 6: | Line 4: | ||
|WIDTH="15%" VALIGN="TOP"|__TOC__ | |WIDTH="15%" VALIGN="TOP"|__TOC__ | ||
|WIDTH="35%" VALIGN="TOP"| | |WIDTH="35%" VALIGN="TOP"| | ||
| − | * '''Quest Objective:''' | + | * '''Quest Objective:''' Find the treasure and give to daughter |
| − | * '''Quest Difficulty:''' | + | * '''Quest Difficulty:''' 1 Star |
| − | * '''Quest Giver:''' | + | * '''Quest Giver:''' [[Sacred 2:Clarence|Clarence]] |
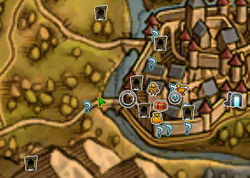
| − | * '''Location(s):''' | + | * '''Location(s):''' [[Sacred 2:Artamark|Artamark]] region, in [[Sacred 2:Griffinborough|Griffinborough]] |
| − | * '''Prerequisite Quest:''' | + | * '''Prerequisite Quest:''' None |
| − | * '''Next Quest:''' | + | * '''Next Quest:''' None |
| − | * '''Reward:''' | + | * '''Reward:''' [[Sacred 2:Gold|Gold]] [[Sacred 2:Experience|Experience]] |
| − | |WIDTH="50%" VALIGN="TOP"| | + | |WIDTH="50%" VALIGN="TOP"| |
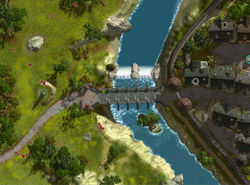
| − | {{S2frame|[[Image: | + | {{S2frame|[[Image:clarence-map.jpg|250px]][[Image:clarence-tab.jpg|250px]]|right|'''[[Sacred 2:Map of Ancaria|View the Ancaria Interactive Map]]'''}} |
|} | |} | ||
{|WIDTH="100%" | {|WIDTH="100%" | ||
|WIDTH="60%" VALIGN="TOP"| | |WIDTH="60%" VALIGN="TOP"| | ||
== Quick Walkthrough == | == Quick Walkthrough == | ||
| − | + | ||
| − | * | + | * Talk to [[Sacred 2:Clarence|Clarence]] |
| − | * | + | * Find treasure |
| − | * | + | * Give treasure to [[Sacred 2:Mechthild|Mechthild]] |
| − | |WIDTH="40%" VALIGN="TOP"|{{S2frame|[[Image: | + | |WIDTH="40%" VALIGN="TOP"|{{S2frame|[[Image:clarence-loc.jpg|500px]]}} |
|} | |} | ||
== Detailed Walkthrough == | == Detailed Walkthrough == | ||
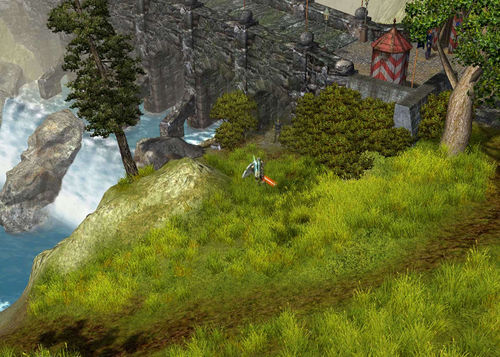
| − | + | Clarence is a down on his luck dishonored man. He once was Greifenburg's (Griffinborough's) best jester. He even represented the city in jesting competitions. But during one event a man named De Mordrey (has a familiar sound to it, doesn't it) offered him gold to throw the competition. In need of money, he agreed, but unfortunately his taking of the bribe was discovered and they banned him from the city never to return. Guess they take jesting pretty seriously around here. Even though he's banned, he hides out under the main entrance to town, within feet of the city guard! | |
| − | |||
| + | {{S2frame|[[Image:clarence-chat.jpg|400px]]|left}} | ||
| + | <br clear="both" /> | ||
| − | + | He asks you to go find some treasure he buried and give it to his daughter. She's about to marry a guy she doesn't love and the gold will offer her a happier alternative. Head over the bridge and go to the first house on the left. When you get close you'll know. | |
| − | {{S2frame|[[Image: | + | {{S2frame|[[Image:player-chat.jpg|400px]]|left}} |
<br clear="both" /> | <br clear="both" /> | ||
| + | He's sooo close to his house but hasn't dared to enter the city yet. He must be really worried about what they do to disgraced jesters. The treasure appears to be behind the house, but you'll have to walk around several buildings to get there. Really? your house doesn't have a back door? | ||
| − | {{S2frame|[[Image: | + | {{S2frame|[[Image:player-chat.jpg|400px]]|left}} |
<br clear="both" /> | <br clear="both" /> | ||
| − | + | When you get close to the tree stump you will again be prompted with a quick chat box | |
| − | {{S2frame|[[Image: | + | |
| + | {{S2frame|[[Image:player-chat2.jpg|400px]]|left}} | ||
<br clear="both" /> | <br clear="both" /> | ||
| + | The treasure was still under the tree (now only a stump). Now where could the daughter be? Yup in the first house we got to when we first entered the city. I mean she was in shouting distance of her father this whole time and never knew? Anyways head back the way you came and enter the house to find [[Sacred 2:Mechthild|Mechthild]] | ||
| − | + | {{S2frame|[[Image:mechthild-chat.jpg|400px]]|left}} | |
| − | |||
| − | |||
| − | |||
| − | |||
| − | |||
| − | {{S2frame|[[Image: | ||
<br clear="both" /> | <br clear="both" /> | ||
| − | + | She's quite happy getting her father's gold and even inquires about her dad. Should I tell her how close he is? Nah, she's happy that she doesn't have to marry....why confuse things? | |
| − | |||
| − | |||
| − | |||
| − | |||
| − | |||
| − | |||
| − | |||
| − | |||
| − | |||
| − | |||
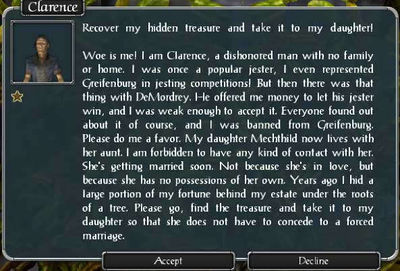
== Logbook Entry == | == Logbook Entry == | ||
| − | + | ||
| − | {| | + | {| |
| − | |{{S2frame|[[Image: | + | |{{S2frame|[[Image:clarence-log.jpg|300px]]|left}} |
| − | |||
|} | |} | ||
== Notes == | == Notes == | ||
| − | |||
</div> | </div> | ||
| − | |||
[[Category:Sacred 2 Quest|{{PAGENAME}}]] | [[Category:Sacred 2 Quest|{{PAGENAME}}]] | ||
[[Category:Sacred 2 Side Quest|{{PAGENAME}}]] | [[Category:Sacred 2 Side Quest|{{PAGENAME}}]] | ||
| − | |||
| − | |||
| − | |||
| − | |||
| − | |||
| − | |||
| − | |||
Revision as of 23:59, 13 December 2011
|
| ||||||||||
Quick Walkthrough |
| |||||||||
Detailed Walkthrough
Clarence is a down on his luck dishonored man. He once was Greifenburg's (Griffinborough's) best jester. He even represented the city in jesting competitions. But during one event a man named De Mordrey (has a familiar sound to it, doesn't it) offered him gold to throw the competition. In need of money, he agreed, but unfortunately his taking of the bribe was discovered and they banned him from the city never to return. Guess they take jesting pretty seriously around here. Even though he's banned, he hides out under the main entrance to town, within feet of the city guard!
|
| ||
He asks you to go find some treasure he buried and give it to his daughter. She's about to marry a guy she doesn't love and the gold will offer her a happier alternative. Head over the bridge and go to the first house on the left. When you get close you'll know.
|
| ||
He's sooo close to his house but hasn't dared to enter the city yet. He must be really worried about what they do to disgraced jesters. The treasure appears to be behind the house, but you'll have to walk around several buildings to get there. Really? your house doesn't have a back door?
|
| ||
When you get close to the tree stump you will again be prompted with a quick chat box
|
| ||
The treasure was still under the tree (now only a stump). Now where could the daughter be? Yup in the first house we got to when we first entered the city. I mean she was in shouting distance of her father this whole time and never knew? Anyways head back the way you came and enter the house to find Mechthild
|
| ||
She's quite happy getting her father's gold and even inquires about her dad. Should I tell her how close he is? Nah, she's happy that she doesn't have to marry....why confuse things?
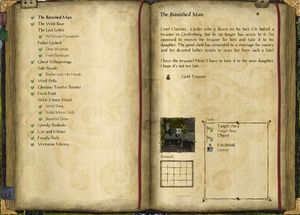
Logbook Entry
| |||||||||
