Difference between revisions of "Sacred 2:The Human Branch - Shadow"
(New page: <div class="plainlinks"> {|WIDTH="100%" |WIDTH="15%" VALIGN="TOP"|__TOC__ |WIDTH="35%" VALIGN="TOP"| * '''Quest Objective:''' * '''Quest Difficulty:''' No difficulty given for this quest ...) |
|||
| (One intermediate revision by the same user not shown) | |||
| Line 3: | Line 3: | ||
|WIDTH="15%" VALIGN="TOP"|__TOC__ | |WIDTH="15%" VALIGN="TOP"|__TOC__ | ||
|WIDTH="35%" VALIGN="TOP"| | |WIDTH="35%" VALIGN="TOP"| | ||
| − | * '''Quest Objective:''' | + | * '''Quest Objective:''' Deal with the Human Branch office |
* '''Quest Difficulty:''' No difficulty given for this quest | * '''Quest Difficulty:''' No difficulty given for this quest | ||
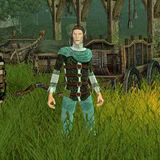
| − | * '''Quest Giver:''' [[Sacred 2:| | + | * '''Quest Giver:''' [[Sacred 2:Marys DeElfici|Marys DeElfici]] |
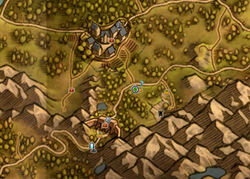
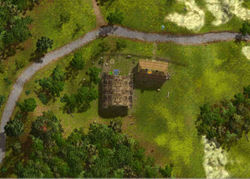
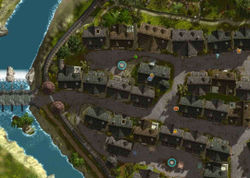
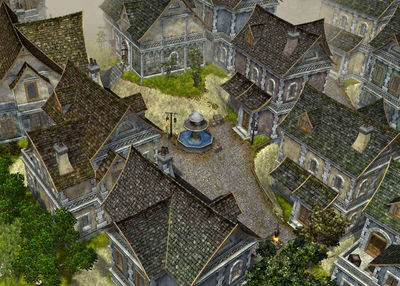
| − | * '''Location(s):''' [[Sacred 2:| | + | * '''Location(s):''' [[Sacred 2:Artamark|Artamark]] north of [[Sacred 2:Dragonmaw Pass|Dragonmaw Pass]] |
| − | * '''Prerequisite Quest:''' [[Sacred 2:| | + | * '''Prerequisite Quest:''' [[Sacred 2:DeElfici I - The Promissory Note - Shadow|DeElfici I - The Promissory Note - Shadow]] |
| − | * '''Next Quest:''' [[Sacred 2:| | + | * '''Next Quest:''' [[Sacred 2:The Wedding Ring - Shadow|The Wedding Ring - Shadow]] |
* '''Reward:''' [[Sacred 2:Gold|Gold]] [[Sacred 2:Experience|Experience]] | * '''Reward:''' [[Sacred 2:Gold|Gold]] [[Sacred 2:Experience|Experience]] | ||
| − | * '''Main Quest Page:''' [[Sacred 2:Class Chain Quest|Class Chain Quest]] | + | * '''Main Quest Page:''' [[Sacred 2:High Elf Class Chain Quest - Shadow|High Elf Class Chain Quest - Shadow]] |
|WIDTH="50%" VALIGN="TOP"| | |WIDTH="50%" VALIGN="TOP"| | ||
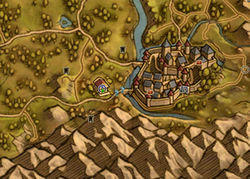
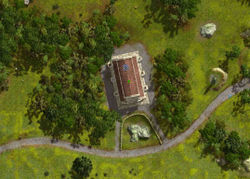
| − | {{S2frame|[[Image: | + | {{S2frame|[[Image:marysmap.jpg|250px]][[Image:marystab.jpg|250px]]|right|'''[[Sacred 2:Map of Ancaria|View the Ancaria Interactive Map]]'''}} |
|} | |} | ||
{|WIDTH="100%" | {|WIDTH="100%" | ||
| Line 19: | Line 19: | ||
== Quick Walkthrough == | == Quick Walkthrough == | ||
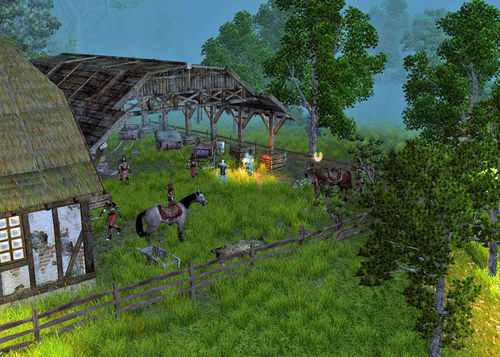
| + | * Kill Marys DeElfici and 5 Guards | ||
| + | * Go inside nearby house | ||
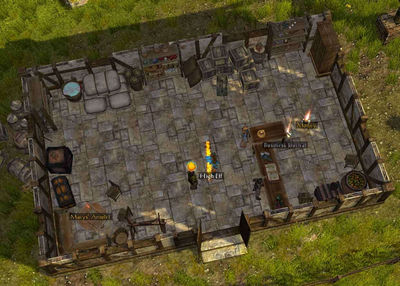
| + | * Pick up '''Money''', '''Marys' Amulet''' and '''Business Journal''' | ||
| + | * Travel to the Temple of the Gods next to [[Sacred 2:Griffinborough|Griffinborough]] | ||
| + | * Talk to the [[Sacred 2:Priest|Priest]] | ||
| + | * Enter Griffinborough and talk to [[Sacred 2:Factor Reginald|Factor Reginald]] | ||
| − | + | |WIDTH="40%" VALIGN="TOP"|{{S2frame|[[Image:marysloc.jpg|500px]]}} | |
| − | |WIDTH="40%" VALIGN="TOP"|{{S2frame|[[Image: | ||
|} | |} | ||
== Detailed Walkthrough == | == Detailed Walkthrough == | ||
| + | After speaing with marys he immediately realizes you are there to kill him. He and his Guards attempt to put up a fight but a no match for a High Elf with vengeance on her mind. You check the nearby house for any valuables and pick up the '''Money''', '''Business Journal''' and '''Marys' Amulet'''. | ||
| + | |||
| + | |||
| + | {{S2frame|[[Image:marysitems.jpg|400px]]|left}} | ||
| + | <br clear="both" /> | ||
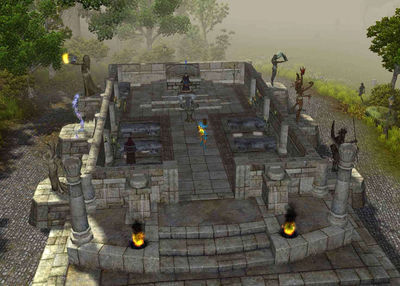
| − | [[ | + | You decide to visit the local Temple of the Gods just west of [[Sacred 2:Griffinborough|Griffinborough]] and inform the head priest of what has happened. Well, ''your'' version of what happened |
| − | {{S2frame|[[Image: | + | {{S2frame|[[Image:priestmap.jpg|250px]][[Image:priesttab.jpg|250px]]|left]]}} |
<br clear="both" /> | <br clear="both" /> | ||
| − | {{S2frame|[[Image: | + | {{S2frame|[[Image:priestloc.jpg|400px]]|left}} |
<br clear="both" /> | <br clear="both" /> | ||
| + | [[Image:priestchat.png|430px]] | ||
| + | He promises the Temple will take over the business. So far so good. no one suspects your involvement at all. | ||
| + | You head into Griffinborough and find Factor Reginald. | ||
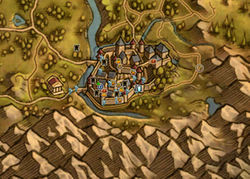
| − | {{S2frame|[[Image: | + | {{S2frame|[[Image:factormap.jpg|250px]][[Image:factortab.jpg|250px]]|left]]}} |
<br clear="both" /> | <br clear="both" /> | ||
| − | {{S2frame|[[Image: | + | {{S2frame|[[Image:factorloc.jpg|400px]]|left}} |
<br clear="both" /> | <br clear="both" /> | ||
| − | [[Image: | + | [[Image:factorchat.png|430px]] |
| + | |||
| + | You tell him the same story. He also believes you and will send the terrible news of Marys's death to his father along with his amulet. | ||
| + | |||
| − | |||
| + | This ends part 2 of the chain quest. Talking to Factor Reginald again begins the 3rd part, [[Sacred 2:The Wedding Ring|The Wedding Ring]] | ||
== Quest Enemies == | == Quest Enemies == | ||
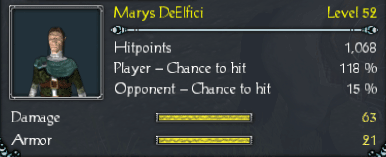
| − | == [[Sacred 2: | + | == [[Sacred 2:Marys DeElfici - The Human Branch - Shadow|Marys DeElfici]] == |
| − | {{:Sacred 2: | + | {{:Sacred 2:Marys DeElfici - The Human Branch - Shadow}} |
== Hirelings and Escorts == | == Hirelings and Escorts == | ||
| − | + | ||
== Logbook Entry == | == Logbook Entry == | ||
{| | {| | ||
| − | |{{S2frame|[[Image: | + | |{{S2frame|[[Image:branchlog.jpg|300px]]|left}} |
|} | |} | ||
| Line 72: | Line 88: | ||
[[Category:Sacred 2 Chain Quest Part|{{PAGENAME}}]] | [[Category:Sacred 2 Chain Quest Part|{{PAGENAME}}]] | ||
[[Category:Sacred 2 Class Quest|{{PAGENAME}}]] | [[Category:Sacred 2 Class Quest|{{PAGENAME}}]] | ||
| − | [[Category:Sacred 2 | + | [[Category:Sacred 2 Shadow Path Quest|{{PAGENAME}}]] |
| − | [[Category:Sacred 2 | + | [[Category:Sacred 2 Artamark Quest|{{PAGENAME}}]] |
<div class="plainlinks"> | <div class="plainlinks"> | ||
Latest revision as of 22:41, 15 April 2012
|
| ||||||||||
Quick Walkthrough
|
| |||||||||
Detailed Walkthrough
After speaing with marys he immediately realizes you are there to kill him. He and his Guards attempt to put up a fight but a no match for a High Elf with vengeance on her mind. You check the nearby house for any valuables and pick up the Money, Business Journal and Marys' Amulet.
|
| ||
You decide to visit the local Temple of the Gods just west of Griffinborough and inform the head priest of what has happened. Well, your version of what happened
|
| ||
|
| ||
He promises the Temple will take over the business. So far so good. no one suspects your involvement at all.
You head into Griffinborough and find Factor Reginald.
|
| ||
|
| ||
You tell him the same story. He also believes you and will send the terrible news of Marys's death to his father along with his amulet.
This ends part 2 of the chain quest. Talking to Factor Reginald again begins the 3rd part, The Wedding Ring
Quest Enemies
Marys DeElfici
|
|
Damage Types: Weakest Against: Quest:The Human Branch - Shadow Quest Location: Dragonmaw Pass in Artamark | ||||||||||||||||||
Hirelings and Escorts
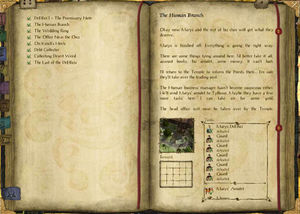
Logbook Entry
| |||||||||
