Difference between revisions of "Sacred 2:The Pirates' Navigator"
(→Notes) |
|||
| Line 16: | Line 16: | ||
== Quick Walkthrough == | == Quick Walkthrough == | ||
| − | * Talk | + | * Talk to [[Sacred 2:Scout Jalenthil|Scout Jalenthil]] near the cave. |
| − | * Enter the cave, walk north and retrieve the map | + | * Enter the cave, walk north and retrieve the map. |
| − | * Return the map to | + | * Return the map to [[Sacred 2:Scout Jalenthil|Scout Jalenthil]], and collect your reward. |
| Line 26: | Line 26: | ||
As for the location: | As for the location: | ||
| − | + | [[Sacred 2:Scout Jalenthil|Scout Jalenthil]] is located near the cave south-west of [[Sacred 2:Sloeford|Sloeford]] as indicated on the map above. Follow the yellow line, to lead you straight to the questgiver. | |
[http://s141.photobucket.com/albums/r64/promatolya/Pesky%20Pirates%20S2Q/Questgiver2.jpg http://i141.photobucket.com/albums/r64/promatolya/Pesky%20Pirates%20S2Q/th_Questgiver2.jpg] | [http://s141.photobucket.com/albums/r64/promatolya/Pesky%20Pirates%20S2Q/Questgiver2.jpg http://i141.photobucket.com/albums/r64/promatolya/Pesky%20Pirates%20S2Q/th_Questgiver2.jpg] | ||
| − | Now begins the hard work. | + | Now begins the hard work. [[Sacred 2:Scout Jalenthil|Scout Jalenthil]] will ask you to enter the cave next to him, and retrieve his map. |
| − | In this cave you'll find some low level | + | In this cave you'll find some low level [[Sacred 2:rat|rat]], [[Sacred 2:Giant Bat|giant bats]] and |
| + | [[Sacred 2:High Elf Enemy| Jade Buccaneer pirates]]. | ||
To get to the map, follow this overview of the cave, going by the red line. | To get to the map, follow this overview of the cave, going by the red line. | ||
| Line 37: | Line 38: | ||
[http://s141.photobucket.com/albums/r64/promatolya/Pesky%20Pirates%20S2Q/cave.jpg http://i141.photobucket.com/albums/r64/promatolya/Pesky%20Pirates%20S2Q/th_cave.jpg] | [http://s141.photobucket.com/albums/r64/promatolya/Pesky%20Pirates%20S2Q/cave.jpg http://i141.photobucket.com/albums/r64/promatolya/Pesky%20Pirates%20S2Q/th_cave.jpg] | ||
| − | + | Once you have retrieved the map, you can either take the other part of the circular cave, and beat some more monsters for the experience, or you can follow the same, safe, route and free yourself from having to slay creatures on your way back. | |
| − | When you leave the cave, | + | When you leave the cave, [[Sacred 2:Scout Jalenthil|Scout Jalenthil]] should still be where he was, right on your screen. Click on him to complete your quest, and rake in your financial reward and experience. |
[http://s141.photobucket.com/albums/r64/promatolya/Pesky%20Pirates%20S2Q/endquest.jpg http://i141.photobucket.com/albums/r64/promatolya/Pesky%20Pirates%20S2Q/th_endquest.jpg] | [http://s141.photobucket.com/albums/r64/promatolya/Pesky%20Pirates%20S2Q/endquest.jpg http://i141.photobucket.com/albums/r64/promatolya/Pesky%20Pirates%20S2Q/th_endquest.jpg] | ||
Revision as of 20:54, 31 December 2010
|
|
Quick Walkthrough
- Talk to Scout Jalenthil near the cave.
- Enter the cave, walk north and retrieve the map.
- Return the map to Scout Jalenthil, and collect your reward.
Detailed Walkthrough
For this quest it is recommended to be battle ready. A low level (lvl 2 or up) should have no significant problems dealing with this quest.
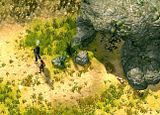
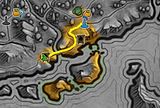
As for the location: Scout Jalenthil is located near the cave south-west of Sloeford as indicated on the map above. Follow the yellow line, to lead you straight to the questgiver.
Now begins the hard work. Scout Jalenthil will ask you to enter the cave next to him, and retrieve his map. In this cave you'll find some low level rat, giant bats and Jade Buccaneer pirates.
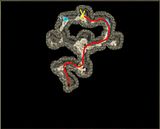
To get to the map, follow this overview of the cave, going by the red line.
Once you have retrieved the map, you can either take the other part of the circular cave, and beat some more monsters for the experience, or you can follow the same, safe, route and free yourself from having to slay creatures on your way back.
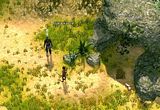
When you leave the cave, Scout Jalenthil should still be where he was, right on your screen. Click on him to complete your quest, and rake in your financial reward and experience.
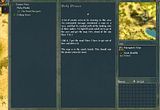
Logbook Entry
Notes
- Note 1: In the cave, it is highly recommended to use spells or attacks with an 'area of effect'. Though the monsters are not strong, they are certainly numerous. Being able to hit, and due to their low lifepoints, slay multiple opponents at a time, significantly reduces your time spent in the cave
- note 2: Inside the cave there are numerous crates ready to be opened, reavealing loot and gold. Since this quest is probably one in your early stages of the game, it's an easy way to gather gold and equipment for your new character.
- note 3: When you leave the cave, you might be 'jumped' by the High Elf thieves outside the cave. Make sure you are prepared for them when you exit the cave. Again, a lvl 2-3+ character should have no significant problem dealing with the Thieves.
- Note: watch out for traps in the cave as they can kill a low level character before you realise what's happening
