Difference between revisions of "Sacred 2:Dark Rituals"
Jump to navigation
Jump to search
Silver_fox (talk | contribs) m |
|||
| (11 intermediate revisions by 2 users not shown) | |||
| Line 1: | Line 1: | ||
| − | |||
{{CPcontent}} | {{CPcontent}} | ||
| − | |||
| − | |||
| − | |||
<div class="plainlinks"> | <div class="plainlinks"> | ||
| − | |||
{|WIDTH="100%" | {|WIDTH="100%" | ||
|WIDTH="15%" VALIGN="TOP"|__TOC__ | |WIDTH="15%" VALIGN="TOP"|__TOC__ | ||
|WIDTH="35%" VALIGN="TOP"| | |WIDTH="35%" VALIGN="TOP"| | ||
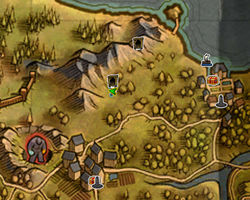
* '''Quest Objective:''' Catch the [[Sacred 2:Succubus|Succubus]] | * '''Quest Objective:''' Catch the [[Sacred 2:Succubus|Succubus]] | ||
| − | * '''Quest Difficulty:''' | + | * '''Quest Difficulty:''' 1-4 stars |
* '''Quest Giver:''' [[Sacred 2:Conjuror|Conjuror]] | * '''Quest Giver:''' [[Sacred 2:Conjuror|Conjuror]] | ||
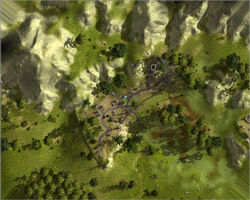
| − | * '''Location(s):''' [[Sacred 2:Orcish Byway | + | * '''Location(s):''' [[Sacred 2:Orcish Byway Cemetery|Orcish Byway Cemetery]], then travels all over Ancaria and ends in the west end of the [[Sacred 2:Bengaresh Desert|Bengaresh Desert]] |
* '''Reward:''' [[Sacred 2:Gold|Gold]], [[Sacred 2:Experience|Experience]], the legendary throwpotion called [[Sacred 2:Essence of Dark Matters|Essence of Dark Matters]] and some random items | * '''Reward:''' [[Sacred 2:Gold|Gold]], [[Sacred 2:Experience|Experience]], the legendary throwpotion called [[Sacred 2:Essence of Dark Matters|Essence of Dark Matters]] and some random items | ||
| − | |WIDTH="50%" VALIGN="TOP"| {{S2frame|[[Image:Conjuror humans worldmap.jpg|250px]][[Image:Conjuror humans map.jpg|250px]]}} | + | |WIDTH="50%" VALIGN="TOP"| {{S2frame|[[Image:Conjuror humans worldmap.jpg|250px]][[Image:Conjuror humans map.jpg|250px]]|right|'''[[Sacred 2:Map of Ancaria|View the Ancaria Interactive Map]]'''}} |
|} | |} | ||
| − | |||
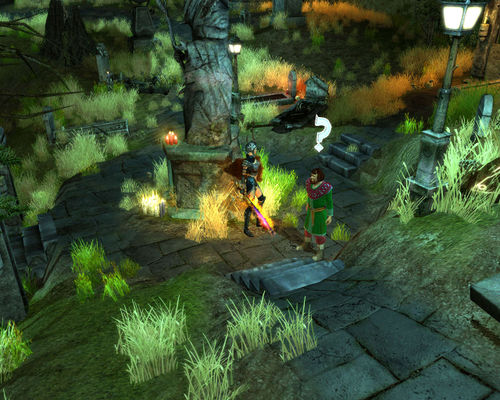
{{S2frame|[[Image:Dark rituals camera1.jpg|500px]]}} | {{S2frame|[[Image:Dark rituals camera1.jpg|500px]]}} | ||
| − | |||
== Quest Parts == | == Quest Parts == | ||
| − | Though this chain is relatively short according to logbook, its first part requires to travel all over Ancaria. Your journey will begin in the [[Sacred 2:Orcish Byway | + | Though this chain is relatively short according to logbook, its first part requires to travel all over Ancaria. Your journey will begin in the [[Sacred 2:Orcish Byway Cemetery|graveyard]] near [[Sacred 2:Orcish Byway|Orcish Byway]]. |
The quests in this chain are: | The quests in this chain are: | ||
| − | #[[Sacred 2: Daemonic Rituals|Daemonic Rituals]] | + | #[[Sacred 2:Daemonic Rituals|Daemonic Rituals]] |
| − | #[[Sacred 2: Dark Invocation|Dark Invocation]] | + | #[[Sacred 2:Dark Invocation|Dark Invocation]] |
| − | In order to start your journey towards completing this really long, multi-part quest, you would have to talk to the [[Sacred 2:Conjuror|Conjuror]] you'd find in the [[Sacred 2:Orcish Byway | + | In order to start your journey towards completing this really long, multi-part quest, you would have to talk to the [[Sacred 2:Conjuror|Conjuror]] you'd find in the [[Sacred 2:Orcish Byway Cemetery|Orcish Byway Cemetery]]. The detailed information on this string of quests starts [[Sacred 2: Daemonic Rituals|here]]. |
== Quick Walkthrough == | == Quick Walkthrough == | ||
| + | |||
| + | === [[Sacred 2:Daemonic Rituals|Daemonic Rituals]] === | ||
| + | |||
* Talk to the [[Sacred 2:Conjuror|Conjuror]] in the graveyard near [[Sacred 2:Orcish Byway|Orcish Byway]] | * Talk to the [[Sacred 2:Conjuror|Conjuror]] in the graveyard near [[Sacred 2:Orcish Byway|Orcish Byway]] | ||
* Defeat the [[Sacred 2:Succubus|Succubus]] | * Defeat the [[Sacred 2:Succubus|Succubus]] | ||
| Line 40: | Line 36: | ||
* Talk to the [[Sacred 2:Hermit - Human Outpost|Hermit]] that lives in the [[Sacred 2:Human Outpost|Human Outpost]] in the caves under the [[Sacred 2:Dragon Sea Islands|Dragon Sea Islands]] | * Talk to the [[Sacred 2:Hermit - Human Outpost|Hermit]] that lives in the [[Sacred 2:Human Outpost|Human Outpost]] in the caves under the [[Sacred 2:Dragon Sea Islands|Dragon Sea Islands]] | ||
* Kill a [[Sacred 2:Young Dragon|Young Dragon]] and collect the Fire Pouch | * Kill a [[Sacred 2:Young Dragon|Young Dragon]] and collect the Fire Pouch | ||
| − | * Talk to the [[Sacred 2:Hermit - Swamp|Hermit]] that lives in [[Sacred 2:The Swamp|the Swamp]] | + | * Talk to the [[Sacred 2:Hermit - Swamp|Hermit]] that lives in [[Sacred 2:The Swamp|the Swamp]] near the [[Sacred 2:Ruins of Khatuz|Ruins of Khatuz]] |
* Find the Pouch with Everwhet Mud in the south-west corner of [[Sacred 2:The Swamp|the Swamp]] | * Find the Pouch with Everwhet Mud in the south-west corner of [[Sacred 2:The Swamp|the Swamp]] | ||
| − | * Talk to the [[Sacred 2:Master Conjuror|Master Conjuror]] in the west end of the [[Sacred 2:Bengaresh Desert|Bengaresh Desert]] | + | * Talk to the [[Sacred 2:Master Conjuror|Master Conjuror]] in the west end of the [[Sacred 2:Bengaresh Desert|Bengaresh Desert]] on the [[Sacred 2:Zahrat Coast|Zahrat Coast]] |
| − | + | ||
| + | |||
| + | |||
| + | === [[Sacred 2:Dark Invocation|Dark Invocation]] === | ||
| + | |||
* Talk to the [[Sacred 2:Master Conjuror|Master Conjuror]] again | * Talk to the [[Sacred 2:Master Conjuror|Master Conjuror]] again | ||
* Find the Basket Full of Demonic Candy in the east end of the [[Sacred 2:Bengaresh Desert|Bengaresh Desert]] | * Find the Basket Full of Demonic Candy in the east end of the [[Sacred 2:Bengaresh Desert|Bengaresh Desert]] | ||
| Line 54: | Line 54: | ||
* [[Sacred 2:Harpy|Harpies]] and a [[Sacred 2:Young Dragon|Young Dragon]] involved in this quest are not a special quest enemies. You just have to kill the enemies of that kind until you'd get the desirable quest items. In the case of the [[Sacred 2:Young Dragon|Young Dragon]] it may take some time and several tries. Looks like this Fire Pouch is hard to find in a good quality. | * [[Sacred 2:Harpy|Harpies]] and a [[Sacred 2:Young Dragon|Young Dragon]] involved in this quest are not a special quest enemies. You just have to kill the enemies of that kind until you'd get the desirable quest items. In the case of the [[Sacred 2:Young Dragon|Young Dragon]] it may take some time and several tries. Looks like this Fire Pouch is hard to find in a good quality. | ||
| − | [[Category:Sacred 2 Chain Quest]] | + | [[Category:Sacred 2 CM Patch Quest|{{SUBPAGENAME}}]] |
| + | [[Category:Sacred 2 Chain Quest|{{PAGENAME}}]] | ||
| + | [[Category:Sacred 2 Quest|{{PAGENAME}}]] | ||
| + | [[Category:Sacred 2 Artamark Quest|{{PAGENAME}}]] | ||
Latest revision as of 20:54, 21 December 2011

|
This page is about additional content added from the CM Patch.
The contents of this page are exclusive content found only by installing the Community Patch. |
|
| ||||||||||
|
| ||
Quest Parts
Though this chain is relatively short according to logbook, its first part requires to travel all over Ancaria. Your journey will begin in the graveyard near Orcish Byway.
The quests in this chain are:
In order to start your journey towards completing this really long, multi-part quest, you would have to talk to the Conjuror you'd find in the Orcish Byway Cemetery. The detailed information on this string of quests starts here.
Quick Walkthrough
Daemonic Rituals
- Talk to the Conjuror in the graveyard near Orcish Byway
- Defeat the Succubus
- Talk to the Conjuror again
- Talk to the Hermit that lives near Tol Rumazil
- Kill the Earth Elemental and collect the Earth Elemental Stone
- Kill 10 Harpies and collect 10 vials of Harpy Blood
- Talk to the Hermit that lives on the Seraphim Island
- Kill the Ice Monster and collect the Eternal Ice Shard
- Talk to the Hermit that lives in the Human Outpost in the caves under the Dragon Sea Islands
- Kill a Young Dragon and collect the Fire Pouch
- Talk to the Hermit that lives in the Swamp near the Ruins of Khatuz
- Find the Pouch with Everwhet Mud in the south-west corner of the Swamp
- Talk to the Master Conjuror in the west end of the Bengaresh Desert on the Zahrat Coast
Dark Invocation
- Talk to the Master Conjuror again
- Find the Basket Full of Demonic Candy in the east end of the Bengaresh Desert
- Talk to the Master Conjuror
- Watch the Invocation Ritual
- Talk to the Master Conjuror to receive your reward
Notes
- In the Community Patch v100 this chain won't show up in the logbook. It is fixed in the next versions.
- Harpies and a Young Dragon involved in this quest are not a special quest enemies. You just have to kill the enemies of that kind until you'd get the desirable quest items. In the case of the Young Dragon it may take some time and several tries. Looks like this Fire Pouch is hard to find in a good quality.


