Difference between revisions of "Sacred 2:Hideout"
| (6 intermediate revisions by the same user not shown) | |||
| Line 1: | Line 1: | ||
{{Languages}} | {{Languages}} | ||
| − | |||
| − | |||
<div class="plainlinks"> | <div class="plainlinks"> | ||
| − | {| | + | {|WIDTH="100%" |
| − | |WIDTH=" | + | |WIDTH="15%" VALIGN="TOP"|__TOC__ |
| − | |WIDTH=" | + | |WIDTH="35%" VALIGN="TOP"| |
| − | * '''Quest Objective:''' Find the hideout and exterminate the | + | * '''Quest Objective:''' Find the hideout and exterminate the outlaws and find some evidence. |
| − | * '''Quest Difficulty:''' | + | * '''Quest Difficulty:''' 2 Stars |
| − | * '''Quest Giver:''' | + | * '''Quest Giver:''' Starts after you talk to the [[Sacred 2:Outlaw - NPC|Outlaw]] you spared in [[Sacred 2:Simple Task|Simple Task]] |
* '''Location(s):''' Central Artamark | * '''Location(s):''' Central Artamark | ||
* '''Prerequisite Quest:''' [[Sacred 2:Simple Task|Simple Task]] | * '''Prerequisite Quest:''' [[Sacred 2:Simple Task|Simple Task]] | ||
* '''Next Quest:''' [[Sacred 2:Suspicion|Suspicion]] | * '''Next Quest:''' [[Sacred 2:Suspicion|Suspicion]] | ||
* '''Reward:''' Experience, Gold, whatever you picked up from your kills | * '''Reward:''' Experience, Gold, whatever you picked up from your kills | ||
| − | |WIDTH=" | + | * '''Main Quest Page:''' [[Sacred 2:By Order of the Crown|By Order of the Crown]] |
| + | |WIDTH="50%" VALIGN="TOP"| | ||
| + | |||
| + | {{S2frame|[[Image:hideoutmap.jpg|250px]][[Image:hideouttab.jpg|250px]]|right|'''[[Sacred 2:Map of Ancaria|View the Ancaria Interactive Map]]'''}} | ||
|} | |} | ||
| + | {|WIDTH="100%" | ||
| + | |WIDTH="60%" VALIGN="TOP"| | ||
== Quick Walkthrough == | == Quick Walkthrough == | ||
| − | * | + | * Enter Outlaw hideout |
| − | * Kill | + | * Kill 11 [[Sacred 2:Outlaw|Outlaws]] |
| − | * | + | * Pick up the '''Half Burned Note''' |
| − | * | + | * Return and talk to Officer Pethyr |
| − | + | * Talk to [[Sacred 2:Commander - NPC|Commander]] | |
| − | * | ||
| + | |WIDTH="40%" VALIGN="TOP"|{{S2frame|[[Image:hideoutloc.jpg|500px]]}} | ||
| + | |} | ||
== Detailed Walkthrough == | == Detailed Walkthrough == | ||
| − | |||
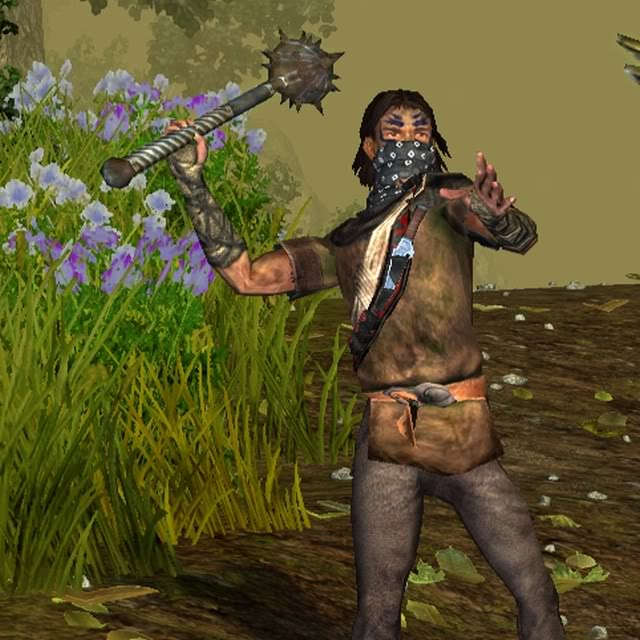
| + | After the Outlaw reveals the location of the hideout, you travel a short distance west and enter the cave. | ||
| + | |||
| + | {{S2frame|[[Image:hideoutpic.jpg|400px]]|left}} | ||
| + | <br clear="both" /> | ||
| + | The cave is full of outlaws so this must be the right cave. Of course they don't like unannounced visitors and attack immediately. Unfortunately for them, you are a highly trained and deadly warrior. They fall beneath your sword in no time at all. Once they are all dead you notice a '''Half Burned Note''' laying on the ground. You pick it up and try to read it but it doesn't make much sense to you. Best course of action is to head back to Officer Pethyr. | ||
| + | |||
| + | {{S2frame|[[Image:pethyrchat2.gif|430px]]|left}} | ||
| + | <br clear="both" /> | ||
| + | |||
| + | You let him know that the hideout has been cleared of outlaws and hand him the note. He can't make much sense out of it either. Talk to him again and he mentions if you're up for another worthwhile task, speak to the Commander about a 'special problem'. | ||
| + | |||
| + | {{S2frame|[[Image:pethyrchat3.gif|430px]]|left}} | ||
| + | <br clear="both" /> | ||
| + | |||
| + | You find the commander in the stronghold courtyard. He says Officer Pethyr must have been very impressed. The phrase 'special problem' is code they use for people who know what they are doing and they can really use to help out. He asks if you might be interested in another task. | ||
| + | |||
| + | {{S2frame|[[Image:commanderchat1.gif|430px]]|left}} | ||
| + | <br clear="both" /> | ||
| + | |||
| + | This ends the 2nd part of the chain quest. The 3rd part, [[Sacred 2:Suspicion|Suspicion]], begins when you speak to the Commander again. | ||
| + | |||
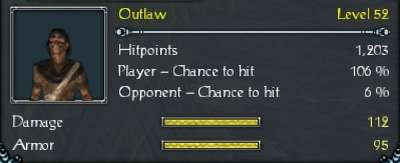
| + | == Quest Enemies == | ||
| + | == [[Sacred 2:Outlaw|Outlaw]] == | ||
| + | {{:Sacred 2:Outlaw}} | ||
== Logbook Entry == | == Logbook Entry == | ||
| − | [ | + | {| |
| + | |{{S2frame|[[Image:hideoutlog1.jpg|300px]]|left}} | ||
| + | |{{S2frame|[[Image:hideoutlog2.jpg|300px]]|left}} | ||
| + | |} | ||
| Line 39: | Line 69: | ||
</div> | </div> | ||
| − | [[Category:Sacred 2 Chain Quest]|{{PAGENAME}}] | + | [[Category:Sacred 2 Quest|{{PAGENAME}}]] |
| + | [[Category:Sacred 2 Chain Quest Part|{{PAGENAME}}]] | ||
| + | [[Category:Sacred 2 Artamark Quest|{{PAGENAME}}]] | ||
Latest revision as of 01:06, 10 October 2013
|
| ||||||||||


Quick Walkthrough |
| |||||||||

Detailed Walkthrough
After the Outlaw reveals the location of the hideout, you travel a short distance west and enter the cave.
|
| ||
 |
||
The cave is full of outlaws so this must be the right cave. Of course they don't like unannounced visitors and attack immediately. Unfortunately for them, you are a highly trained and deadly warrior. They fall beneath your sword in no time at all. Once they are all dead you notice a Half Burned Note laying on the ground. You pick it up and try to read it but it doesn't make much sense to you. Best course of action is to head back to Officer Pethyr.
|
| ||
 |
||
You let him know that the hideout has been cleared of outlaws and hand him the note. He can't make much sense out of it either. Talk to him again and he mentions if you're up for another worthwhile task, speak to the Commander about a 'special problem'.
|
| ||
 |
||
You find the commander in the stronghold courtyard. He says Officer Pethyr must have been very impressed. The phrase 'special problem' is code they use for people who know what they are doing and they can really use to help out. He asks if you might be interested in another task.
|
| ||
 |
||
This ends the 2nd part of the chain quest. The 3rd part, Suspicion, begins when you speak to the Commander again.
Quest Enemies
Outlaw
|
|
Damage Types: Weakest Against: Quest:Sickle Moon Wool Quest Location: Black Oaks in Artamark | ||||||||||||||||||


Logbook Entry
|
| ||||||||||||||||||

