Difference between revisions of "Sacred 2:The Great Wall"
(New page: {{subst:Quest}}) |
|||
| Line 1: | Line 1: | ||
| − | |||
| − | |||
| − | |||
<div class="plainlinks"> | <div class="plainlinks"> | ||
{|WIDTH="100%" | {|WIDTH="100%" | ||
|WIDTH="15%" VALIGN="TOP"|__TOC__ | |WIDTH="15%" VALIGN="TOP"|__TOC__ | ||
|WIDTH="35%" VALIGN="TOP"| | |WIDTH="35%" VALIGN="TOP"| | ||
| − | * '''Quest Objective:''' | + | * '''Quest Objective:''' Retrieve Shirka's equipment and escort her to Human Lands |
| − | * '''Quest Difficulty:''' | + | * '''Quest Difficulty:''' No difficulty given for this quest |
| − | * '''Quest Giver:''' | + | * '''Quest Giver:''' [[Sacred 2:Shirka Alana - NPC|Shirka Alana]] |
| − | * '''Location(s):''' | + | * '''Location(s):''' [[Sacred 2:Tyr Lysia|Tyr Lysia]] south of [[Sacred 2:Dragonmaw Pass|Dragonmaw Pass]] |
| − | * '''Prerequisite Quest:''' | + | * '''Prerequisite Quest:''' [[Sacred 2:Shirka Alana|Shirka Alana]] |
| − | * '''Next Quest:''' | + | * '''Next Quest:''' [[Sacred 2:The Rise of Shirka Alana|The Rise of Shirka Alana]] |
| − | * '''Reward:''' | + | * '''Reward:''' [[Sacred 2:Experience|Experience]] |
| − | |WIDTH="50%" VALIGN="TOP"| | + | * '''Main Quest Page:''' [[Sacred 2:Inquisitor Class Chain Quest|Inquisitor Class Chain Quest]] |
| + | |WIDTH="50%" VALIGN="TOP"| | ||
| − | {{S2frame|[[Image: | + | {{S2frame|[[Image:shirka4map.jpg|250px]][[Image:shirka4tab.jpg|250px]]|right|'''[[Sacred 2:Map of Ancaria|View the Ancaria Interactive Map]]'''}} |
|} | |} | ||
{|WIDTH="100%" | {|WIDTH="100%" | ||
|WIDTH="60%" VALIGN="TOP"| | |WIDTH="60%" VALIGN="TOP"| | ||
== Quick Walkthrough == | == Quick Walkthrough == | ||
| − | + | * Head toward [[Sacred 2:Dragonmaw Pass|Dragonmaw Pass]]. | |
| − | * | + | * Meet Shirka on the way and talk to her |
| − | * | + | * Kill 5 [[Sacred 2:Brigand|Brigands]] near where you met her. |
| − | + | * Escort Shirka through Dragonmaw Pass gates and talk to her | |
| − | |WIDTH="40%" VALIGN="TOP"|{{S2frame|[[Image: | + | * Travel alone to Temple just above [[Sacred 2:Grunwald|Grunwald portal]] |
| + | |||
| + | |WIDTH="40%" VALIGN="TOP"|{{S2frame|[[Image:shirka4loc.jpg|500px]]}} | ||
|} | |} | ||
== Detailed Walkthrough == | == Detailed Walkthrough == | ||
| − | |||
| − | + | As you head north from [[Sacred 2:Clearview|Clearview]] on your way to the Human lands you see [[Sacred 2:Shirka Alana - NPC|Shirka Alana]] along the main road just south of [[Sacred 2:Dragonmaw Pass|Dragonmaw Pass]]. You wonder what is wrong now, since you're convinced something must be. Her stint in the Inquisition Guard didn't last long at all. She was kicked out for insubordination and lack of discipline. On top of that she was robbed. If she had stayed in the Guard she might have figured out how to defend herself. So now some [[Sacred 2:Brigand|Brigands]] have stolen all her equipment and her plans to become a mercenary were stopped before she even had a chance to start. You sigh and tell her you'll see what you can do about getting her gear back. | |
| + | |||
| + | [[Image:shirka4chat.png|430px]] | ||
| + | You head east a little ways and spot the brigands divvying up the loot. There's five of them but they offer an Inquisitor no real challenge. You take them down and give Shirka her gear back. | ||
| − | |||
| − | {{S2frame|[[Image: | + | {{S2frame|[[Image:brigmap.jpg|250px]][[Image:brigtab.jpg|250px]]|left]]}} |
<br clear="both" /> | <br clear="both" /> | ||
| − | + | {{S2frame|[[Image:brigloc.jpg|400px]]|left}} | |
| − | {{S2frame|[[Image: | ||
<br clear="both" /> | <br clear="both" /> | ||
| − | |||
| − | |||
| − | |||
| + | You're about to go on your way when she asks if you wouldn't mind escorting her to the Human lands. It's not far and she doesn't seem to do well on her own so you agree. | ||
| − | + | [[Image:Shirka5chat.png|430px]] | |
| − | + | You make it past the gates when she asks you to stop. Dear god, what now? To your surprise she merely thanks you for assisting her. But you have a gut feeling this won't be the last time you'll have to help her out. | |
| − | + | {{S2frame|[[Image:shirka6map.jpg|250px]][[Image:shirka6tab.jpg|250px]]|left]]}} | |
| + | <br clear="both" /> | ||
| − | {{S2frame|[[Image: | + | {{S2frame|[[Image:shirka6loc.jpg|400px]]|left}} |
<br clear="both" /> | <br clear="both" /> | ||
| + | |||
| + | [[Image:shirka6chat.png|430px]] | ||
| + | |||
| + | This end part 2 of the chain quest. Head toward the Temple of the Gods, north of the [[Sacred 2:Grunwald|Grunwald]] portal to continue in part 3, [[Sacred 2:The Rise of Shirka Alana|The Rise of Shirka Alana]] | ||
| + | |||
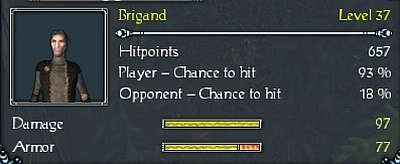
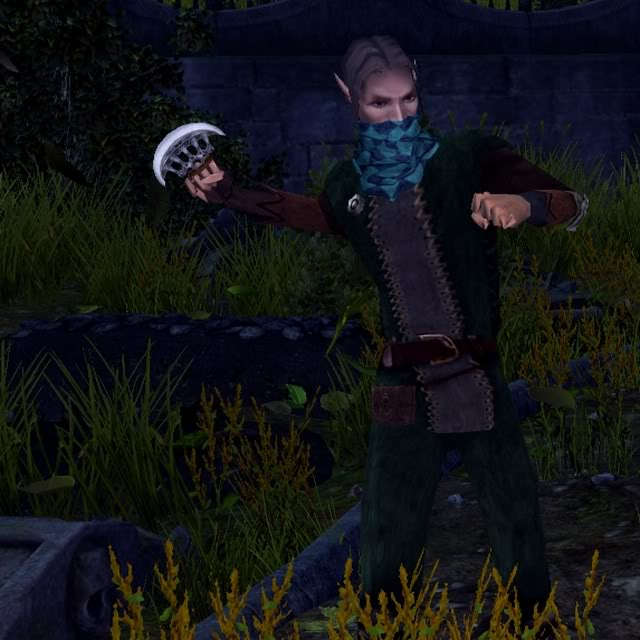
== Quest Enemies == | == Quest Enemies == | ||
| − | |||
| − | === [[Sacred 2: | + | |
| − | {{:Sacred 2: | + | === [[Sacred 2:Brigand|Brigand]] === |
| + | {{:Sacred 2:Brigand}} | ||
== Hirelings and Escorts == | == Hirelings and Escorts == | ||
| − | |||
| − | * [[Sacred 2: | + | * [[Sacred 2:Shirka Alana - NPC|Shirka Alana]] - Escort. Immortal. |
| − | |||
| + | == Logbook Entry == | ||
| − | |||
| − | |||
{| | {| | ||
| − | |{{S2frame|[[Image: | + | |{{S2frame|[[Image:greatwalllog.jpg|300px]]|left}} |
| − | + | ||
|} | |} | ||
== Notes == | == Notes == | ||
| − | + | ||
</div> | </div> | ||
| − | |||
[[Category:Sacred 2 Quest|{{PAGENAME}}]] | [[Category:Sacred 2 Quest|{{PAGENAME}}]] | ||
| − | + | [[Category:Sacred 2 Chain Quest Part|{{PAGENAME}}]] | |
| − | [[Category:Sacred 2 Chain Quest | + | [[Category:Sacred 2 Class Quest|{{PAGENAME}}]] |
| − | [[Category:Sacred 2 Class | ||
| − | |||
[[Category:Sacred 2 Shadow Path Quest|{{PAGENAME}}]] | [[Category:Sacred 2 Shadow Path Quest|{{PAGENAME}}]] | ||
| − | [[Category:Sacred 2 | + | [[Category:Sacred 2 Tyr Lysia Quest|{{PAGENAME}}]] |
| − | |||
| − | |||
Latest revision as of 02:54, 1 January 2012
|
| ||||||||||


Quick Walkthrough
|
| |||||||||

Detailed Walkthrough
As you head north from Clearview on your way to the Human lands you see Shirka Alana along the main road just south of Dragonmaw Pass. You wonder what is wrong now, since you're convinced something must be. Her stint in the Inquisition Guard didn't last long at all. She was kicked out for insubordination and lack of discipline. On top of that she was robbed. If she had stayed in the Guard she might have figured out how to defend herself. So now some Brigands have stolen all her equipment and her plans to become a mercenary were stopped before she even had a chance to start. You sigh and tell her you'll see what you can do about getting her gear back.

You head east a little ways and spot the brigands divvying up the loot. There's five of them but they offer an Inquisitor no real challenge. You take them down and give Shirka her gear back.
|
| ||
  |
||
|
| ||
 |
||
You're about to go on your way when she asks if you wouldn't mind escorting her to the Human lands. It's not far and she doesn't seem to do well on her own so you agree.

You make it past the gates when she asks you to stop. Dear god, what now? To your surprise she merely thanks you for assisting her. But you have a gut feeling this won't be the last time you'll have to help her out.
|
| ||
  |
||
|
| ||
 |
||

This end part 2 of the chain quest. Head toward the Temple of the Gods, north of the Grunwald portal to continue in part 3, The Rise of Shirka Alana
Quest Enemies
Brigand
|
|
Damage Types: Weakest Against: Region: Tyr Lysia | ||||||||||||||||||


|
|
Damage Types: Weakest Against: Region: Tyr Lysia | ||||||||||||||||||


Hirelings and Escorts
- Shirka Alana - Escort. Immortal.
Logbook Entry
| |||||||||
