Difference between revisions of "Sacred 2:Children and Demons"
(→Notes) |
|||
| (10 intermediate revisions by 4 users not shown) | |||
| Line 1: | Line 1: | ||
{{Languages}} | {{Languages}} | ||
| − | |||
<div class="plainlinks"> | <div class="plainlinks"> | ||
| − | {| | + | {|WIDTH="100%" |
| − | |WIDTH=" | + | |WIDTH="15%" VALIGN="TOP"|__TOC__ |
| − | |WIDTH=" | + | |WIDTH="35%" VALIGN="TOP"| |
| − | * '''Quest Objective:''' | + | * '''Quest Objective:''' Find [[Sacred 2:Farmer Koremar|Farmer Koremar's]] children |
| − | * '''Quest Difficulty:''' | + | * '''Quest Difficulty:''' None |
* '''Quest Giver:''' [[Sacred 2:Farmer Koremar|Farmer Koremar]] | * '''Quest Giver:''' [[Sacred 2:Farmer Koremar|Farmer Koremar]] | ||
| − | * '''Location(s):''' [[Sacred 2:Sloeford|Sloeford]] | + | * '''Location(s):''' [[Sacred 2:Sloeford|Sloeford]] and [[Sacred 2:Twainbrook|Twainbrook]]. |
| − | * '''Prerequisite Quest:''' | + | * '''Prerequisite Quest:''' None |
* '''Next Quest:''' [[Sacred 2:Children and Demons II|Children and Demons II]] | * '''Next Quest:''' [[Sacred 2:Children and Demons II|Children and Demons II]] | ||
| − | * '''Reward:''' | + | * '''Reward:''' None |
| − | |WIDTH=" | + | |WIDTH="50%" VALIGN="TOP"| {{S2frame|[[Image:Farmer koremar worldmap.jpg|250px]][[Image:Farmer koremar map.jpg|250px]]|right|'''[[Sacred 2:Map of Ancaria|View the Ancaria Interactive Map]]'''}} |
| − | |||
| − | [ | ||
|} | |} | ||
| − | + | {|WIDTH="100%" | |
| + | |WIDTH="60%" VALIGN="TOP"| | ||
== Quick Walkthrough == | == Quick Walkthrough == | ||
| − | * | + | * Talk to [[Sacred 2:Farmer Koremar|Farmer Koremar]] in [[Sacred 2:Sloeford|Sloeford]]. |
| − | * Walk east to the cave entrance | + | * Walk east to the place between the small lake and the [[Sacred 2:Dungeon Map of Ancaria|cave]] entrance. |
| − | * Pick up toys | + | * Get a message from your character who noticed the dark figure. |
| − | * | + | * Pick up the toys that are lying on the ground. |
| − | * | + | * Walk inside the cave nearby. |
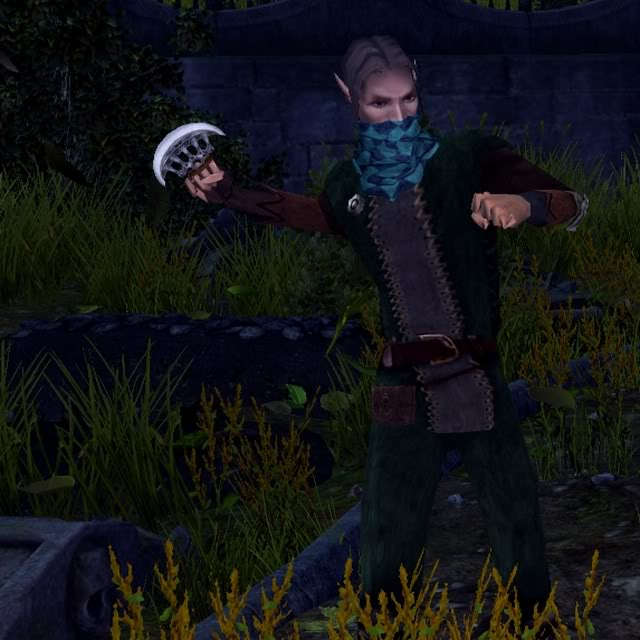
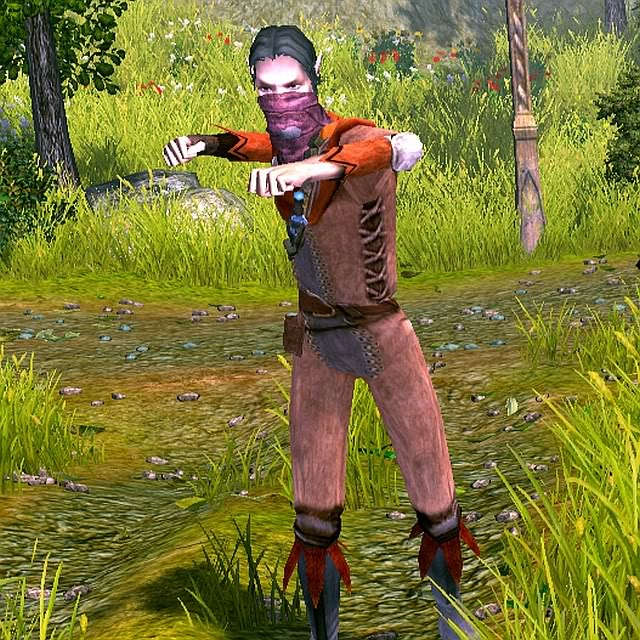
| − | * | + | * Fight the [[Sacred 2:Brigand|Brigands]] inside the cave. Kill five Brigands and [[Sacred 2:Brigand Leader - Children and Demons|their Leader]]. |
| − | * | + | * Pick up the key the [[Sacred 2:Brigand Leader - Children and Demons|Brigand Leader]] drops. |
| − | + | * Walk to the closed door that is inside the cave and open it with the key you've picked. | |
| − | + | * Talk to the [[Sacred 2:Child - Children and Demons|Child]]. | |
| − | + | * Escort all five children to [[Sacred 2:Farmer Koremar|Farmer Koremar]]. | |
| + | * Talk to [[Sacred 2:Farmer Koremar|Farmer Koremar]]. | ||
| + | * Walk inside the house behind [[Sacred 2:Farmer Koremar|Farmer Koremar]] and talk to [[Sacred 2:Lienna|Lienna]]. | ||
| + | * Talk to [[Sacred 2:Elodriel|Elodriel]] in [[Sacred 2:Twainbrook|Twainbrook]]. | ||
| + | |WIDTH="40%" VALIGN="TOP"|{{S2frame|[[Image:Children and demons1 camera1.jpg|500px]]}} | ||
| + | |} | ||
== Detailed Walkthrough == | == Detailed Walkthrough == | ||
| − | You have recently arrived | + | You have recently arrived in [[Sacred 2: Sloeford|Sloeford]] looking for a place to rest when a farmer stops you asking for help. You decide to listen at him for a while and you find out his children have been missing for over two hours. You decide to look for them near the lake where they were playing.<br> |
| − | + | [[Image:Children and demons1 dialog 1.png|430px]]<br> | |
| − | [ | + | You walk to the east till the lake, and you see no children playing there. So you decide to go a bit further searching for them.<br> |
| − | [ | + | {{S2frame|[[Image:Children and demons1 worldmap1.jpg|250px]][[Image:Children and demons1 map1.jpg|250px]]|left}} |
| − | + | <br clear="both" /> | |
| − | + | Just a step after you see something crossing in front of you... it was a dark figure, wasn't it?! You walk quickly after it...<br> | |
| − | You walk to the east till the lake, and you see no children playing there. Just a step after you see something crossing in front of you... was | + | {{S2frame|[[Image:Children and demons1 camera2.jpg|400px]]|left}} |
| − | + | <br clear="both" /> | |
| − | [ | + | Of course, your character has noticed the strange figure. Now the Seraphim wonders who this person may be... and what this dark lady has to do with the children who disappeared from this place.<br> |
| − | + | [[Image:Children and demons1 dialog 2.png|430px]]<br> | |
| − | [ | + | You walk further down the road, and half way between the lake and the cave entrance you find some toys on the ground. That's not the kind of signal you were looking for, but that's the best you have. At least these toys proof that the children were there. You pick them up, since the kids would be happy to get their toys back, and then...<br> |
| − | + | {{S2frame|[[Image:Children and demons1 camera3.jpg|400px]]|left}} | |
| − | + | <br clear="both" /> | |
| − | + | Look!! That sinister figure again... You just saw it near the cave entrance. Let's find out what's cooking inside there!<br> | |
| − | + | {{S2frame|[[Image:Children and demons1 worldmap2.jpg|250px]][[Image:Children and demons1 map2.jpg|250px]]|left}} | |
| − | [ | + | <br clear="both" /> |
| − | + | Inside the cave you find lots of [[Sacred 2:Rat|rats]], five [[Sacred 2:Brigand|Brigands]] and their leader. After killing all of them you reach a closed door.<br> | |
| − | Look!! That sinister figure again... You just saw it near the cave entrance. Let's find out what's cooking inside there! | + | {{S2frame|[[Image:Children and demons1 camera4.jpg|400px]]|left}} |
| − | + | <br clear="both" /> | |
| − | [ | + | Since you picked a key from the [[Sacred 2:Brigand Leader - Children and Demons|Brigand Leader]] that attacked you in the cave, you open the door and the kids are inside!! |
| − | [ | + | {{S2frame|[[Image:Child children and demons worldmap.jpg|250px]][[Image:Child children and demons map.jpg|250px]]|left}} |
| − | + | <br clear="both" /> | |
| − | Inside the cave you find lots of [[Sacred 2:Rat|rats]] | + | {{S2frame|[[Image:Children children and demons.jpg|400px]]|left}} |
| − | + | <br clear="both" /> | |
| − | [ | + | They are standing near the campfire waiting for the help to come. Now that you've killed all the brigands who put the kids into this place, you can talk to one of the boys and tell him that they are free to go.<br> |
| − | [ | + | [[Image:Children and demons1 dialog 3.png|430px]]<br> |
| − | [ | + | Now the children are safe you bring them back with [[Sacred 2:Farmer Koremar|Farmer Koremar]], who will be pleased to see they're back with him.<br> |
| − | + | [[Image:Children and demons1 dialog 4.png|430px]]<br> | |
| − | Now the children are safe you bring them back with [[Sacred 2:Farmer Koremar|Farmer Koremar]], who will be pleased to see they're back with him. | + | But as you walk into [[Sacred 2:Farmer Koremar|Koremar's]] house, you see that his wife [[Sacred 2:Lienna|Lienna]] is still quite nervous. <br> |
| − | + | {{S2frame|[[Image:Children and demons1 camera5.jpg|400px]]|left}} | |
| − | [ | + | <br clear="both" /> |
| − | + | You ask her about what is she afraid and you are told a terrible story: two of her children were kidnapped nine months ago, but [[Sacred 2:Farmer Koremar|Koremar]] doesn't like to talk about it. [[Sacred 2:Lienna|Lienna]] asks you to go to [[Sacred 2:Twainbrook|Twainbrook]] and ask her friend [[Sacred 2:Elodriel|Elodriel]] if she has found out something about the kidnapped children.<br> | |
| − | But | + | [[Image:Children and demons1 dialog 5.png|430px]]<br> |
| − | |||
| − | [ | ||
| − | |||
| − | |||
Always pleased to help good people you walk north to [[Sacred 2:Twainbrook|Twainbrook]]. Once there you easily find [[Sacred 2:Elodriel|Elodriel]] in the town's main square. | Always pleased to help good people you walk north to [[Sacred 2:Twainbrook|Twainbrook]]. Once there you easily find [[Sacred 2:Elodriel|Elodriel]] in the town's main square. | ||
| + | {{S2frame|[[Image:Children and demons1 camera6.jpg|400px]]|left}} | ||
| + | <br clear="both" /> | ||
| + | She will explain you what she knows about the children.<br> | ||
| + | [[Image:Children and demons1 dialog 6.png|430px]]<br> | ||
| + | Of course, you will stop the evil people who are using children as a slaves, but that's the next story: [[Sacred 2:Children and Demons II|Children and Demons II]]. | ||
| − | [ | + | == Quest Enemies == |
| − | [ | + | === [[Sacred 2:Brigand Leader - Children and Demons|Brigand Leader]] === |
| − | + | {{:Sacred 2:Brigand Leader - Children and Demons}} | |
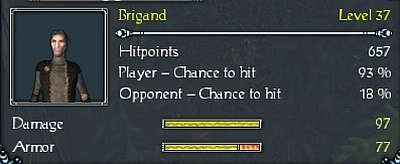
| − | + | === [[Sacred 2:Brigand|Brigand]] === | |
| − | + | {{:Sacred 2:Brigand}} | |
| − | |||
| − | |||
| + | == Hirelings and Escorts == | ||
| + | * [[Sacred 2:Child - Children and Demons|Children]] - Five children who behave similarly. Escorts. Try to escape the fight. | ||
== Logbook Entry == | == Logbook Entry == | ||
| − | [ | + | {| |
| − | [ | + | |{{S2frame|[[Image:Children and demons1 log 1.jpg|300px]]|left}} |
| − | + | |{{S2frame|[[Image:Children and demons1 log 2.jpg|300px]]|left}} | |
| − | + | |} | |
== Notes == | == Notes == | ||
| − | *Since this cave is near the spot where you can find the Runemaster's son, it is convenient to do both of this quest and [[Sacred 2:The Runemaster's Son|The Runemaster's Son]] at the same time. | + | * Since this cave is near the spot where you can find the Runemaster's son, it is convenient to do both of this quest and [[Sacred 2:The Runemaster's Son|The Runemaster's Son]] at the same time. |
| + | * You might also walk up the hill that goes past the cave and into the temple where there are four fonts that you can get [[Sacred 2:Health potion|healing potions]] from and six chests with other goodies. | ||
</div> | </div> | ||
| − | [[Category:Sacred 2 Class Quest]] | + | [[Category:Sacred 2 Class Quest|{{SUBPAGENAME}}]] |
[[Category:Sacred 2 Quest|{{SUBPAGENAME}}]] | [[Category:Sacred 2 Quest|{{SUBPAGENAME}}]] | ||
| + | [[Category:Sacred 2 Tyr Lysia Quest|{{PAGENAME}}]] | ||
Latest revision as of 00:13, 20 December 2011
|
| ||||||||||


Quick Walkthrough
|
| |||||||||

Detailed Walkthrough
You have recently arrived in Sloeford looking for a place to rest when a farmer stops you asking for help. You decide to listen at him for a while and you find out his children have been missing for over two hours. You decide to look for them near the lake where they were playing.

You walk to the east till the lake, and you see no children playing there. So you decide to go a bit further searching for them.
|
| ||
  |
||
Just a step after you see something crossing in front of you... it was a dark figure, wasn't it?! You walk quickly after it...
|
| ||
 |
||
Of course, your character has noticed the strange figure. Now the Seraphim wonders who this person may be... and what this dark lady has to do with the children who disappeared from this place.

You walk further down the road, and half way between the lake and the cave entrance you find some toys on the ground. That's not the kind of signal you were looking for, but that's the best you have. At least these toys proof that the children were there. You pick them up, since the kids would be happy to get their toys back, and then...
|
| ||
 |
||
Look!! That sinister figure again... You just saw it near the cave entrance. Let's find out what's cooking inside there!
|
| ||
  |
||
Inside the cave you find lots of rats, five Brigands and their leader. After killing all of them you reach a closed door.
|
| ||
 |
||
Since you picked a key from the Brigand Leader that attacked you in the cave, you open the door and the kids are inside!!
|
| ||
  |
||
|
| ||
 |
||
They are standing near the campfire waiting for the help to come. Now that you've killed all the brigands who put the kids into this place, you can talk to one of the boys and tell him that they are free to go.

Now the children are safe you bring them back with Farmer Koremar, who will be pleased to see they're back with him.

But as you walk into Koremar's house, you see that his wife Lienna is still quite nervous.
|
| ||
 |
||
You ask her about what is she afraid and you are told a terrible story: two of her children were kidnapped nine months ago, but Koremar doesn't like to talk about it. Lienna asks you to go to Twainbrook and ask her friend Elodriel if she has found out something about the kidnapped children.

Always pleased to help good people you walk north to Twainbrook. Once there you easily find Elodriel in the town's main square.
|
| ||
 |
||
She will explain you what she knows about the children.

Of course, you will stop the evil people who are using children as a slaves, but that's the next story: Children and Demons II.
Quest Enemies
Brigand Leader
|
|
Damage Types: Weakest Against: Quest:Children and Demons | ||||||||||||||||||


Brigand
|
|
Damage Types: Weakest Against: Region: Tyr Lysia | ||||||||||||||||||
|
|
Damage Types: Weakest Against: Region: Tyr Lysia | ||||||||||||||||||

Hirelings and Escorts
- Children - Five children who behave similarly. Escorts. Try to escape the fight.
Logbook Entry
|
| ||||||||||||||||||


Notes
- Since this cave is near the spot where you can find the Runemaster's son, it is convenient to do both of this quest and The Runemaster's Son at the same time.
- You might also walk up the hill that goes past the cave and into the temple where there are four fonts that you can get healing potions from and six chests with other goodies.