Difference between revisions of "Sacred 2:Daemonic Rituals"
Silver_fox (talk | contribs) (New page: {{subst:Quest}}) |
Silver_fox (talk | contribs) |
||
| Line 1: | Line 1: | ||
| − | |||
| − | |||
| − | |||
<div class="plainlinks"> | <div class="plainlinks"> | ||
| + | {{CPcontent}} | ||
{|WIDTH="100%" | {|WIDTH="100%" | ||
|WIDTH="15%" VALIGN="TOP"|__TOC__ | |WIDTH="15%" VALIGN="TOP"|__TOC__ | ||
|WIDTH="35%" VALIGN="TOP"| | |WIDTH="35%" VALIGN="TOP"| | ||
| − | * '''Quest Objective:''' | + | * '''Quest Objective:''' Find the way to catch the [[Sacred 2:Succubus|Succubus]] |
| − | * '''Quest Difficulty:''' | + | * '''Quest Difficulty:''' Not Rated (at least for now) |
| − | * '''Quest Giver:''' | + | * '''Quest Giver:''' [[Sacred 2:Conjuror|Conjuror]] |
| − | * '''Location(s):''' | + | * '''Location(s):''' [[Sacred 2:Orcish Byway Cemetary|Orcish Byway Cemetary]] |
| − | * '''Prerequisite Quest:''' | + | * '''Prerequisite Quest:''' None |
| − | * '''Next Quest:''' | + | * '''Next Quest:''' [[Sacred 2: Dark Invocation|Dark Invocation]] |
| − | * '''Reward:''' | + | * '''Reward:''' |
| − | |WIDTH="50%" VALIGN="TOP"| | + | |WIDTH="50%" VALIGN="TOP"| |
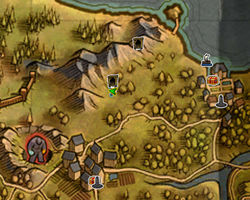
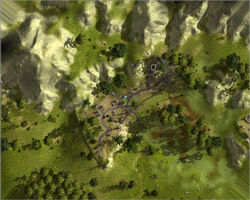
| − | + | {{S2frame|[[Image:Conjuror humans worldmap.jpg|250px]][[Image:Conjuror humans map.jpg|250px]]|right|'''[[Sacred 2:Map of Ancaria|View the Ancaria Interactive Map]]'''}} | |
| − | {{S2frame|[[Image: | ||
|} | |} | ||
{|WIDTH="100%" | {|WIDTH="100%" | ||
|WIDTH="60%" VALIGN="TOP"| | |WIDTH="60%" VALIGN="TOP"| | ||
== Quick Walkthrough == | == Quick Walkthrough == | ||
| − | + | * Talk to the [[Sacred 2:Conjuror|Conjuror]] in the graveyard near [[Sacred 2:Orcish Byway|Orcish Byway]] | |
| − | * | + | * Defeat the [[Sacred 2:Succubus|Succubus]] |
| − | * | + | * Talk to the [[Sacred 2:Conjuror|Conjuror]] again |
| − | * | + | * Talk to the [[Sacred 2:Hermit - Tol Rumazil|Hermit]] that lives near [[Sacred 2:Tol Rumazil|Tol Rumazil]] |
| − | |WIDTH="40%" VALIGN="TOP"|{{S2frame|[[Image: | + | * Kill the [[Sacred 2:Earth Elemental - Dark Rituals|Earth Elemental]] and collect the Earth Elemental Stone |
| + | * Kill 10 [[Sacred 2:Harpy|Harpies]] and collect 10 vials of Harpy Blood | ||
| + | * Talk to the [[Sacred 2:Hermit - Seraphim Island|Hermit]] that lives on the [[Sacred 2:Seraphim Island|Seraphim Island]] | ||
| + | * Kill the [[Sacred 2:Ice Monster|Ice Monster]] and collect the Eternal Ice Shard | ||
| + | * Talk to the [[Sacred 2:Hermit - Human Outpost|Hermit]] that lives in the [[Sacred 2:Human Outpost|Human Outpost]] in the caves under the [[Sacred 2:Dragon Sea Islands|Dragon Sea Islands]] | ||
| + | * Kill a [[Sacred 2:Young Dragon|Young Dragon]] and collect the Fire Pouch | ||
| + | * Talk to the [[Sacred 2:Hermit - Swamp|Hermit]] that lives in [[Sacred 2:The Swamp|the Swamp]] | ||
| + | * Find the Pouch with Everwhet Mud in the south-west corner of [[Sacred 2:The Swamp|the Swamp]] | ||
| + | * Talk to the [[Sacred 2:Master Conjuror|Master Conjuror]] in the west end of the [[Sacred 2:Bengaresh Desert|Bengaresh Desert]] | ||
| + | |WIDTH="40%" VALIGN="TOP"|{{S2frame|[[Image:Dark rituals camera1.jpg|500px]]}} | ||
|} | |} | ||
== Detailed Walkthrough == | == Detailed Walkthrough == | ||
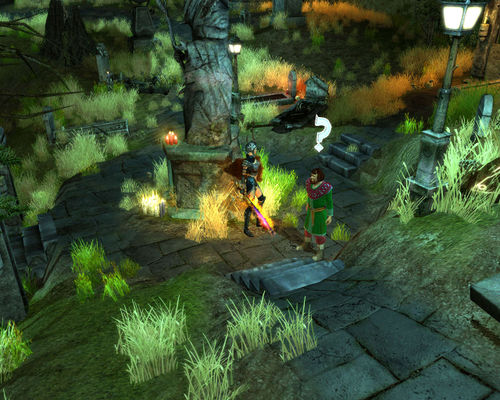
| − | + | When you come to the [[Sacred 2:Orcish Byway Cemetary|Orcish Byway Cemetary]], you'd see a person, standing right in the middle of it. This man looks very upset, but doesn't seem to mourn for his dead relative or friend. So you decide to approach the man and ask about what happened to him. He turns out to be a [[Sacred 2:Conjuror|Conjuror]] who practices summoning rituals. And what makes him so desperate is the big mistake he just did, while trying to summon a follower of [[Sacred 2:Book 5 - Kuan, God of War|Kuan]].<br> | |
| − | + | [[Image:Dark rituals dialog1.png|430px]]<br> | |
| − | + | After hearing that a powerful daemon of [[Sacred 2:Book 6 - Ker, Goddess of Evil|Ker]] is roaming aroun the land of [[Sacred 2:Artamark|Artamark]], you decide to find that creature and battle it. It doesn't matter whether or not you a caring about savin Ancaria from this menace. This [[Sacred 2:Succubus|Succubus]] seems to be an interesting opponent to fight anyway. So in a search for the daemon you leave the [[Sacred 2:Orcish Byway Cemetary|Cemetary]]. The [[Sacred 2:Succubus|Succubus]] doesn't seem to go very far from it, so you'd be able to find her in the nearest forest. This daemon may be a difficult opponent for some players, since it has a significant amount of a [[Sacred 2:Leech life from opponents|Life Leech]] and may summon some [[Sacred 2:Demon Enemy|minor demons]] to assist it in battle.<br> | |
| − | + | But though you manage to defeat the [[Sacred 2:Succubus|Succubus]], you are not able to kill her. While being badly wounded, the daemon escapes the battlefield by teleporting somewhere out of your sight. Being disappointed with this fact, you return to the [[Sacred 2:Conjuror|Conjuror]] to tell him the news.<br> | |
| − | + | [[Image:Dark rituals dialog2.png|430px]]<br> | |
| − | + | After hearing that you were unable to just kill the [[Sacred 2:Succubus|Succubus]], the [[Sacred 2:Conjuror|Conjuror]] finally realises that you'd need to consult with a real specialist in order to catch and banish the daemon. So he sends you off to the [[Sacred 2:Hermit - Tol Rumazil|acquaintance]] of his, the follower of [[Sacred 2:Book 6 - Ker, Goddess of Evil|Ker]], who should know how to treat the daemons from his Goddess' realm. The only trouble is that [[Sacred 2:Hermit - Tol Rumazil|this conjuror]] left the society long time ago, and travelled to the land of [[Sacred 2:Nor Plat|Nor Plat]] to practice his rituals alone without being watched by the others. So you would have to find this [[Sacred 2:Hermit - Tol Rumazil|Hermit's]] hut in the west [[Sacred 2:Nor Plat|Nor Plat]], near [[Sacred 2:Tol Rumazil|Tol Rumazil]] and pay him a visit.<br> | |
| − | + | ''- If you have the map opened already, the fastest way to get to his hut would be to teleport to [[Sacred 2:Za'Zuruik|Za'Zuruik]] and walk north from it. If you are walking through the main campaign, it would be better to forget about this quest for now, until the storyline would bring you to this area.''<br> | |
| − | {{S2frame|[[Image: | + | [[Image:Dark rituals dialog3.png|430px]]<br> |
| + | Looks like this [[Sacred 2:Hermit - Tol Rumazil|Hermit]] already knows about the [[Sacred 2:Succubus|Succubus]]. But he is a conjuror after all. He may have some magical sources of the information. But anyway, he not only knows about your problem but have an idea about what you should do as well. So after talking to him, you'd have to set off for a new journey.<br> | ||
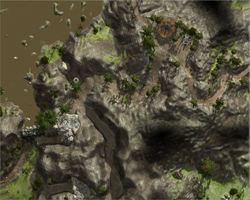
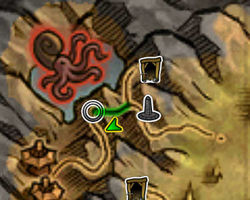
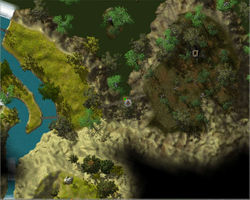
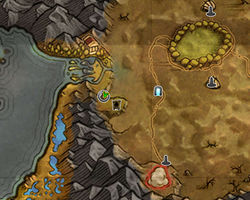
| + | First of all, you'd have to find a [[Sacred 2:Earth Elemental - Dark Rituals|Earth Elemental]] you can get the Earth Elemental Stone from. It won't be very hard. A suitable creature roams the mountains just near the [[Sacred 2:Hermit - Tol Rumazil|Hermit's]] hut. The map below shows where you can find that quest creature:<br> | ||
| + | {{S2frame|[[Image:Elemental map.jpg|250px]][[Image:Elemental worldmap.jpg|250px]]|left}} | ||
| + | <br clear="both" /> | ||
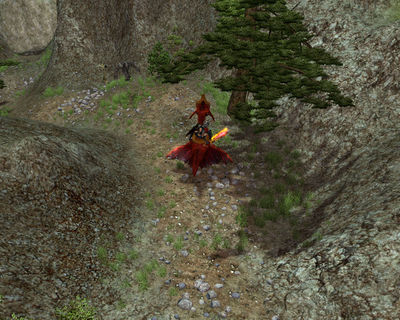
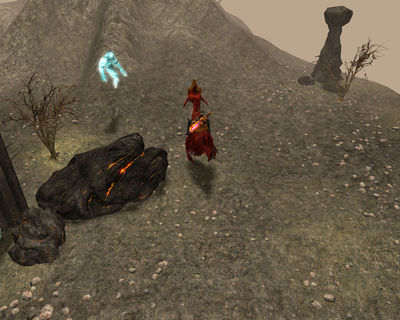
| + | That's what the place it roams around looks like:<br> | ||
| + | {{S2frame|[[Image:Dark rituals camera5.jpg|400px]]|left}} | ||
| + | <br clear="both" /> | ||
| + | Then you need to find and kill 10 [[Sacred 2:Harpy|Harpies]] in order to collect 10 vials of Harpy Blood, which seems to be quite a useful ingridient. Since your character is quite used to spilling monsters' blood, the most tough part of this task would be to find the suitable [[Sacred 2:Harpy|Harpies]]. Only ordinary orange-coloured [[Sacred 2:Harpy|Harpies]] would suit your task. But it looks like their natural habitat doesn't matter. You may find some harpies near the [[Sacred 2:Hermit - Tol Rumazil|Hermit's]] hut. But you may also look for them in any other place of the world of Ancaria.<br> | ||
| + | ''- If you can't find enough [[Sacred 2:Harpy|Harpies]] near the [[Sacred 2:Hermit - Tol Rumazil|Hermit's]] hut, you can teleport to the [[Sacred 2:Dragonmaw Pass|Dragonmaw Pass]] and easily find enough of them just near the portal.''<br> | ||
| + | Now when you have enough of this monsters and the ingridients that should be taken from them, you should move further, because only another crazy [[Sacred 2:Hermit - Seraphim Island|Hermit Conjuror]] knows what else is needed for the ritual they prepare. You still have now idea what they are going to do, yet hope that it would help to catch the daemon.<br> | ||
| + | The [[Sacred 2:Hermit - Seraphim Island|Hermit]] you need to find now lives on the [[Sacred 2:Seraphim Island|Seraphim Island]].<br> | ||
| + | ''- And again, if you are walking through the main campaign, it would be better to forget about this quest for now, until the storyline would bring you to the [[Sacred 2:Seraphim Island|Seraphim Island]]. But if you have the world explored already, the fastest way to find the next hermit would be to teleport right to the [[Sacred 2:Seraphim Island|Seraphim Island]] and then walk through it.''<br> | ||
| + | [[Image:Dark rituals dialog4.png|430px]]<br> | ||
| + | So, you've found another [[Sacred 2:Hermit - Seraphim Island|Hermit]]. And again he can tell you only a part of the story. He tells you what ingridient you would need to find next, but also tells you to visit [[Sacred 2:Hermit - Human Outpost|one more of his colleagues]]. Looks like all of them know only a part of the recipe. He also mentions some 'invocation', yet doesn't explain what it is.<br> | ||
| + | Though the overall idea of the ritual you're preparing is still unclear, your next task is understandable enough. You have to find the Eternal Ice Shard, which could be split from the skin of the [[Sacred 2:Ice Monster|Ice Monster]]. Luckily, there is such a creature on the [[Sacred 2:Seraphim Island|Seraphim Island]]. The map below shows where you can find it:<br> | ||
| + | {{S2frame|[[Image:Ice monster map.jpg|250px]][[Image:Ice monster worldmap.jpg|250px]]|left}} | ||
| + | <br clear="both" /> | ||
| + | That's what the place it roams around looks like:<br> | ||
| + | {{S2frame|[[Image:Dark rituals camera6.jpg|400px]]|left}} | ||
<br clear="both" /> | <br clear="both" /> | ||
| − | + | Now that you've got the icicle... sorry, the Eternal Ice Shard of course, you may move to the next region and therefore to the next [[Sacred 2:Hermit - Human Outpost|Hermit]]. The next one lives in the [[Sacred 2:Human Outpost|Human Outpost]] in the caves under the [[Sacred 2:Dragon Sea Islands|Dragon Sea Islands]].<br> | |
| − | + | ''- There is a portal in this [[Sacred 2:Human Outpost|Human Outpost]], so you can teleport directly to it if you have it active. But if you are walking through the main campaign, you'd better wait for the story to lead you to this place (don't worry, you can't miss this place while following the main campaign).''<br> | |
| − | {{S2frame|[[Image: | + | [[Image:Dark rituals dialog5.png|430px]]<br> |
| + | This [[Sacred 2:Hermit - Human Outpost|Hermit]] looks even more crazy than the previous two. He tells you something about the opportunity to tame the daemon. Not exactly the thing you were going to do with it, but if it would make the [[Sacred 2:Succubus|Succubus]] harmless, it's good too. He also mentions some 'Brotherhood'. What could that 'Brotherhood' be?<br> | ||
| + | And of course he asks you to find one more ingridient. This time it's the Fire Pouch that allows Dragons to breath fire. Of course, battling a big dragon for the sake of ingridient is somewhat ridiculous, but luckily the [[Sacred 2:Young Dragon|Young Dragon's]] Fire Pouch would be appropriate too. So now you just have to kill a [[Sacred 2:Young Dragon|Young Dragon]] and retrieve the Fire Pouch. These little creatures are multiple in the region you're in, so it won't be hard to find what you need. You just have to kill the [[Sacred 2:Young Dragon|Young Dragons]] until you'd get the desirable quest item. It may take some time and several tries. Looks like this Fire Pouch is hard to find in a good quality. <br> | ||
| + | Then you should go to... yes, you're right, yet another [[Sacred 2:Hermit - Swamp|Hermit]] that lives in [[Sacred 2:The Swamp|the Swamp]]. He lives it a hut in the northern part of [[Sacred 2:The Swamp|the Swamp]], near the portal.<br> | ||
| + | ''- And once more, you may either teleport to this place directly, or wait for the campaign to lead you to it. Don't worry, it would. The place where this hermin lives is not only next to the portal, but also next to the place where you first enter [[Sacred 2:The Swamp|the Swamp Region]] while completing the main campaign.'' <br> | ||
| + | [[Image:Dark rituals dialog6.png|430px]]<br> | ||
| + | According to this [[Sacred 2:Hermit - Swamp|Hermit]] your journey would be finished soon. The next person you should meet is these hermits' [[Sacred 2:Master Conjuror|'Master']]. Hopefully, he could tell you more about what's going on here. <br> | ||
| + | But before you could meet him, you should find one more ingridient. It's a Pouch with the substance called 'Everwhet Mud'. This is the mud that can get dry under no circumstances. Of course, this mud is special enough to be gathered only from some special water-hole in these godforsaken swamps.<br> | ||
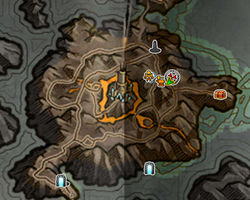
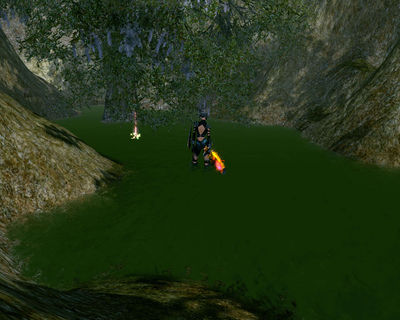
| + | ''- As for the place where you can find the Pouch with Everwhet Mud, if you're familiar to the game, it would be enough to mention that it lies right under the bridge that leads you to the Ascaron Headquarters. If you don't know, where it is, you can take a look at the pictures below. The fastest way to get there is to teleport to the portal. If you don't have it active, you'd have to take a long walk through [[Sacred 2:The Swamp|the Swamp]].''<br> | ||
| + | {{S2frame|[[Image:Everwet mud map.jpg|250px]][[Image:Everwet mud worldmap.jpg|250px]]|left}} | ||
<br clear="both" /> | <br clear="both" /> | ||
| − | + | {{S2frame|[[Image:Dark rituals camera2.jpg|400px]]|left}} | |
| − | |||
| − | |||
| − | |||
| − | |||
| − | |||
| − | |||
| − | {{S2frame|[[Image: | ||
<br clear="both" /> | <br clear="both" /> | ||
| + | Now that you've finally got the Mud, you can proceed to the mentioned [[Sacred 2:Master Conjuror|Master Conjuror]], who lives in the west end of the [[Sacred 2:Bengaresh Desert|Bengaresh Desert]]. It'd be interesting to know what makes him live in such an inhospitable place.<br> | ||
| + | ''- The fastest way to get to him is to use the boat portal to sail to [[Sacred 2:Turbak|Turbak]], and then head west along the seashore. Eigher way, you'd have to experience a long run through the [[Sacred 2:Bengaresh Desert|Bengaresh Desert]].''<br> | ||
| + | [[Image:Dark rituals dialog7.png|430px]]<br> | ||
| + | And now you've finally found the [[Sacred 2:Master Conjuror|Master Conjuror]], these hermits' superior and tried to ask him some questions. Though he tends to rant a lot, maybe he is able to explain you some things. But he doesn't want to do it now. Instead of answering the questions you've got, he just rants and mentions that he needs something more. Well, you've gone too far with this quest to just stop now, so you should talk to him again in order to start the [[Sacred 2: Dark Invocation|next part of this chain quest]]. | ||
== Quest Enemies == | == Quest Enemies == | ||
| − | + | === [[Sacred 2:Succubus|Succubus]] === | |
| − | + | {{:Sacred 2:Succubus}} | |
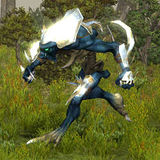
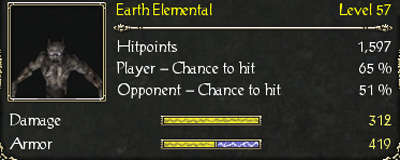
| − | === [[Sacred 2: | + | === [[Sacred 2:Earth Elemental - Dark Rituals|Earth Elemental]] === |
| − | {{:Sacred 2: | + | {{:Sacred 2:Earth Elemental - Dark Rituals}} |
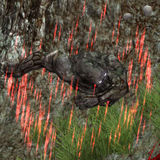
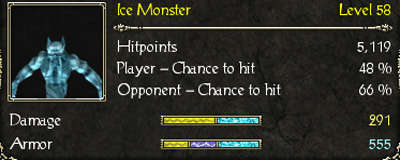
| − | + | === [[Sacred 2:Ice Monster|Ice Monster]] === | |
| − | == | + | {{:Sacred 2:Ice Monster}} |
| − | |||
| − | |||
| − | |||
| − | |||
| − | |||
== Logbook Entry == | == Logbook Entry == | ||
| Line 70: | Line 96: | ||
|{{S2frame|[[Image:Quest Name log1.jpg|300px]]|left}} | |{{S2frame|[[Image:Quest Name log1.jpg|300px]]|left}} | ||
|} | |} | ||
| − | |||
| − | |||
== Notes == | == Notes == | ||
| − | + | * In the [[Sacred 2:Community Patch|Community Patch]] v100 this chain won't show up in the logbook. It is fixed in the next versions. | |
| + | </div> | ||
| − | + | [[Category:Sacred 2 Chain Quest Part|{{PAGENAME}}]] | |
| − | + | [[Category:Sacred 2 CM Patch Quest|{{SUBPAGENAME}}]] | |
| − | |||
| − | [[Category:Sacred 2 | ||
| − | |||
| − | |||
| − | [[Category:Sacred 2 | ||
| − | |||
[[Category:Sacred 2 Quest|{{PAGENAME}}]] | [[Category:Sacred 2 Quest|{{PAGENAME}}]] | ||
Revision as of 20:31, 28 January 2011

|
This page is about additional content added from the CM Patch.
The contents of this page are exclusive content found only by installing the Community Patch. |
|
| ||||||||||
Quick Walkthrough
|
| |||||||||
Detailed Walkthrough
When you come to the Orcish Byway Cemetary, you'd see a person, standing right in the middle of it. This man looks very upset, but doesn't seem to mourn for his dead relative or friend. So you decide to approach the man and ask about what happened to him. He turns out to be a Conjuror who practices summoning rituals. And what makes him so desperate is the big mistake he just did, while trying to summon a follower of Kuan.
430px
After hearing that a powerful daemon of Ker is roaming aroun the land of Artamark, you decide to find that creature and battle it. It doesn't matter whether or not you a caring about savin Ancaria from this menace. This Succubus seems to be an interesting opponent to fight anyway. So in a search for the daemon you leave the Cemetary. The Succubus doesn't seem to go very far from it, so you'd be able to find her in the nearest forest. This daemon may be a difficult opponent for some players, since it has a significant amount of a Life Leech and may summon some minor demons to assist it in battle.
But though you manage to defeat the Succubus, you are not able to kill her. While being badly wounded, the daemon escapes the battlefield by teleporting somewhere out of your sight. Being disappointed with this fact, you return to the Conjuror to tell him the news.
430px
After hearing that you were unable to just kill the Succubus, the Conjuror finally realises that you'd need to consult with a real specialist in order to catch and banish the daemon. So he sends you off to the acquaintance of his, the follower of Ker, who should know how to treat the daemons from his Goddess' realm. The only trouble is that this conjuror left the society long time ago, and travelled to the land of Nor Plat to practice his rituals alone without being watched by the others. So you would have to find this Hermit's hut in the west Nor Plat, near Tol Rumazil and pay him a visit.
- If you have the map opened already, the fastest way to get to his hut would be to teleport to Za'Zuruik and walk north from it. If you are walking through the main campaign, it would be better to forget about this quest for now, until the storyline would bring you to this area.
430px
Looks like this Hermit already knows about the Succubus. But he is a conjuror after all. He may have some magical sources of the information. But anyway, he not only knows about your problem but have an idea about what you should do as well. So after talking to him, you'd have to set off for a new journey.
First of all, you'd have to find a Earth Elemental you can get the Earth Elemental Stone from. It won't be very hard. A suitable creature roams the mountains just near the Hermit's hut. The map below shows where you can find that quest creature:
|
| ||
That's what the place it roams around looks like:
|
| ||
Then you need to find and kill 10 Harpies in order to collect 10 vials of Harpy Blood, which seems to be quite a useful ingridient. Since your character is quite used to spilling monsters' blood, the most tough part of this task would be to find the suitable Harpies. Only ordinary orange-coloured Harpies would suit your task. But it looks like their natural habitat doesn't matter. You may find some harpies near the Hermit's hut. But you may also look for them in any other place of the world of Ancaria.
- If you can't find enough Harpies near the Hermit's hut, you can teleport to the Dragonmaw Pass and easily find enough of them just near the portal.
Now when you have enough of this monsters and the ingridients that should be taken from them, you should move further, because only another crazy Hermit Conjuror knows what else is needed for the ritual they prepare. You still have now idea what they are going to do, yet hope that it would help to catch the daemon.
The Hermit you need to find now lives on the Seraphim Island.
- And again, if you are walking through the main campaign, it would be better to forget about this quest for now, until the storyline would bring you to the Seraphim Island. But if you have the world explored already, the fastest way to find the next hermit would be to teleport right to the Seraphim Island and then walk through it.
430px
So, you've found another Hermit. And again he can tell you only a part of the story. He tells you what ingridient you would need to find next, but also tells you to visit one more of his colleagues. Looks like all of them know only a part of the recipe. He also mentions some 'invocation', yet doesn't explain what it is.
Though the overall idea of the ritual you're preparing is still unclear, your next task is understandable enough. You have to find the Eternal Ice Shard, which could be split from the skin of the Ice Monster. Luckily, there is such a creature on the Seraphim Island. The map below shows where you can find it:
|
| ||
That's what the place it roams around looks like:
|
| ||
Now that you've got the icicle... sorry, the Eternal Ice Shard of course, you may move to the next region and therefore to the next Hermit. The next one lives in the Human Outpost in the caves under the Dragon Sea Islands.
- There is a portal in this Human Outpost, so you can teleport directly to it if you have it active. But if you are walking through the main campaign, you'd better wait for the story to lead you to this place (don't worry, you can't miss this place while following the main campaign).
430px
This Hermit looks even more crazy than the previous two. He tells you something about the opportunity to tame the daemon. Not exactly the thing you were going to do with it, but if it would make the Succubus harmless, it's good too. He also mentions some 'Brotherhood'. What could that 'Brotherhood' be?
And of course he asks you to find one more ingridient. This time it's the Fire Pouch that allows Dragons to breath fire. Of course, battling a big dragon for the sake of ingridient is somewhat ridiculous, but luckily the Young Dragon's Fire Pouch would be appropriate too. So now you just have to kill a Young Dragon and retrieve the Fire Pouch. These little creatures are multiple in the region you're in, so it won't be hard to find what you need. You just have to kill the Young Dragons until you'd get the desirable quest item. It may take some time and several tries. Looks like this Fire Pouch is hard to find in a good quality.
Then you should go to... yes, you're right, yet another Hermit that lives in the Swamp. He lives it a hut in the northern part of the Swamp, near the portal.
- And once more, you may either teleport to this place directly, or wait for the campaign to lead you to it. Don't worry, it would. The place where this hermin lives is not only next to the portal, but also next to the place where you first enter the Swamp Region while completing the main campaign.
430px
According to this Hermit your journey would be finished soon. The next person you should meet is these hermits' 'Master'. Hopefully, he could tell you more about what's going on here.
But before you could meet him, you should find one more ingridient. It's a Pouch with the substance called 'Everwhet Mud'. This is the mud that can get dry under no circumstances. Of course, this mud is special enough to be gathered only from some special water-hole in these godforsaken swamps.
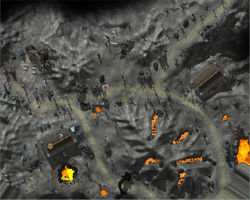
- As for the place where you can find the Pouch with Everwhet Mud, if you're familiar to the game, it would be enough to mention that it lies right under the bridge that leads you to the Ascaron Headquarters. If you don't know, where it is, you can take a look at the pictures below. The fastest way to get there is to teleport to the portal. If you don't have it active, you'd have to take a long walk through the Swamp.
|
| ||
|
| ||
Now that you've finally got the Mud, you can proceed to the mentioned Master Conjuror, who lives in the west end of the Bengaresh Desert. It'd be interesting to know what makes him live in such an inhospitable place.
- The fastest way to get to him is to use the boat portal to sail to Turbak, and then head west along the seashore. Eigher way, you'd have to experience a long run through the Bengaresh Desert.
430px
And now you've finally found the Master Conjuror, these hermits' superior and tried to ask him some questions. Though he tends to rant a lot, maybe he is able to explain you some things. But he doesn't want to do it now. Instead of answering the questions you've got, he just rants and mentions that he needs something more. Well, you've gone too far with this quest to just stop now, so you should talk to him again in order to start the next part of this chain quest.
Quest Enemies
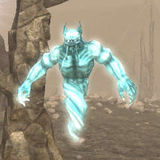
Succubus
|
Damage Types:
Weakest Against: Equally Resistant to All Damage Types Quest:Daemonic Rituals Quest Location: Orcish Byway Cemetery in Artamark | ||||||||||
Earth Elemental
|
|
Damage Types: Weakest Against: Quest:Daemonic Rituals Quest Location: Orcish Byway Cemetery in Artamark | ||||||||||||||||||
Ice Monster
|
|
Damage Types: Weakest Against: Quest:Daemonic Rituals Quest Location: Orcish Byway Cemetery in Artamark | ||||||||||||||||||
Logbook Entry
UPLOAD A PICTURE SHOWING THE LOGBOOK FOR THIS QUEST AND REPLACE THIS TEXT WITH A THUMBNAIL OF IT HERE. EXAMPLE:
|
| ||||||||||||||||||
Notes
- In the Community Patch v100 this chain won't show up in the logbook. It is fixed in the next versions.
