Difference between revisions of "Sacred 2:The Lives of Others"
(New page: {{subst:Quest}}) |
(→Quick Walkthrough: clarified last step.) |
||
| (6 intermediate revisions by 2 users not shown) | |||
| Line 1: | Line 1: | ||
| − | |||
| − | |||
| − | |||
<div class="plainlinks"> | <div class="plainlinks"> | ||
{|WIDTH="100%" | {|WIDTH="100%" | ||
|WIDTH="15%" VALIGN="TOP"|__TOC__ | |WIDTH="15%" VALIGN="TOP"|__TOC__ | ||
|WIDTH="35%" VALIGN="TOP"| | |WIDTH="35%" VALIGN="TOP"| | ||
| − | * '''Quest Objective:''' | + | * '''Quest Objective:''' Track down the priests and an orc and recover items used in resurrections |
| − | * '''Quest Difficulty:''' | + | * '''Quest Difficulty:''' No diffculty given for quest |
| − | * '''Quest Giver:''' | + | * '''Quest Giver:''' [[Ensign Zahar|Ensign Zahar]] |
| − | * '''Location(s):''' | + | * '''Location(s):''' [[Sacred 2:Artamark|Artamark]] region north of [[Sacred 2:Dragonmaw Pass|Dragonmaw Pass]] |
| − | * '''Prerequisite Quest:''' | + | * '''Prerequisite Quest:''' [[Sacred 2:In Search of Life|In Search of Life]] |
| − | * '''Next Quest:''' | + | * '''Next Quest:''' [[Sacred 2:Orcish Necromancers|Orcish Necromancers]] |
| − | * '''Reward:''' | + | * '''Reward:''' [[Sacred 2:Gold|Gold]] [[Sacred 2:Experience|Experience]] |
| − | |WIDTH="50%" VALIGN="TOP"| | + | * '''Main Quest Page:''' [[Sacred 2:Shadow Warrior Class Chain Quest - Light]] |
| + | |WIDTH="50%" VALIGN="TOP"| | ||
| − | {{S2frame|[[Image: | + | {{S2frame|[[Image:zaharmap.jpg|250px]][[Image:zahartab.jpg|250px]]|right|'''[[Sacred 2:Map of Ancaria|View the Ancaria Interactive Map]]'''}} |
|} | |} | ||
{|WIDTH="100%" | {|WIDTH="100%" | ||
|WIDTH="60%" VALIGN="TOP"| | |WIDTH="60%" VALIGN="TOP"| | ||
== Quick Walkthrough == | == Quick Walkthrough == | ||
| − | + | * Talk to [[Ensign Zahar|Ensign Zahar]] | |
| − | * | + | * Escort Zahar and defeat 8 [[Sacred 2:Revenant|Revenants]] |
| − | * | + | * Return to where you met Zahar and talk to him |
| − | * | + | * Travel to [[Sacred 2:Griffinborough|Griffinborough]] |
| − | |WIDTH="40%" VALIGN="TOP"|{{S2frame|[[Image: | + | * Speak to [[Sacred 2:Notary A. Point|Notary A. Point]] |
| + | * Travel to [[Sacred 2:Trallheim Manor|Trallheim Manor]] and enter cellar | ||
| + | * Defeat [[Sacred 2:Lair of the Undead|Lair of the Undead]] and [[Sacred 2:Dumb Undead|Dumb Undead]] | ||
| + | * Defeat [[Sacred 2:High Priest Hessus|High Priest Hessus]], [[Sacred 2:Johannes|Johannes]] and [[Sacred 2:John the Resurrector|John the Resurrector]] | ||
| + | * Pick up '''The Book of the Dead''' and leave cellar | ||
| + | * Travel to [[Sacred 2:Orcish Byway|Orcish Byway]] and speak to [[Sacred 2:Farmer Benjamin|Farmer Benjamin]] | ||
| + | * Travel to [[Sacred 2:Orcish Byway Cemetery|Orcish Byway Cemetery]] and enter vault | ||
| + | * Kill 6 [[Sacred 2:Undead - Undead|Undead]] | ||
| + | * Kill the [[Sacred 2:Undead Beast|Undead Beast]] | ||
| + | * Talk to [[Sacred 2:Abbott Charolus - NPC|Abbott Charolus]] then defeat him | ||
| + | * Pick up '''Demonic Essense''' and leave vault | ||
| + | * Speak to [[Sacred 2:James Orkus|James Orkus]] standing just outside the vault before leaving the cemetery to start the next quest. | ||
| + | |||
| + | |WIDTH="40%" VALIGN="TOP"|{{S2frame|[[Image:zaharloc.jpg|500px]]}} | ||
|} | |} | ||
== Detailed Walkthrough == | == Detailed Walkthrough == | ||
| − | |||
| − | + | Ensign Zahar tells you about seeing the Orc and priests that raced through the area. As they passed, Zahar saw a light in the forest. Looks like they wiped out a caravan and used the dead to test their resurrections. Guess it didn't turn out well since they were left behind. Well, can't leave those poor souls out there living a half-life. You and the ensign go a short walk north into the woods and dispatch the poor revenants. | |
| + | |||
| + | |||
| + | {{S2frame|[[Image:zaharchat2.jpg|430px]]|left}} | ||
| + | <br clear="both" /> | ||
| + | |||
| + | |||
| + | {{S2frame|[[Image:revenantmap.jpg|250px]][[Image:revenanttab.jpg|250px]]|left]]}} | ||
| + | <br clear="both" /> | ||
| + | |||
| + | |||
| + | {{S2frame|[[Image:revenantloc.jpg|400px]]|left}} | ||
| + | <br clear="both" /> | ||
| + | |||
| + | |||
| + | After the battle Zahar says it was an honor to fight along side you...a feeling you don't reciprocate. He also says he overheard one of the priests mention visiting a relative somewhere in Artamark. | ||
| + | |||
| + | {{S2frame|[[Image:zaharchat3.jpg|430px]]|left}} | ||
| + | <br clear="both" /> | ||
| + | |||
| + | |||
| + | You decide to head to [[Sacred 2:Griffinborough|Griffinborough]] registry office and see if you can uncover anything. You meet up with [[Sacred 2:Notary A. Point|Notary A. Point]]. He looks through his records and can only find one estate that is owned by an Elf. That has got to be the place ! You get directions and head off to [[Sacred 2:Trallheim Manor|Trallheim Manor]]. | ||
| + | |||
| + | |||
| + | {{S2frame|[[Image:notarymap.jpg|250px]][[Image:notarytab.jpg|250px]]|left]]}} | ||
| + | <br clear="both" /> | ||
| + | |||
| + | |||
| + | {{S2frame|[[Image:notaryloc.jpg|400px]]|left}} | ||
| + | <br clear="both" /> | ||
| + | |||
| + | |||
| + | {{S2frame|[[Image:notarychat.jpg|430px]]|left}} | ||
| + | <br clear="both" /> | ||
| + | |||
| + | |||
| + | When you reach the estate nothing seems amiss. You notice a cellar entrance and decide to go in and investigate. Your instincts were correct, there are undead everywhere. You go further into the basement killing zombies as you go when you enter the end room. You'll see 3 of the elven priests practicing their unholy ritual. | ||
| + | |||
| + | {{S2frame|[[Image:manormap.jpg|250px]][[Image:manortab.jpg|250px]]|left]]}} | ||
| + | <br clear="both" /> | ||
| + | |||
| + | |||
| + | {{S2frame|[[Image:manorloc.jpg|400px]]|left}} | ||
| + | <br clear="both" /> | ||
| + | |||
| + | You rush in and send [[Sacred 2:High Priest Hessus|High Priest Hessus]], [[Sacred 2:Johannes|Johannes]] and [[Sacred 2:John the Resurrector|John the Resurrector]] to their well deserved deaths. After killing the priests you discover '''The Book of the Dead'''. You have one of the items needed...2 more to find. | ||
| + | |||
| + | {{S2frame|[[Image:manorcellar.jpg|400px]]|left}} | ||
| + | <br clear="both" /> | ||
| + | |||
| + | The book by itself can only create dumb undead beings. You feel you have no choice but to head after the Orc now. As you head towards Nor Plat, you travel through the town of [[Sacred 2:Orcish Byway|Orcish Byway]]. There you meet [[Sacred 2:Farmer Benjamin|Farmer Benjamin]]. He relates a story that's very interesting to you. | ||
| + | |||
| + | |||
| + | The farmer has seen an abbot creeping around the town cemetery at night resurrecting the dead. He can even be heard laughing at times. Looks like his sanity is on the edge. You know this has to be another renegade priest and assure the farmer you will take care of everything. | ||
| − | |||
| − | {{S2frame|[[Image: | + | {{S2frame|[[Image:benjaminmap.jpg|250px]][[Image:benjamintab.jpg|250px]]|left]]}} |
<br clear="both" /> | <br clear="both" /> | ||
| − | {{S2frame|[[Image: | + | {{S2frame|[[Image:benjaminloc.jpg|400px]]|left}} |
<br clear="both" /> | <br clear="both" /> | ||
| − | + | {{S2frame|[[Image:benjaminchat.jpg|430px]]|left}} | |
| − | {{S2frame|[[Image: | ||
<br clear="both" /> | <br clear="both" /> | ||
| + | You head east of of town to the [[Sacred 2:Orcish Byway Cemetery|Orcish Byway Cemetery]]. You head into the main vault, sure the abbot's down there. He's been up to no good. You are attacked by an undead beast, but it's not smart enough to be a major challenge. You talk to Abbot Charolus. He was one of the ones responsible for resurrecting you! He tells you that you can forget about recovering the 3 Ritual artifacts. An orc has stolen the '''Pyramid of Control'''. He doesn't know you have the book! Time to say goodbye to the abbot. Defeat him and pick up the '''Demonic Essense'''. Nothing more to been done here, so you head on out. At the vault entrance there is an orc waiting for you....!! | ||
| − | + | {{S2frame|[[Image:bywaycemmap.jpg|250px]][[Image:bywaycemtab.jpg|250px]]|left]]}} | |
| + | <br clear="both" /> | ||
| − | [[Image: | + | {{S2frame|[[Image:bywaycem.jpg|400px]]|left}} |
| + | <br clear="both" /> | ||
| − | + | {{S2frame|[[Image:beastandabbott.jpg|400px]]|left}} | |
| + | <br clear="both" /> | ||
| − | {{S2frame|[[Image: | + | {{S2frame|[[Image:charoluschat.jpg|430px]]|left}} |
<br clear="both" /> | <br clear="both" /> | ||
== Quest Enemies == | == Quest Enemies == | ||
| − | |||
| − | === [[Sacred 2: | + | == [[Sacred 2:Revenant|Revenant]] == |
| − | {{:Sacred 2: | + | {{:Sacred 2:Revenant}} |
| + | |||
| + | == [[Sacred 2:High Priest Hessus|High Priest Hessus]] == | ||
| + | {{:Sacred 2:High Priest Hessus}} | ||
| + | |||
| + | == [[Sacred 2:Johannes|Johannes]] == | ||
| + | {{:Sacred 2:Johannes}} | ||
| + | |||
| + | == [[Sacred 2:John the Resurrector|John the Resurrector]] == | ||
| + | {{:Sacred 2:John the Resurrector}} | ||
| + | |||
| + | == [[Sacred 2:Abbot Charolus|Abbot Charolus]] == | ||
| + | {{:Sacred 2:Abbot Charolus}} | ||
| + | |||
| + | == [[Sacred 2:Undead Beast|Undead Beast]] == | ||
| + | {{:Sacred 2:Undead Beast}} | ||
| + | |||
== Hirelings and Escorts == | == Hirelings and Escorts == | ||
| − | |||
| − | + | ||
| − | * [[Sacred 2: | + | * [[Sacred 2:Ensign Zahar|Ensign Zahar]] - Escort. Immortal. Will fight. |
== Logbook Entry == | == Logbook Entry == | ||
| − | + | ||
{| | {| | ||
| − | |{{S2frame|[[Image: | + | |{{S2frame|[[Image:otherliveslog1.jpg|300px]]|left}} |
| − | |{{S2frame|[[Image: | + | |{{S2frame|[[Image:otherliveslog2.jpg|300px]]|left}} |
| + | |{{S2frame|[[Image:otherliveslog3.jpg|300px]]|left}} | ||
|} | |} | ||
== Notes == | == Notes == | ||
| − | |||
| + | The Light and Shadow version of this quest are exactly the same. | ||
</div> | </div> | ||
| − | + | ||
[[Category:Sacred 2 Quest|{{PAGENAME}}]] | [[Category:Sacred 2 Quest|{{PAGENAME}}]] | ||
| − | + | [[Category:Sacred 2 Chain Quest Part|{{PAGENAME}}]] | |
| − | [[Category:Sacred 2 Chain Quest | ||
[[Category:Sacred 2 Class Quest|{{PAGENAME}}]] | [[Category:Sacred 2 Class Quest|{{PAGENAME}}]] | ||
[[Category:Sacred 2 Light Path Quest|{{PAGENAME}}]] | [[Category:Sacred 2 Light Path Quest|{{PAGENAME}}]] | ||
| − | [[Category:Sacred 2 | + | [[Category:Sacred 2 Artamark Quest|{{PAGENAME}}]] |
| − | |||
| − | |||
| − | |||
Latest revision as of 09:18, 5 August 2013
|
| ||||||||||


Quick Walkthrough
|
| |||||||||

Detailed Walkthrough
Ensign Zahar tells you about seeing the Orc and priests that raced through the area. As they passed, Zahar saw a light in the forest. Looks like they wiped out a caravan and used the dead to test their resurrections. Guess it didn't turn out well since they were left behind. Well, can't leave those poor souls out there living a half-life. You and the ensign go a short walk north into the woods and dispatch the poor revenants.
|
| ||
 |
||
|
| ||
  |
||
|
| ||
 |
||
After the battle Zahar says it was an honor to fight along side you...a feeling you don't reciprocate. He also says he overheard one of the priests mention visiting a relative somewhere in Artamark.
|
| ||
 |
||
You decide to head to Griffinborough registry office and see if you can uncover anything. You meet up with Notary A. Point. He looks through his records and can only find one estate that is owned by an Elf. That has got to be the place ! You get directions and head off to Trallheim Manor.
|
| ||
  |
||
|
| ||
 |
||
|
| ||
 |
||
When you reach the estate nothing seems amiss. You notice a cellar entrance and decide to go in and investigate. Your instincts were correct, there are undead everywhere. You go further into the basement killing zombies as you go when you enter the end room. You'll see 3 of the elven priests practicing their unholy ritual.
|
| ||
  |
||
|
| ||
 |
||
You rush in and send High Priest Hessus, Johannes and John the Resurrector to their well deserved deaths. After killing the priests you discover The Book of the Dead. You have one of the items needed...2 more to find.
|
| ||
 |
||
The book by itself can only create dumb undead beings. You feel you have no choice but to head after the Orc now. As you head towards Nor Plat, you travel through the town of Orcish Byway. There you meet Farmer Benjamin. He relates a story that's very interesting to you.
The farmer has seen an abbot creeping around the town cemetery at night resurrecting the dead. He can even be heard laughing at times. Looks like his sanity is on the edge. You know this has to be another renegade priest and assure the farmer you will take care of everything.
|
| ||
  |
||
|
| ||
 |
||
|
| ||
 |
||
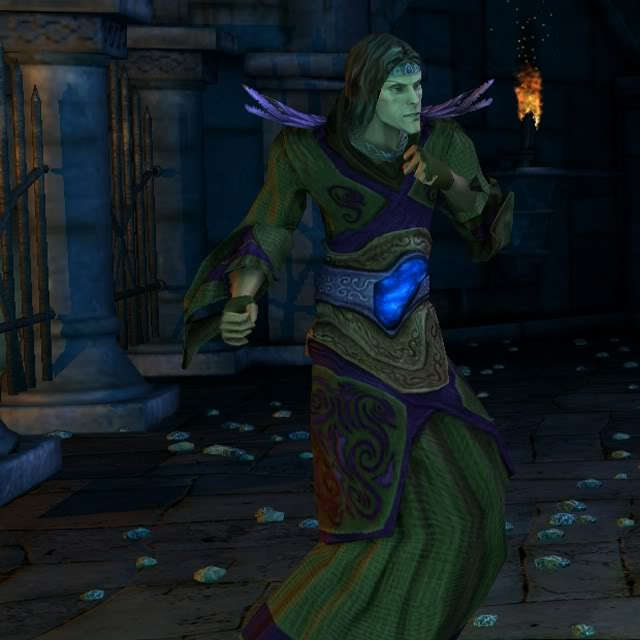
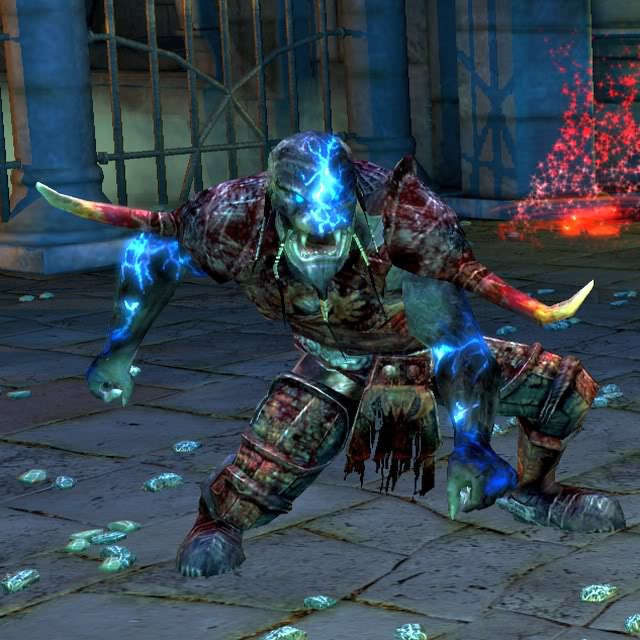
You head east of of town to the Orcish Byway Cemetery. You head into the main vault, sure the abbot's down there. He's been up to no good. You are attacked by an undead beast, but it's not smart enough to be a major challenge. You talk to Abbot Charolus. He was one of the ones responsible for resurrecting you! He tells you that you can forget about recovering the 3 Ritual artifacts. An orc has stolen the Pyramid of Control. He doesn't know you have the book! Time to say goodbye to the abbot. Defeat him and pick up the Demonic Essense. Nothing more to been done here, so you head on out. At the vault entrance there is an orc waiting for you....!!
|
| ||
  |
||
|
| ||
 |
||
|
| ||
 |
||
|
| ||
 |
||
Quest Enemies
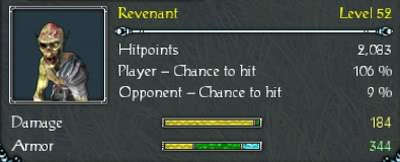
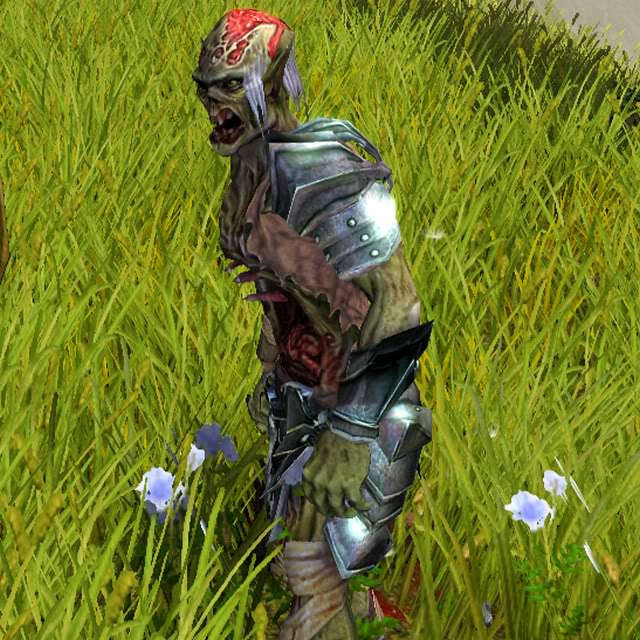
Revenant
|
|
Damage Types: Weakest Against: Quest:The Lives of Others Quest Location: Black Oaks in Artamark | ||||||||||||||||||


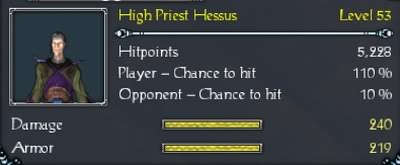
High Priest Hessus
|
|
Damage Types: Weakest Against: Quest:In Search of Life Quest Location: [[Sacred 2:|]] in Artamark | ||||||||||||||||||


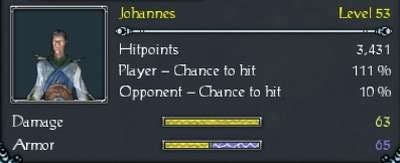
Johannes
|
|
Damage Types: Weakest Against: Quest:The Lives of Others Quest Location: [[Sacred 2:|]] in Artamark | ||||||||||||||||||
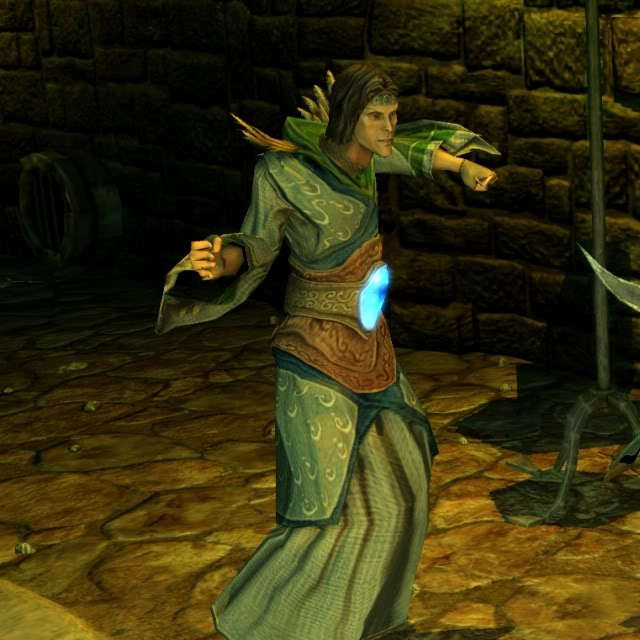
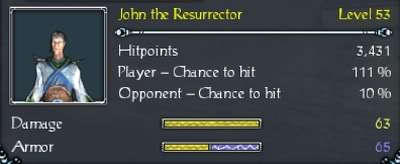
John the Resurrector
|
|
Damage Types: Weakest Against: Quest:The Lives of Others Quest Location: [[Sacred 2:|]] in Artamark | ||||||||||||||||||
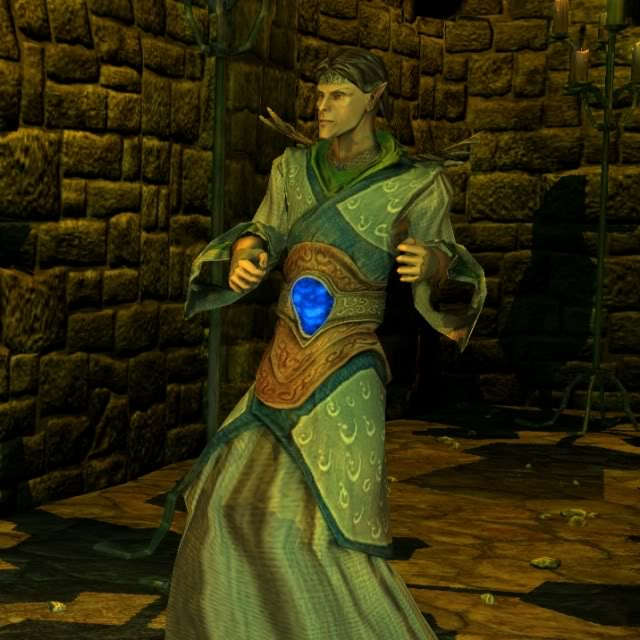
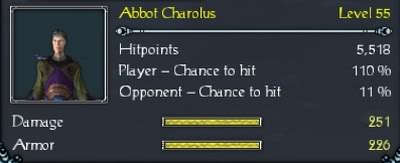
Abbot Charolus
|
|
Damage Types: Weakest Against: Quest:The Lives of Others Quest Location: Orcish Byway Cemetery in Artamark | ||||||||||||||||||
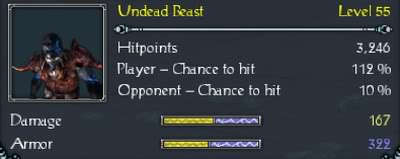
Undead Beast
|
|
Damage Types: Weakest Against: Quest:The Lives of Others Quest Location: Orcish Byway in Artamark | ||||||||||||||||||
Hirelings and Escorts
- Ensign Zahar - Escort. Immortal. Will fight.
Logbook Entry
|
|
| |||||||||||||||||||||||||||


Notes
The Light and Shadow version of this quest are exactly the same.