Difference between revisions of "Sacred 2:Azrael, Harbinger of Justice, Rocker's Guide to the Celestial Dual Wield Seraphim"
m (Text replace - "http://www.sacredwiki.org/images/Sacred_2/Att/vitality.gif" to "File:Vitality.gif") |
m (Text replace - "Exalted Warrior Focus" to "Exalted Warrior Focus") |
||
| Line 83: | Line 83: | ||
Level 18- http://www.sacredwiki.org/images/Sacred_2/Skills/celestialmagicfocus.gif [[Sacred 2:Celestial Magic Focus|Celestial Magic Focus]]- Celestial Magic Focus is a supporting aspect of this build. It decreases the regeneration time of combat arts in the celestial aspect and increases the level without penalty, which means that you can read more runes without losing their full affect. Even cooler, it will help us to get some more modification points. We will only be keeping this skill at 21 points, because that is where diminishing returns kick in, so you will get the most bang for your buck at skill level 21. | Level 18- http://www.sacredwiki.org/images/Sacred_2/Skills/celestialmagicfocus.gif [[Sacred 2:Celestial Magic Focus|Celestial Magic Focus]]- Celestial Magic Focus is a supporting aspect of this build. It decreases the regeneration time of combat arts in the celestial aspect and increases the level without penalty, which means that you can read more runes without losing their full affect. Even cooler, it will help us to get some more modification points. We will only be keeping this skill at 21 points, because that is where diminishing returns kick in, so you will get the most bang for your buck at skill level 21. | ||
| − | Level 25- http://www.sacredwiki.org/images/Sacred_2/Skills/exaltedwarriorfocus.gif [[Sacred 2: | + | Level 25- http://www.sacredwiki.org/images/Sacred_2/Skills/exaltedwarriorfocus.gif [[Sacred 2:Aspect Focus|Exalted Warrior Focus]]- Exalted Warrior Focus is another supporting aspect of the build. It decreases the regeneration time of combat arts in the Exalted Warrior aspect and increases the level without penalty, which means that you can read more runes without losing their full affect. As a extra, it will help us to get some more modification points. We will only be keeping this skill at 21 points, because that is where diminishing returns kick in, so you will get the most bang for your buck at skill level 21. |
Level 35- http://www.sacredwiki.org/images/Sacred_2/Skills/constitution.gif [[Sacred 2:Constitution|Constitution]]- Constitution is another skill I try to have in all of my builds. It increases your hitpoint pool, allowing you to survive longer without health potions, and increases the regeneration outside of combat, which is very nice in between fighting enemies groups. The mastery bonus is even better though: all of your out of combat regeneration gets changed to in combat regen, which means your a pumping health machine! Master this skill 5th. | Level 35- http://www.sacredwiki.org/images/Sacred_2/Skills/constitution.gif [[Sacred 2:Constitution|Constitution]]- Constitution is another skill I try to have in all of my builds. It increases your hitpoint pool, allowing you to survive longer without health potions, and increases the regeneration outside of combat, which is very nice in between fighting enemies groups. The mastery bonus is even better though: all of your out of combat regeneration gets changed to in combat regen, which means your a pumping health machine! Master this skill 5th. | ||
Revision as of 03:24, 30 October 2013
|
|
By Ryanrocker1217
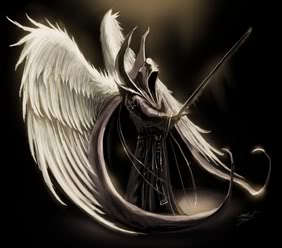
"In the days of old, before the dawn of a new era; a blight of injustices ravaged the land of Ancaria. Greed, Rage, Pride, and Jealousy had corrupted the minds of the high priests long ago. This sect of individuals took on the name of the Inquisition; an organization of terror whose only goal was to satisfy their own selfish desires. Worship of long forgotten fiends and demons resulted in certain magical seals being broken; allowing horrible abominations like Testa, Kuan, Ker, and a multitude of Sakarra demons to break loose. Although the situation looked grim, five renegade spellcasters combined their powers and awakened the ancient protectors of the land: the Seraphim. These heavenly angels formed under the leadership of Azrael, the Harbinger of Justice. Under her command the Seraphim and their allies set forth to destroy those who inflicted injustices and to bring their light to the rising darkness. Legends tell of how heroic Azrael charged into battle, and this is her story…" 1 Introduction 2 Attributes 3 Skills 4 Combat Arts 5 Gear 6 Gameplay and Tips ---Combat Art Slots ---Playstyle ---Item Modifiers to Look For ---Buff Suiits ---Expert Touch 7 Credits and Thanks
Hey there everyone and thanks for reading my new Seraphim guide :) Although I named her Azrael, she is also known as the Archangel of Death, the Grim Reaper, The Fourth Horsewoman of the Apocalypse, and She Who Rides the Pale Horse. Your probably wondering how this build came about so I'll lay out the basic concept. I had played a dual wield, BFG, Celestial/Rev Tech caster, and pure Rev Tech seras. I was searching for a build that could combine some of my favorite aspects of the seraphim, such as the dual wielding, Radiant Pillar, Cleansing Brilliance, and flexibility of skill picks. So I set out to create this build, which has been tested in singleplayer to level 150 using a 10% modded experience file, and is currently at level 41 in ClosedNet. This is a fun to play Seraphim build for people of any playstyle and allows for much customization on the players part. I hope you enjoy :) #2 Attributes
For the explanation of these attribute choices, soldat's has written the best reasoning for picking stamina over everything else, so I will quote him. "why stamina? why not int for casters or str/dex for weapon users? because anything other than sta is misleading. an often overlooked property of Combat Arts is their modification scaling based on ca level. the only way to effectively raise these modifiers' values is to raise Combat Arts, which means incurring a higher regen penalty. sta reduces penalties, so much so that I strive to find +sta on gear and make it a high priority. even over vit. str/dex/int does not allow for rune consumption, only to raise damage without respect to ca level. example- archangel's wrath mod explosive. if left at ca level 1[realistic...maybe 20], the chance for Area of Effect is less, but damage is increased through the proper weapon attribute, str or dex. if pumping sta, you can increase the damage of aw, while indirectly raising the chance for Area of Effect until it is 100%. a caveat...once you reach the point of penalty because you've eaten too many runes past what your focus dictates, raising str/dex/int will benefit you more than sta, but that is for advanced players with intimate knowledge of their character and her gear and specific playstyle." #3 Skills Ah, here's where we get into the meat of the build. Skills are what define a character, so it is important that we pick skills that not only flow together, but make your seraphim fun to play. Level 2- Level 3- Level 5- Level 8- Level 12- Level 18- Level 25- Level 35- Level 50- Here's where the fun begins on the players part. Level 65 is a free skill pick, which means that any skill you put here will be fine, and the build will still run as intended. However, I do have some suggestions about which skills to look at and which ones can help this build. The choice is completely up to you :)!
#4 Combat Arts: Battle Stance- Battle Stance is our main buff. This should be on at all times, except when Cleansing Brilliance is on. By itself it increases attack and defense values, while increasing your damage. Sounds good right? The modifications make it even better. Premonition increases your attack values even further, Flexibility adds a chance to dodge weapon attacks, and Retaliation activates close combat reflection- which means you can stand around and let enemies hit themselves :D Modifications (Use 1st, 2nd, and 3rd modification points)
Pelting Strikes- Pelting Strikes is our main damage attack combo, along with being our bosskiller. It makes a chain of attacks (around 5 or 6 with dual wielding) and will auto-target any surrounding enemies. The attack animation is very nice to watch, it reminds me of some intricate dance. We will mod it so that it has a chance to double hit, will reduce the opponent's defense making them harder to hit, and for an increase in critical hit chance. Succession and Precision are very good together, sometimes double hitting with a critical. Modifications (Use 4th, 5th, and 6th modification points)
Dashing Alacrity- Dashing Alacrity is our utility semibuff. We will try to keep it on at all times in the later levels. It increases both your run and attack speed, and will break rooting affects. We mod it to increase our attack speed even further, and to make it last almost as long as the regeneration time+cooldown. Modifications (Use 7th, 8th, and 9th modification points)
Assailing Somersault- Assailing Somersault is a fun combat art to use. I really only use it to fool around, and do cool attacks on weaker enemies. We mod it so that we can fly through the air farther, make it into an Area of Effect attack, and for a chance to stun our opponents. Modifications (Use 10th, 11th, and 12th modification points)
 Magic MagicRadiant Pillar- Radiant Pillar is the second part of our Area of Effect attack. Modded, it will bring all enemies into melee range, will cover the entire screen, and will start to inflict deathblow. Doesn't get much better than this ;) Modifications (Use 1st, 2nd, and 3rd modification points)
Hallowed Restoration- Hallowed Restoration is our ultimate healing/protective utility throughout the game. With our first mod point, we turn it into a in-combat health regen tool. It basically will give you the affect of constitution mastery for 10 seconds. Prevention and Antidote are just the icing on the cake, allowing for you to shrug of root and DoT attacks. Modifications (Use 4th, 8th, and 9th modification points)
Cleansing Brilliance- Cleansing Brilliance is our one time buff for the swamps, or anywhere that T-Energy creatures and undead run rampant. It is actually a permant Area of Effect attack, damaging those specific creatures. We mod it so that enemies attack in slow motion, undead are smacked even harder, and we can hit a larger area with our light. Modifications (Use 5th, 6th, and 7th modification points)
Baneful Smite- Ah, Baneful Smite, another one of my fool around combat arts. It makes an amazing debuffer when modded correctly, or can be used to fry weaker enemies for fun. It has almost no range restrictions so if you see an enemy in the distance - zap away! We mod it to render an enemy useless, make them unable to hit us, and to inflict magic DoT on them. Modifications (Use 10th, 11th, and 12th modification points)
#5 Gear: The gear for this character is very important. Without the right gear, bosses will be alot tougher and harder to kill. I recommend finding and getting these pieces off minibosses, before going out and trying to take on the campaign bosses. Attack Suit: Our attack suit will consist of the entire Revelation of the Seraphim set, minus the wings. The reasoning for this is because of the LL% set bonus which will allow us to knock down even the toughest boss. For the wings of our battle suit we will be using the Wings of Revenge, a very nice set piece which gives us run speed, +defensive skills, and allows us to hit our enemies practically all the time. Visibility Range Suit: This is a little thing I've started to do with my builds recently. Getting a really high map revealed. Not only is it fun exploring places you've never really seen before, it also raises you base chance to find valuables. This suit should be tailored specifically for visibility. Socket in visibility rings and amulets wherever you can. The pieces you'll need for an awesome Visibility Range suit are below-
As an added bonus, 3 of the items in our suit give us a set bonus that gives us even more visibility range! The Twilight of the Gods set bonus is here:
#6 Gameplay and Tips After all that wall of text, you're probably yelling at me saying, "Cool beans Ryan, but HOWWWW do you play her?" Well hopefully this section can help answers those questions of yours. Combat Art Slots
Playstyle The play style for this build is simple in essence but can be easily changed to fit anyone's style of play. Basically you have your Area of Effect attack, which is Radiant Pillar then Pelting Strikes. This combo works really well because all the enemies are sucked into melee range from the pillar, so then you can hack up your opponents with pelting. And, while you're attacking them, they continue to take damage from the pillar and deathblow starts to kick in, sometimes obliterating entire mobs. Your second combo is used for when your nervous about stronger mobs and harder bosses. By using Hallowed Restoration, then Pelting, you give yourself in-combat healing for 10 seconds that can stack! Especially when combined with Life Leech, you are extremely well protected. Hallowed Restoration by itself is used when sprinting through the campaign and mad dashing from point A to B. Dashing Alacrity, should be used whenever you need a boost to attack and run speed, or when your rooted and need to get away. Like I said, the last slot can be used for whatever you want. Personally I like sticking in Pelting Strikes by itself for bosses. Don't forget your buffs! Make sure you always have on battle stance, or in the higher difficulties you could simply die because of it. Only use Cleansing Brilliance for areas that have lots of undead or T-Energy creatures like the swamps. Item Modifiers to Look For The following modifiers are great assets to this build if you can find them on jewelry, or weapons.
Buff Suits With the new emphasis on buff suits, buffs have become enormously strong, while still retaining low regen penalty times. How is this accomplished? Well, the best article is written by the HolosBrothers (Furian and Loco) and can be found HERE. Basically the concept is socketing a second armor set with loads of +Combat Arts and runes, equipping the armor, casting the buff, then reequipping your original armor. It allows you to retain all of the boni from the pumped up buff, but keeps the regen time the same as it was without the armor. Exploit? No. Cheat? No. Makes your life easier? YES! Expert Touch Expert touch was NOT taken in this build because it uses too many combinations of two separate aspects. #7 Credits and Thanks Thanks to soldats for the attribute write-up, Antitrust for his article on Sword Weapons and Dual Wielding, Furian and Loco for the buff suit guide, Vanclaf for the formatting inspirations, Clan [D.a.r.k] for the shopper and smith support, and to all those who made this a fun ride. Thanks for reading the build! See Also |
||||||||||||||||||||


